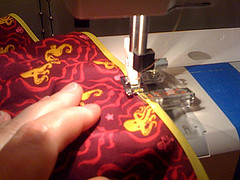
Truth be told, I've made a corset once before; Simplicity 9769, affectionately known as the Giant Cock Corset, as I built it from upholstery fabric featuring colorful roosters on a burgundy field. It was sort of a test to see how hard it is to do, and what kinds of materials I could use. Looking at it now, I can see how I fouled it up a bit. I had used plastic needlepoint canvas in place of real boning, and that doesn't impart much structure at all. Plus it's a little big.
For some reason, I thought it would be easy to find highlighter-yellow vinyl at Joann. Where did I get that idea? Turns out, I can get vinyl in any color I want, as long as it's black.
I dug through the upholstery flats and found some random vinyl in there, but certainly no yellow, and really nothing that was all that interesting. Except for this one that I found on the red tag clearance table. It was an upholstery vinyl, big leather texture on one side with a sort of flannel backing. And it was kind of... pinky beige. Quite... fleshy. I picked it up and put it down and picked it up and thought, "This is a very unfortunate color. Or... it's a very fortunate color. Gruesome." Finally I just bought the stuff. Made for a different idea than the bright yellow one, so, new plan.
Because I had less than a week to make the thing, I didn't have enough time to order supplies, even if I'd wanted to. That's okay, I like making it up anyway. I've read about a lot of different things people have used for corset boning. I wanted something with some strength, but it's not like I'm doing tight-lacing or waist-training, so I didn't need to get carried away. My first thought was to get some of the biggest zip ties I could get. Lowe's has 175-lb test zip ties in 18" lengths for something like $4.50/8. They were a little narrow and I'd have preferred they be stiffer, but at least they were immediately available and not horribly expensive -- although I would have to buy 3 packages.
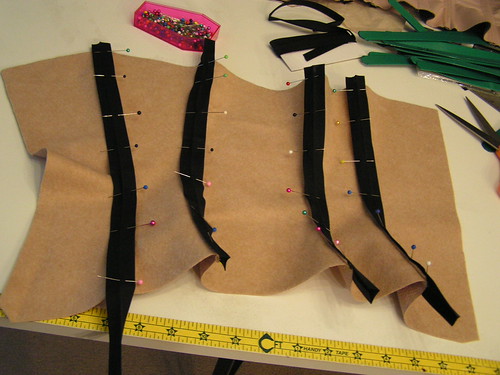
Then I remembered someone suggesting that I grab some of the steel banding that lumber yards use to bind pallets of board. Since I was already at Lowe's, I traipsed over to the lumber department to discovery that they use plastic strapping on their pallets, and it seemed kinda wide. Hm, not what I had in mind. On the other hand, plastic might be easier to work with and I wouldn't have to be concerned with treating the metal to keep from rusting. When I found a strip that had been snipped open, I yanked it down and had a closer look. Turned it to be relatively stiff, just over .5" wide, and I was convinced I could cut it with a good pair of utility scissors. Each section was right around 10 feet, and I knew I was going to need close to 20 feet total, so I looked around for more. That strapping is like a lot of other things -- you never notice it until you're looking for it, then you see tons of it. I grabbed, shoot I don't know, probably 100 feet in the end. Just bundled 'em up in a big loop. On my way out, a cashier was looking at me sideways, and I said, "You don't mind I take these, yeah?" She kinda sneered, "Uh, no." So I got my material for free, without stealing. For once.


Corsets are typically made from only a few panels. Got 'em cut out and stitched together, careful about how things were pinned. As we know from other vinyl adventures, pinning mars vinyl, but you can always keep the pins within the seam allowance. Normally you'd want to do flat-felled seams here for strength and... flatness. But all those layers of vinyl get pretty thick. So instead I flattened both seam allowances to one side and top-stitched with my trusty Teflon foot, then trimmed the excess nice and tight.
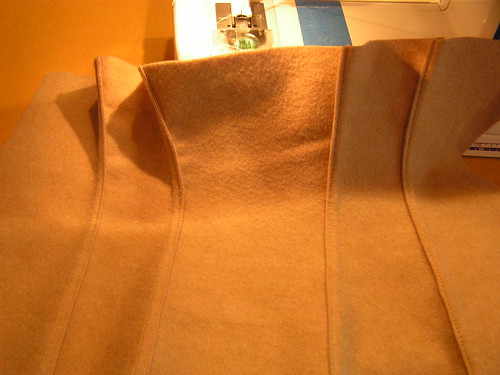
The pattern calls for twill tape as boning casings, but the plastic strapping was actually wider than the steel bones would have been -- just a touch under the width of extra-wide double-fold bias tape that's been opened up. What a coincidence! (Oh there are no coincidences in math.)
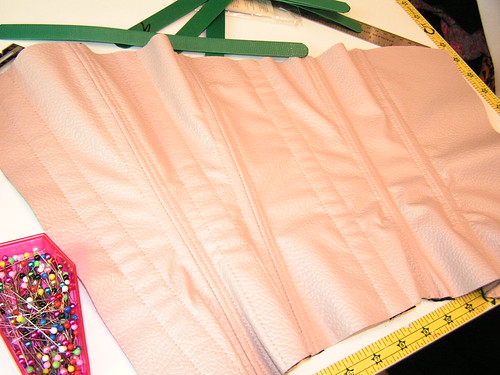
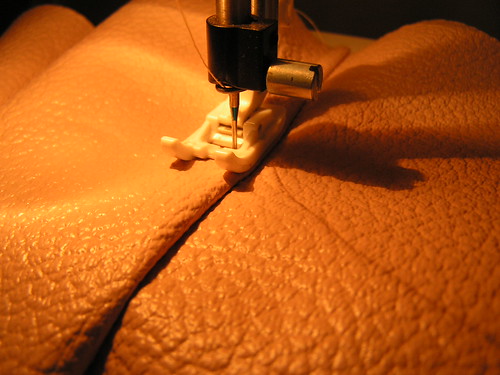
I opened up that bias tape and stripped it over the seams, pinning just through the flannel backing, then stitched close to the edges. More bias tape went roughly through the middles of the panels for still more boning. More boning! Can never get enough boning. This was fun because this was one of those situations where you have to put a layer of tissue paper between the vinyl and the sewing machine so it doesn't get all skippy. No pics of that, but you can take my word that it was a bit of a pain in the arse. Sometimes sewing is a lot like painting -- an hour of prep, 10 minutes of work, an hour of cleanup. Pulling out all the tissue paper was kinda like that.
The previous time I had made this pattern -- the Giant Cock Corset mentioned earlier -- I used a big zipper for the front closure. I like zippers. I was thinking about going the same route with this corset, but struggled with how completely non-18th century appropriate that would be. Not that anything else I was wearing would be... but I do like playing along. As with the boning, I knew I wouldn't have enough time to order a traditional busk, but it occurred to me to call the better fabric store in town, Haberman in Royal Oak, because they have a bridal salon. Turns out, they do have busks in stock -- for $35. If there is any theme that carries through most of my projects, I think you'd agree with me that that theme is Cheap. So I didn't see making that investment. Realistically my choices were zipper or... nothing. I went with nothing. Thought it would be slicker.
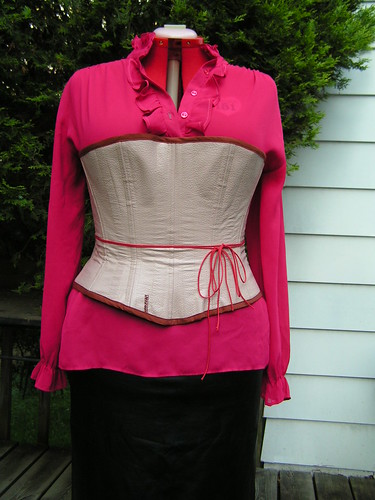

As for the rear lacing, I had some two-part grommets here already (and what's the difference between grommets and eyelets anyway? are the grommets the two-part and eyelets the ones without the backing ring?). I took the two bones that were to go in the back edges and drilled evenly-spaced holes -- and how much do I love garment projects that involve power tools? When I installed the grommets, I skipped half the holes that I'd drilled -- there are 9 lacing holes in the corset now, but there are, in fact, 17 holes available. Just in case.
After the grommets were in and all the bones in place, my old friend extra-wide double-fold bias tape finished the top and bottom edges. And that's it! Fairly rigid, nicely heavy duty corset! Here's the price breakdown, as I remember:
Clearance vinyl: $3 for 1 yard
Extra-wide double-fold bias tape: 3 packages (1 for casings, 2 for edging) at around $2/pkg
Plastic boning: Free
Grommets: On hand
Round waxed cotton cord: $4.50 for about 5 times as much as I needed
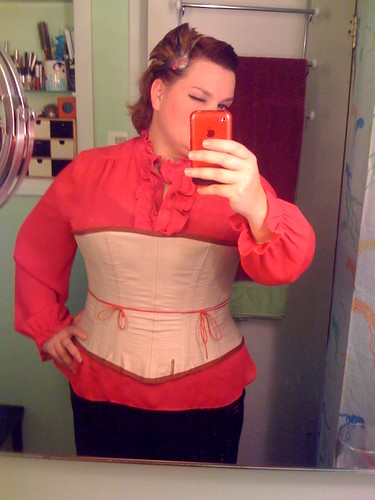
As usual, the piece looks better on me than it does on the dummy, but Heddy is wearing the same outfit that I wore to the Ball Saturday night; that is a black vinyl pencil skirt. The corset is quite comfortable, although getting into it was... a bit of a challenge. I figured if I got it mostly right I could borrow someone's slave once at the event, for purely wardrobe purposes. You can see that I tied it in the front, so I was able to keep it well adjusted. Well, enough so that whenever I dropped anything, I had to have someone else pick it up for me. A small price to pay, I'd say.
My only "complaint" at this point is that it's too plain. Because it was largely a test, and was in a bit of a hurry, I didn't do anything decorative to it. I really want to play up the fleshy aspect of it. I had considered doing some semi-random Frankenstein-style stitches to make it look like the panels were pieced together from smaller pieces of skin. But I also thought it would be cool to have someone draw some old tattoo-style art on it. We'll see what I wind up with before it hits the city again the next time.