Sunday, September 19, 2010

A follow-up I forgot to make!

I realized the other day that I never posted the finished project that I teased in this post. I think I assumed I did, because I've worn the dress at least three times.

I like the idea of making a Birthday Dress for myself, something maybe a bit outside my usual "style." (haha I have a style.) Because my birthday is in July, I have sundress-y options of which I might not ordinarily avail myself. In 2009, I knew I'd be spending my birthday in Vegas, at the Penn & Teller show on the night of, so something vivid was definitely called for.

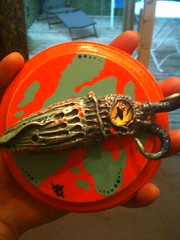
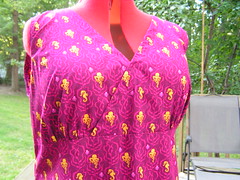
They've become so popular these days, I'm almost loath to admit it, but I have a long-term love affair with all things Cephalopod. The good thing about them becoming such rockstars on the crafting scene is the availability of some super-sweet fabrics. Last year I discovered the "Mendocino" collection by Heather Ross. There were a couple of colorways, but you know I'm going to pick screaming fuchsia/orange whenever that's an option.

This also marked one of the few times I paid full price (faint!) for project fabric. I remember being so nervous when I started cutting it, you'd have thought it was my first time.

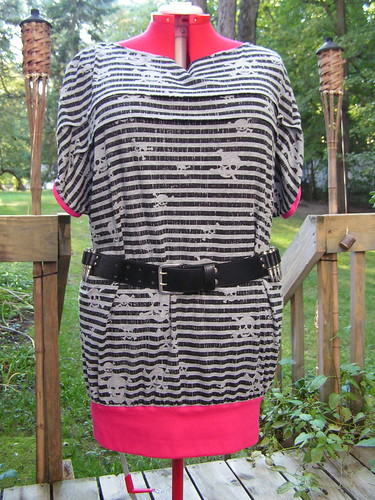
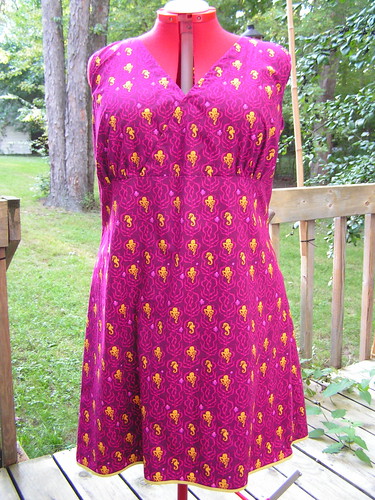
I chose a simple dress with no sleeves and an open neck, the now out of print Simplicity 5074, out of my stash. I've got a bit extra to work with in the Up Top department, which I tend to remedy by lengthening the bodice, but I didn't on this dress. On the other hand, it's probably a little too big in the 24 that I made. The sleeves actually have little flanges or something, as I recall, but I omitted those and just did a regular narrow hem on the arm openings. Also omitted the zipper, of course. It pulls over easily enough. I wound up whacking about 6" off the length, finishing with this lovely bright yellow narrow bias tape.

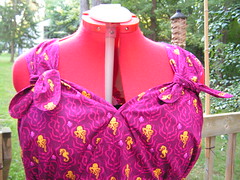
There is also a little bit of gapping in the cross-over in the front, which could just be tacked. Additionally, I made two little ties of matching fabric to tie off the thick shoulder straps. It changes the fit and look of the dress greatly. Much more bombshell this way. Wearable the other way, too; simply more casual.


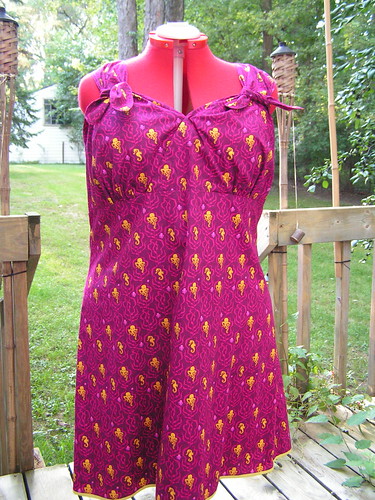
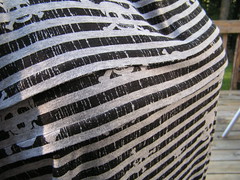
The dress is comfortable and makes an entrance, to be sure (particularly if I wear it with orange tights and red shoes, like last time), but the fabric itself is a bit stiff. If I wear it with leggings, which of course I always do, it wants to stick to my legs. It's a great cut for my shape, though, so I could imagine making it again, out of something a bit more flowy. And possibly less octo-y.

(Ugh, that last picture is kinda terrible. I'm not as lopsided as Heddy seems to be here.)

Tuesday, September 14, 2010

Mending with a Stippling Foot

This is my stippling foot. I just had to have it... and then not use it much. But it's one of those tools which, when you need it, there is no substitute. Its first major project was the Vinyl Flames Applique NYE dress. This time, it was mending a vertical tear in the leg of a pair of blue jeans.

The foot attaches to the machine in place of the ankle, with a spring-loaded lever that goes over-top of the needle-mounting screw. The picture at left shows the foot installed on my machine, with the needle off. With the feed dogs down (inactivated), the open-toed presser foot presses down on the fabric on the down-stroke, and is lifted off the fabric completely on the up-stroke. This allows you to move the fabric around freely. The stippling foot is also referred to as a free-motion or freehand embroidery foot, as it allows you to essentially draw any shape you like, in any direction. (Sewing nerdness complete.)

Recently, a coworker gave me a pair of jeans with a long tear down the front of the left upper thigh, which I'd apparently at some point agreed to mend. (I have no memory of this... but what the hell, I'm a giver.) She had a quadrupled piece of skull and crossbones quilters cotton pinned behind the long tear, showing how she wanted it. "Why don't you just hand-sew it?" I asked her. She laughed.

I finally had some time today, so I took a closer look at the pants. I hadn't given it much thought when she gave them to me, but when I looked at them, I realized they would have to be sewn sideways because of the position of the tear. Erm, that's not how sewing machines work... then I remembered the stippling foot. I decided what I would do was sew several rounds around the tear in a sort of scribbled stitch (good lord, that sounded like I was possessed by Seuss there for a moment).

First, I unpinned the layers and ironed everything. Then I replaced the four layers of cotton behind the tear and hand-based. I decided to sew a bit outside of the tear; there wasn't much denim actually missing from the tear, but it seemed like she wanted the skulls to show, so I left it open so she could either trim it out, or just leave it free to fray like crazy (up to the machine stitching).

Then I slid the leg onto the machine and traced around the basting, bunches of times, following the basic shape of the tear. I could have gone really crazy, using a more contrasting thread, and stitching a lot more, and scribblieringly, but at this point, she has no idea what I'm doing to mend them, so I didn't want to go overboard. Looking at the jeans now, if they were mine, I'd definitely have done more. We'll see how she reacts. (No, wait, why am I even saying that? I'll give them to her and never see them again.) After a few rounds of stitching, I trimmed the extra skull fabric from the inside.

These are clearly well-loved/-worn jeans, as there are a couple more (less scandalously-placed) holes and some threadbare spots. Since I was at it, I took a chunk from what had been trimmed off and made a small patch for the other side, scribble-stitching that from the top side. Trimmed the edges and pulled a few threads so it'll ravel nicely, too. Cute, right?


Oh dear. Why do I have a feeling a bunch more holey jeans are going to wind up dropped off at my desk?

Okay, I admit. After I made this post and looked at the pictures, I decided to do more, longer, looser scribbles to soften the whole shape. Why do something if I'm not going to do it all the way?

Sunday, September 12, 2010

What? Not another skull dress!

Yes, another skull dress. I don't do it on purpose, I swear.

I found this adorable stripey skull knit on the clearance table and bought the remainder, not sure what I was going to make. I want to learn to work with knits more, though, since they're so nice to wear.

I dug through my patterns to find something that could support so much... stripeyness. I thought Butterick 5327 was an interesting shape, but the way I'm built, bat-wing styles make me completely waist-less, rather than being nearly waist-less. So I decided to make a tunic out of it to lengthen the whole bodyline. At the same time, I had my eye on Simplicity 2998, and decided to work in a detail from that design.

I started with View C and just extended the lower hem to just past my ass. I went on a hunt for a good, strong pink knit, which I found in a nice rib. I decided to make the strip 4" high, and just long enough to hug my upper thigh area. I gathered the lower edge of the tunic, folded the pink in half, and overlocked the 3 raw edges together. The shape as it came together was pretty good, but those dropped shoulders bothered me. Again, with my build, my shoulders are a bit sloped, so those sleeves were just making me look lost.

I shortened the sleeves and then ran elastic gathers along the shoulder to pull the whole thing into an itty-bitty short sleeve. Then I found a matching pink pre-made bias tape and ringed the armholes – you know I loves me some bias tape, and I wanted to make the pink more highlighted.

So there you have it! I really like the pleat detail at the upper front and back, even though it does get a bit lost on this particular fabric, and the loose neck. It's a super comfy dress, though, and I've worn it at least three times now, including to the Psychedelic Furs (with a big belt) and to a festival last night (with a long-sleeve zipper-front sweater).

Bear with me...

I've been hanging on to the oooooold blogger template for a long time, because I'd done so much customization. I'm updating now, though, which means I'll be redesigning and moving shit around for the foreseeable future. Fun! Same dumb old content though, rest assured.

Wednesday, September 08, 2010

The future from the past.

Before going to see the Mighty Mighty Bosstones last week, I was excavating the depths of my wardrobe, and unearthed a gorgeous green retro suit which I hadn't worn in maybe a decade. In the pants pocket (yes, they fit, more or less) I found a big silver ring with a black cats-eye stone that I used to wear all the time (which also still fit me) and this fortune.

I didn't wear the suit, but I had both the ring and the fortune with me for the show. After my usual night of having a bouncing good time and being approached by no one, I pulled my keys out of my pocket, and the fortune came out with them. I let it blow away across Detroit.

Friday, September 03, 2010

Just bragging.

This past weekend was the People's Art Festival. I haven't missed one yet (of the whole, what, 4 there have been?), and as always, MOTORCITYBLOG had a big presence there. Art, music, fashion show, beeeeeers...

I had scanned through the vendor list the week before, and while I knew there were lots of awesome artists expected to show, there was one artist in particular whose work I was chomping at the bit to see in person; Emi Slade.

Everyone knows I'm a sucker (heh) for the cephs, and they are more popular than ever in arts and crafts right now. Emi's works are extraordinary though, and I couldn't wait to see them.

It seems like it's been a long time since I've brought home some original art, and after visiting Emi's booth literally 4-5 times – bringing another person with me each time! — I finally plunked down my ducats for this beauty. The colors! Just perfect for me.

Not only are Emi's works super-cool, while they are fantastical, they are clearly, and carefully, modeled on real-life creatures. This made them even more special to me, and added to the notion that they could swim off at any moment.

Just gushing to be supportive and to brag, I swear this isn't a paid ad. :)

This fella is actually installed on a small plate stand on a shelf in my living room, which I'll probably get better photos of later. Until then, my iPhone snaps will have to do.

Until it eats Sevie at least...

Web Statistics