First of all, there's this.
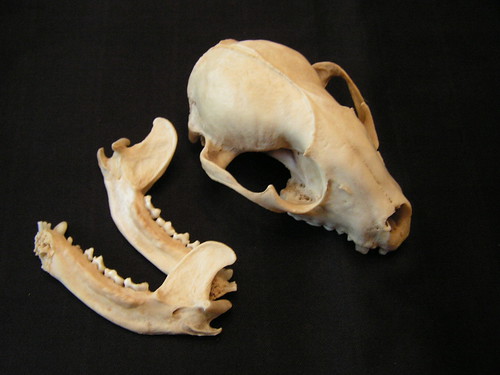
This is -- incredibly -- the fifth real animal skull I've put on display in my living room. It is the first, however, that came from my yard. (Though the second that I've cleaned myself -- bone only! I didn't skin anything.)
The lower jaw was still near the skull, all teeth intact, but the jaw broke in half when I retrieved it. It's a bit of a funny story, actually. My friend John was over, and when we were walking to my car, he said, "There's a pretty cool skull behind your garage."
I said, "Oh, I should check that out! ...pause... What were you doing behind my garage?"
"I knew you were going to say exactly that!" Let's just say he had his boy-type reasons for being back there.
Went back behind the garage, where I think I've never been in the time I've lived here, and there it was, sitting in a pile of leaves, almost entirely clean. From another skull I have, I recognized it as a raccoon; looking at the teeth, I'm guessing this guy died of old age. I cleaned it up with peroxide, although I haven't taken the next step of gluing the lower jaw together and then gluing and sealing the teeth. It will join the others at that point. When it's ready, I'll take another picture of this one next to the other raccoon I have -- it makes an interesting comparison.
But! I'm too excited about this right now to mess around with bones! Check it out.
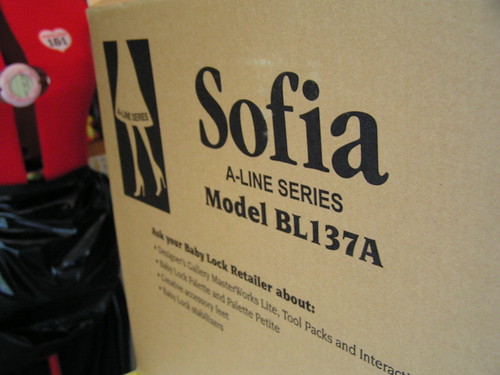
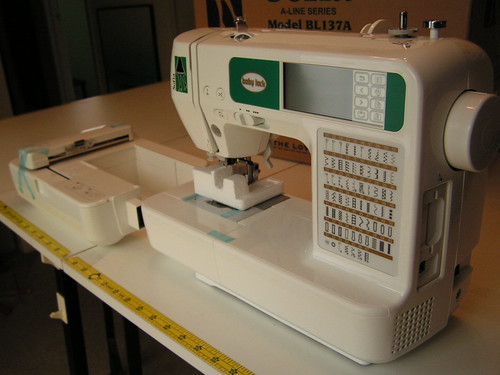
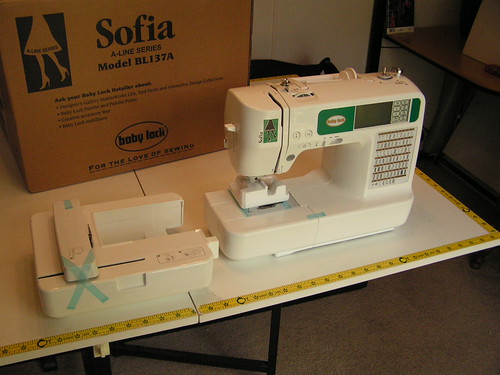
I've been waiting to post about this. Early in the summer, I entered a t-shirt reconstruction contest online. The grand prize was a computerized embroidery machine, the Baby Lock Sofia. I posted photos of my three-tee hoodie and then waited. The winners were to be voted on by visitors to the site over a several-week period. Every time I checked in, there were more and more entries, and it really looked like I was falling pretty far behind.
Then a couple of weeks ago, I got email from a representative from the parent company of Baby Lock congratulating me and asking for my shipping address! I was so surprised, I was literally in disbelief. I had a thought for a moment that it was someone trying to scam an address out of me... but I checked the contest site, and sure enough, there was my project, front and center. I won!
This is kick-ace for two reasons. First of all, I've wanted a full-bore embroidery machine for the past couple of years. The problem is they're expensive and I couldn't justify the cost. (Plus, there are so many options, I'd need a machine embroidery mentor just to decide on a model.) Second, and maybe even more significantly, this wasn't a random drawing. I won this machine because people voted on something I made. Forgive me for using a somewhat abused word, but it was seriously validating.
Ain't it a beaut? I told pretty much everyone I know about it that day, but didn't want to say anything here until I had the machine in hand. (So so cynical.) It arrived yesterday, and it's killing me that I can't set it up completely and spend the next several days elbow-deep in machine embroidery. There's going to be a serious learning curve involved. Not to mention I have to find a good place for it! I'm considering making the radical move of displacing my (ancient) desktop computer and putting the embroidery machine in its place, in my work studio. This would be the first time in my adult life that I didn't have a major desktop computer set up.
Man. When did I become such a giant craft/sewing dweeb anyway?
Well, wherever it's going to live it's going to need a new name. I mean, "Sofia"? As if. Going to need something much more suitable to join its new brethren, Nigel (the Husqvarna workhorse) and Roland (the Jaguar serger).
But right now? I've gotta finish my ballgown. Pictures of that are to come...
Tuesday, October 27, 2009
Friday, October 23, 2009
A side note: Motorcityblog.net
Friday, September 11, 2009
The Ambivalence of Halloween
Halloween provokes the very definition of mixed feelings in me.
On the one hand, I love it. Fall is my favorite time of year, and for the past several, I've taken Halloween-week off from work. It's a great time for a road trip, and there are always wonderfully macabre and hoakishly paranormal shenanigans to be found. As Halloween becomes a more legit/adult holiday -- by which I mean selling opportunity -- the gewgaws and thingamajigs and other decorative trappings have improved greatly, which turns out to be important for someone whose primary decorating scheme seems to be "skulls." It's also the time of year I buy all my socks. (Yes, all of my socks feature bats or black cats or dancing skeletons. It's true.)
On the other hand, I hate it. Halloween is for stitchers/crafters/skull aficionados what New Year's Eve is to serious drinkers: Amateur night. Everyone figures that because I sew, I'm going to have this awesome costume idea/execution that I've been working on since June. "Ooh, you're so creative... and you do all that sewing... What are you going to be? This'll be great!" That's a lot of pressure! And why do I have to BE anything?
I'm not so crazy about the idea that I need to come up with something particularly funny or punny or topical or gruesome. How about if I just make something cool? Or pretty? Or elaborate? A big period costume? Well, if I do THAT, then I really do have to go all out, being slightly compulsive (oh come on, it's another trait stitchers tend to share -- that and pack-rattitude). And I've never really done that sort of big project. Plus, the kinds of places I'd go, the parties I'd attend, aren't exactly the... elaborate sorts of affairs.
Except maybe this year.
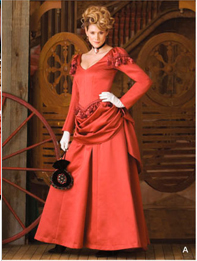
I'm considering a formal, masks-mandatory masquerade for devil's night. And that means... formal. Not just formal, but dark -- in attitude -- formal. Well. Let's see what we can do about that.
This is the "costume" I'm considering.
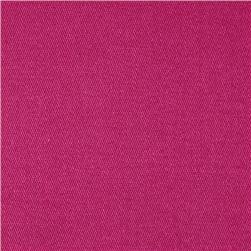
And this is the color.
But with black accents and other nasty details (to be expanded upon later). I ordered both fuchsia sateen and twill -- 10 yards of each! -- from Fabric.com yesterday; I'll decide which one I want to use once they arrive. It's a fairly large project for me-of-the-instant-gratification, so send me some encouragement, or at least wish me luck.
On the one hand, I love it. Fall is my favorite time of year, and for the past several, I've taken Halloween-week off from work. It's a great time for a road trip, and there are always wonderfully macabre and hoakishly paranormal shenanigans to be found. As Halloween becomes a more legit/adult holiday -- by which I mean selling opportunity -- the gewgaws and thingamajigs and other decorative trappings have improved greatly, which turns out to be important for someone whose primary decorating scheme seems to be "skulls." It's also the time of year I buy all my socks. (Yes, all of my socks feature bats or black cats or dancing skeletons. It's true.)
On the other hand, I hate it. Halloween is for stitchers/crafters/skull aficionados what New Year's Eve is to serious drinkers: Amateur night. Everyone figures that because I sew, I'm going to have this awesome costume idea/execution that I've been working on since June. "Ooh, you're so creative... and you do all that sewing... What are you going to be? This'll be great!" That's a lot of pressure! And why do I have to BE anything?
I'm not so crazy about the idea that I need to come up with something particularly funny or punny or topical or gruesome. How about if I just make something cool? Or pretty? Or elaborate? A big period costume? Well, if I do THAT, then I really do have to go all out, being slightly compulsive (oh come on, it's another trait stitchers tend to share -- that and pack-rattitude). And I've never really done that sort of big project. Plus, the kinds of places I'd go, the parties I'd attend, aren't exactly the... elaborate sorts of affairs.
Except maybe this year.
I'm considering a formal, masks-mandatory masquerade for devil's night. And that means... formal. Not just formal, but dark -- in attitude -- formal. Well. Let's see what we can do about that.
This is the "costume" I'm considering.
And this is the color.
But with black accents and other nasty details (to be expanded upon later). I ordered both fuchsia sateen and twill -- 10 yards of each! -- from Fabric.com yesterday; I'll decide which one I want to use once they arrive. It's a fairly large project for me-of-the-instant-gratification, so send me some encouragement, or at least wish me luck.
Monday, July 20, 2009
The Skin Corset
In Vegas, on one of the shuttles to or from somewhere, wearing a dress that I'd made, I suddenly decided that I wanted to make a corset. Mostly I thought it would be a cute addition to that dress -- my octo dress, which I still need to photograph -- in a bright yellow vinyl. When I got home, I received an announcement for the Marquis de Sade Ball the upcoming weekend. That solidified the project and the deadline. I can make a corset in, like, 3 days, right?
Truth be told, I've made a corset once before; Simplicity 9769, affectionately known as the Giant Cock Corset, as I built it from upholstery fabric featuring colorful roosters on a burgundy field. It was sort of a test to see how hard it is to do, and what kinds of materials I could use. Looking at it now, I can see how I fouled it up a bit. I had used plastic needlepoint canvas in place of real boning, and that doesn't impart much structure at all. Plus it's a little big.
For some reason, I thought it would be easy to find highlighter-yellow vinyl at Joann. Where did I get that idea? Turns out, I can get vinyl in any color I want, as long as it's black.
I dug through the upholstery flats and found some random vinyl in there, but certainly no yellow, and really nothing that was all that interesting. Except for this one that I found on the red tag clearance table. It was an upholstery vinyl, big leather texture on one side with a sort of flannel backing. And it was kind of... pinky beige. Quite... fleshy. I picked it up and put it down and picked it up and thought, "This is a very unfortunate color. Or... it's a very fortunate color. Gruesome." Finally I just bought the stuff. Made for a different idea than the bright yellow one, so, new plan.
Because I had less than a week to make the thing, I didn't have enough time to order supplies, even if I'd wanted to. That's okay, I like making it up anyway. I've read about a lot of different things people have used for corset boning. I wanted something with some strength, but it's not like I'm doing tight-lacing or waist-training, so I didn't need to get carried away. My first thought was to get some of the biggest zip ties I could get. Lowe's has 175-lb test zip ties in 18" lengths for something like $4.50/8. They were a little narrow and I'd have preferred they be stiffer, but at least they were immediately available and not horribly expensive -- although I would have to buy 3 packages.
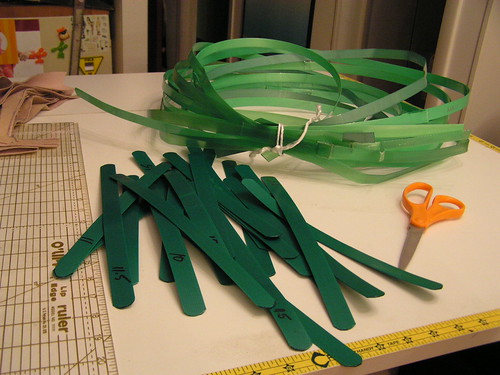
Then I remembered someone suggesting that I grab some of the steel banding that lumber yards use to bind pallets of board. Since I was already at Lowe's, I traipsed over to the lumber department to discovery that they use plastic strapping on their pallets, and it seemed kinda wide. Hm, not what I had in mind. On the other hand, plastic might be easier to work with and I wouldn't have to be concerned with treating the metal to keep from rusting. When I found a strip that had been snipped open, I yanked it down and had a closer look. Turned it to be relatively stiff, just over .5" wide, and I was convinced I could cut it with a good pair of utility scissors. Each section was right around 10 feet, and I knew I was going to need close to 20 feet total, so I looked around for more. That strapping is like a lot of other things -- you never notice it until you're looking for it, then you see tons of it. I grabbed, shoot I don't know, probably 100 feet in the end. Just bundled 'em up in a big loop. On my way out, a cashier was looking at me sideways, and I said, "You don't mind I take these, yeah?" She kinda sneered, "Uh, no." So I got my material for free, without stealing. For once.
Taking the measurements from the pattern info, I measured, marked and cut 20 strips, rounding the ends with scissors to avoid the pokies. Easy.
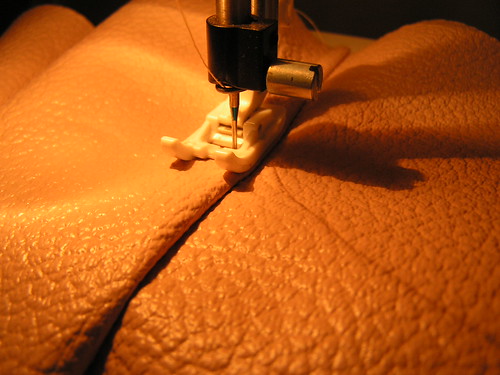
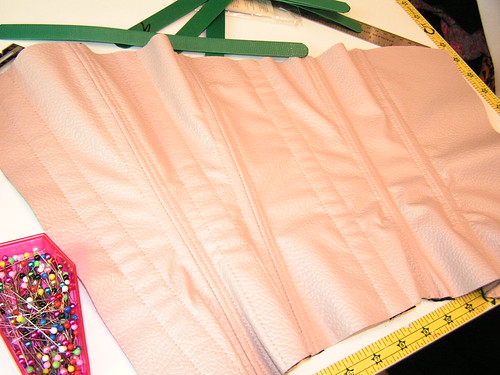
Corsets are typically made from only a few panels. Got 'em cut out and stitched together, careful about how things were pinned. As we know from other vinyl adventures, pinning mars vinyl, but you can always keep the pins within the seam allowance. Normally you'd want to do flat-felled seams here for strength and... flatness. But all those layers of vinyl get pretty thick. So instead I flattened both seam allowances to one side and top-stitched with my trusty Teflon foot, then trimmed the excess nice and tight.
The pattern calls for twill tape as boning casings, but the plastic strapping was actually wider than the steel bones would have been -- just a touch under the width of extra-wide double-fold bias tape that's been opened up. What a coincidence! (Oh there are no coincidences in math.)
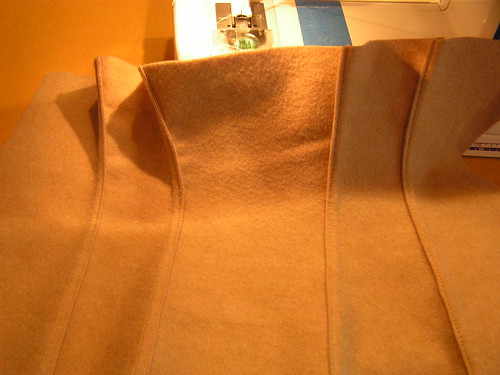
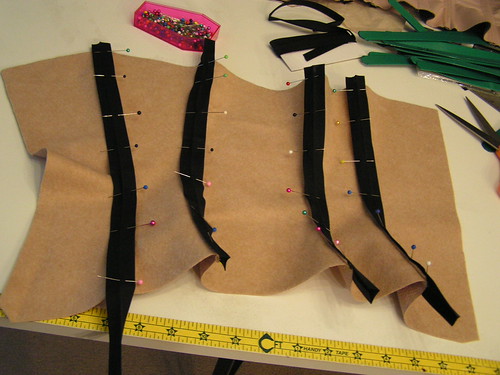
I opened up that bias tape and stripped it over the seams, pinning just through the flannel backing, then stitched close to the edges. More bias tape went roughly through the middles of the panels for still more boning. More boning! Can never get enough boning. This was fun because this was one of those situations where you have to put a layer of tissue paper between the vinyl and the sewing machine so it doesn't get all skippy. No pics of that, but you can take my word that it was a bit of a pain in the arse. Sometimes sewing is a lot like painting -- an hour of prep, 10 minutes of work, an hour of cleanup. Pulling out all the tissue paper was kinda like that.
The previous time I had made this pattern -- the Giant Cock Corset mentioned earlier -- I used a big zipper for the front closure. I like zippers. I was thinking about going the same route with this corset, but struggled with how completely non-18th century appropriate that would be. Not that anything else I was wearing would be... but I do like playing along. As with the boning, I knew I wouldn't have enough time to order a traditional busk, but it occurred to me to call the better fabric store in town, Haberman in Royal Oak, because they have a bridal salon. Turns out, they do have busks in stock -- for $35. If there is any theme that carries through most of my projects, I think you'd agree with me that that theme is Cheap. So I didn't see making that investment. Realistically my choices were zipper or... nothing. I went with nothing. Thought it would be slicker.
As for the rear lacing, I had some two-part grommets here already (and what's the difference between grommets and eyelets anyway? are the grommets the two-part and eyelets the ones without the backing ring?). I took the two bones that were to go in the back edges and drilled evenly-spaced holes -- and how much do I love garment projects that involve power tools? When I installed the grommets, I skipped half the holes that I'd drilled -- there are 9 lacing holes in the corset now, but there are, in fact, 17 holes available. Just in case.
After the grommets were in and all the bones in place, my old friend extra-wide double-fold bias tape finished the top and bottom edges. And that's it! Fairly rigid, nicely heavy duty corset! Here's the price breakdown, as I remember:
Clearance vinyl: $3 for 1 yard
Extra-wide double-fold bias tape: 3 packages (1 for casings, 2 for edging) at around $2/pkg
Plastic boning: Free
Grommets: On hand
Round waxed cotton cord: $4.50 for about 5 times as much as I needed
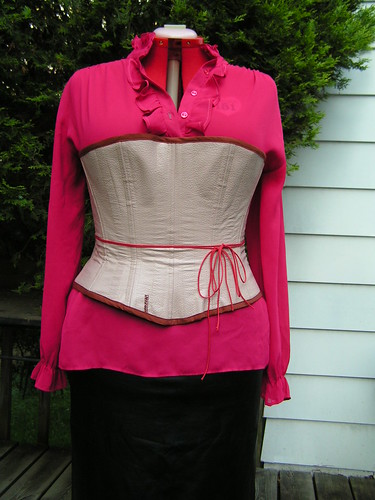
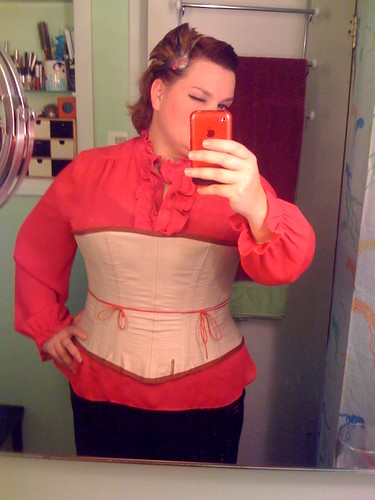
As usual, the piece looks better on me than it does on the dummy, but Heddy is wearing the same outfit that I wore to the Ball Saturday night; that is a black vinyl pencil skirt. The corset is quite comfortable, although getting into it was... a bit of a challenge. I figured if I got it mostly right I could borrow someone's slave once at the event, for purely wardrobe purposes. You can see that I tied it in the front, so I was able to keep it well adjusted. Well, enough so that whenever I dropped anything, I had to have someone else pick it up for me. A small price to pay, I'd say.
My only "complaint" at this point is that it's too plain. Because it was largely a test, and was in a bit of a hurry, I didn't do anything decorative to it. I really want to play up the fleshy aspect of it. I had considered doing some semi-random Frankenstein-style stitches to make it look like the panels were pieced together from smaller pieces of skin. But I also thought it would be cool to have someone draw some old tattoo-style art on it. We'll see what I wind up with before it hits the city again the next time.
Truth be told, I've made a corset once before; Simplicity 9769, affectionately known as the Giant Cock Corset, as I built it from upholstery fabric featuring colorful roosters on a burgundy field. It was sort of a test to see how hard it is to do, and what kinds of materials I could use. Looking at it now, I can see how I fouled it up a bit. I had used plastic needlepoint canvas in place of real boning, and that doesn't impart much structure at all. Plus it's a little big.
For some reason, I thought it would be easy to find highlighter-yellow vinyl at Joann. Where did I get that idea? Turns out, I can get vinyl in any color I want, as long as it's black.
I dug through the upholstery flats and found some random vinyl in there, but certainly no yellow, and really nothing that was all that interesting. Except for this one that I found on the red tag clearance table. It was an upholstery vinyl, big leather texture on one side with a sort of flannel backing. And it was kind of... pinky beige. Quite... fleshy. I picked it up and put it down and picked it up and thought, "This is a very unfortunate color. Or... it's a very fortunate color. Gruesome." Finally I just bought the stuff. Made for a different idea than the bright yellow one, so, new plan.
Because I had less than a week to make the thing, I didn't have enough time to order supplies, even if I'd wanted to. That's okay, I like making it up anyway. I've read about a lot of different things people have used for corset boning. I wanted something with some strength, but it's not like I'm doing tight-lacing or waist-training, so I didn't need to get carried away. My first thought was to get some of the biggest zip ties I could get. Lowe's has 175-lb test zip ties in 18" lengths for something like $4.50/8. They were a little narrow and I'd have preferred they be stiffer, but at least they were immediately available and not horribly expensive -- although I would have to buy 3 packages.
Then I remembered someone suggesting that I grab some of the steel banding that lumber yards use to bind pallets of board. Since I was already at Lowe's, I traipsed over to the lumber department to discovery that they use plastic strapping on their pallets, and it seemed kinda wide. Hm, not what I had in mind. On the other hand, plastic might be easier to work with and I wouldn't have to be concerned with treating the metal to keep from rusting. When I found a strip that had been snipped open, I yanked it down and had a closer look. Turned it to be relatively stiff, just over .5" wide, and I was convinced I could cut it with a good pair of utility scissors. Each section was right around 10 feet, and I knew I was going to need close to 20 feet total, so I looked around for more. That strapping is like a lot of other things -- you never notice it until you're looking for it, then you see tons of it. I grabbed, shoot I don't know, probably 100 feet in the end. Just bundled 'em up in a big loop. On my way out, a cashier was looking at me sideways, and I said, "You don't mind I take these, yeah?" She kinda sneered, "Uh, no." So I got my material for free, without stealing. For once.
Taking the measurements from the pattern info, I measured, marked and cut 20 strips, rounding the ends with scissors to avoid the pokies. Easy.
Corsets are typically made from only a few panels. Got 'em cut out and stitched together, careful about how things were pinned. As we know from other vinyl adventures, pinning mars vinyl, but you can always keep the pins within the seam allowance. Normally you'd want to do flat-felled seams here for strength and... flatness. But all those layers of vinyl get pretty thick. So instead I flattened both seam allowances to one side and top-stitched with my trusty Teflon foot, then trimmed the excess nice and tight.
The pattern calls for twill tape as boning casings, but the plastic strapping was actually wider than the steel bones would have been -- just a touch under the width of extra-wide double-fold bias tape that's been opened up. What a coincidence! (Oh there are no coincidences in math.)
I opened up that bias tape and stripped it over the seams, pinning just through the flannel backing, then stitched close to the edges. More bias tape went roughly through the middles of the panels for still more boning. More boning! Can never get enough boning. This was fun because this was one of those situations where you have to put a layer of tissue paper between the vinyl and the sewing machine so it doesn't get all skippy. No pics of that, but you can take my word that it was a bit of a pain in the arse. Sometimes sewing is a lot like painting -- an hour of prep, 10 minutes of work, an hour of cleanup. Pulling out all the tissue paper was kinda like that.
The previous time I had made this pattern -- the Giant Cock Corset mentioned earlier -- I used a big zipper for the front closure. I like zippers. I was thinking about going the same route with this corset, but struggled with how completely non-18th century appropriate that would be. Not that anything else I was wearing would be... but I do like playing along. As with the boning, I knew I wouldn't have enough time to order a traditional busk, but it occurred to me to call the better fabric store in town, Haberman in Royal Oak, because they have a bridal salon. Turns out, they do have busks in stock -- for $35. If there is any theme that carries through most of my projects, I think you'd agree with me that that theme is Cheap. So I didn't see making that investment. Realistically my choices were zipper or... nothing. I went with nothing. Thought it would be slicker.
As for the rear lacing, I had some two-part grommets here already (and what's the difference between grommets and eyelets anyway? are the grommets the two-part and eyelets the ones without the backing ring?). I took the two bones that were to go in the back edges and drilled evenly-spaced holes -- and how much do I love garment projects that involve power tools? When I installed the grommets, I skipped half the holes that I'd drilled -- there are 9 lacing holes in the corset now, but there are, in fact, 17 holes available. Just in case.
After the grommets were in and all the bones in place, my old friend extra-wide double-fold bias tape finished the top and bottom edges. And that's it! Fairly rigid, nicely heavy duty corset! Here's the price breakdown, as I remember:
Clearance vinyl: $3 for 1 yard
Extra-wide double-fold bias tape: 3 packages (1 for casings, 2 for edging) at around $2/pkg
Plastic boning: Free
Grommets: On hand
Round waxed cotton cord: $4.50 for about 5 times as much as I needed
As usual, the piece looks better on me than it does on the dummy, but Heddy is wearing the same outfit that I wore to the Ball Saturday night; that is a black vinyl pencil skirt. The corset is quite comfortable, although getting into it was... a bit of a challenge. I figured if I got it mostly right I could borrow someone's slave once at the event, for purely wardrobe purposes. You can see that I tied it in the front, so I was able to keep it well adjusted. Well, enough so that whenever I dropped anything, I had to have someone else pick it up for me. A small price to pay, I'd say.
My only "complaint" at this point is that it's too plain. Because it was largely a test, and was in a bit of a hurry, I didn't do anything decorative to it. I really want to play up the fleshy aspect of it. I had considered doing some semi-random Frankenstein-style stitches to make it look like the panels were pieced together from smaller pieces of skin. But I also thought it would be cool to have someone draw some old tattoo-style art on it. We'll see what I wind up with before it hits the city again the next time.
Thursday, July 02, 2009
Footsies
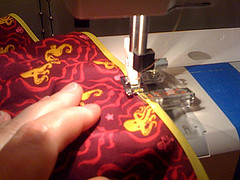
The more I get the hang of using my adjustable bias binding foot, the more I love it.
Are you dying to know what I'm making there? I'm dying to show it, but I'm busy packing, and it's coming with me.
Wednesday, June 24, 2009
My birthday trip is BOOKED!
I'd been putting off locking anything down because, when I'm traveling alone, I tend to keep hoping that someone will be able to come with me, or maybe I'll find something worthwhile locally. [Not strictly true, but an expedient explanation.] And this is a big trip for me -- I usually only go away for a weekend at a time. A whole week? Major.

I finally made my reservations today.
July 4: Leave for Vegas. (I'm sure there will be some KILLER fireworks, and I'm staying at the Imperial Palace, across from the Mirage. Love that volcano!)
July 5: Bill Maher at the Orleans.
July 7: My birthday! Penn & Teller at the Rio; who else could I possibly want to spend my birthday with? (And the Houdini x-stitch will finally be going home.)
July 9-12: The Amazing Meeting, one day of which I will attempt to attend (probably the 9th to see Jamy Ian Swiss speak).
EDITED TO ADD:
July 10: Skeptics' Guide to the Universe dinner. It's going to mean me haulin' ass to the airport, but my spot is reserved!
July 10: I fly home (and some poor soul picks me up at 5.30am the next morning).
In the meantime, there will be Bodies, there will be helicopters (I've always wanted to fly over the strip), there will be me in octopus- and skull-encrusted sundresses (trust me, this is an event unto itself), and any other ridiculousness I can get in on (suggestions will be taken, dirty and otherwise).
Aside from the fact that I feel like I'm going to vomix* from the amount of money I just spent this morning, I'm super excited. Happy birthday to me!
*Something of an inside joke.
I finally made my reservations today.
July 4: Leave for Vegas. (I'm sure there will be some KILLER fireworks, and I'm staying at the Imperial Palace, across from the Mirage. Love that volcano!)
July 5: Bill Maher at the Orleans.
July 7: My birthday! Penn & Teller at the Rio; who else could I possibly want to spend my birthday with? (And the Houdini x-stitch will finally be going home.)
July 9-12: The Amazing Meeting, one day of which I will attempt to attend (probably the 9th to see Jamy Ian Swiss speak).
EDITED TO ADD:
July 10: Skeptics' Guide to the Universe dinner. It's going to mean me haulin' ass to the airport, but my spot is reserved!
July 10: I fly home (and some poor soul picks me up at 5.30am the next morning).
In the meantime, there will be Bodies, there will be helicopters (I've always wanted to fly over the strip), there will be me in octopus- and skull-encrusted sundresses (trust me, this is an event unto itself), and any other ridiculousness I can get in on (suggestions will be taken, dirty and otherwise).
Aside from the fact that I feel like I'm going to vomix* from the amount of money I just spent this morning, I'm super excited. Happy birthday to me!
*Something of an inside joke.
Sunday, June 21, 2009
Another addition to the site.
Those are my (largely irrelevant) tweets in the sidebar, in case you were wondering.
Wednesday, June 17, 2009
I'm giving away this dress.
Update: The dress has been claimed and will be on its way to California soon!
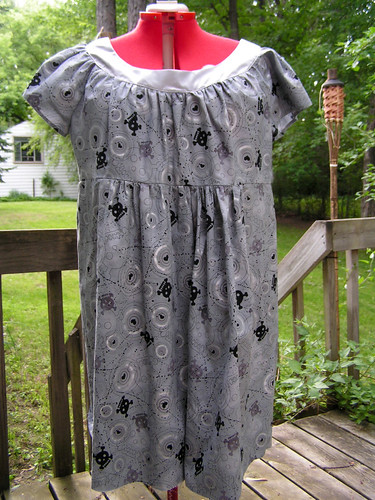
I have made a version of View A of Butterick 5348, initially as a "muslin" but not so much of muslin. I needed a quilting cotton of a similar type to the real fabric I intended on using, and believe it or not, the crazy fabric I wound up finding -- perfect for me -- was also the cheapest of its type available at my local Joann that day.
The dress is a shape that I had questions about, so I went with a larger size than I would normally make. The ultimate result is that the dress is both too big and too small for me. The waist sits nowhere near where it should on me (way too high -- my top takes up too much space) and it's otherwise a little too wide. But this is why we do muslins, right?
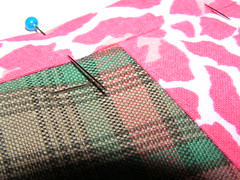
Because it's such a cool fabric and the dress is very nearly completely finished, I'm hoping someone else will want it -- someone who suits these measurements better than I:
Butterick Size: Misses 24
Chest: 44"
Bust: 46"
Waist: 39"
Hip: 48"
Back Waist Length: 17.5"
I take no responsibility for how accurate any of these measurements are. I usually make size 20-22 with some adjustments for a longer bodice, but I made no adjustments to this one. Aside from it really not fitting me correctly, it just doesn't suit me. I'll keep trying to find a dress pattern that does, though, beyond the one A-line that does seem to work well for me.
So! Does anyone want this dress? Someone who will actually wear it? My sewing dummy is not showing it off very well because, well, nothing ever looks right on my sewing dummy.
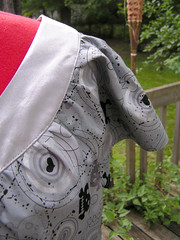
It is not my best zipper insertion, and it will need a hook/clasp at the back neck. It is also unhemmed for your convenience, and I will send along with it the rest of the silver satin that I used at the neck, which would make a perfect hem band if you want more length. There's also enough to make a purse or something if you'd like.
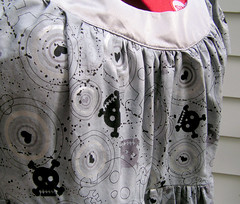
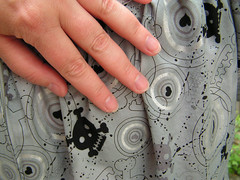
The images show the print pretty accurately -- isn't it awesome? The circles that look silvery actually are silvery, which is why I went with that satin at the neckband. Matches pretty well.
Comment on this post and let me know.

I have made a version of View A of Butterick 5348, initially as a "muslin" but not so much of muslin. I needed a quilting cotton of a similar type to the real fabric I intended on using, and believe it or not, the crazy fabric I wound up finding -- perfect for me -- was also the cheapest of its type available at my local Joann that day.The dress is a shape that I had questions about, so I went with a larger size than I would normally make. The ultimate result is that the dress is both too big and too small for me. The waist sits nowhere near where it should on me (way too high -- my top takes up too much space) and it's otherwise a little too wide. But this is why we do muslins, right?
Because it's such a cool fabric and the dress is very nearly completely finished, I'm hoping someone else will want it -- someone who suits these measurements better than I:
Butterick Size: Misses 24
Chest: 44"
Bust: 46"
Waist: 39"
Hip: 48"
Back Waist Length: 17.5"
I take no responsibility for how accurate any of these measurements are. I usually make size 20-22 with some adjustments for a longer bodice, but I made no adjustments to this one. Aside from it really not fitting me correctly, it just doesn't suit me. I'll keep trying to find a dress pattern that does, though, beyond the one A-line that does seem to work well for me.
So! Does anyone want this dress? Someone who will actually wear it? My sewing dummy is not showing it off very well because, well, nothing ever looks right on my sewing dummy.
It is not my best zipper insertion, and it will need a hook/clasp at the back neck. It is also unhemmed for your convenience, and I will send along with it the rest of the silver satin that I used at the neck, which would make a perfect hem band if you want more length. There's also enough to make a purse or something if you'd like.
The images show the print pretty accurately -- isn't it awesome? The circles that look silvery actually are silvery, which is why I went with that satin at the neckband. Matches pretty well.
Comment on this post and let me know.

Sunday, April 26, 2009
Thanks, CRAFT!
The first thing I do most mornings is wake up my iPhone (and not the other way around) and scan through my email for anything good (rare). This morning I noticed a handful of new comments to this here blog. Now, since I almost never get comments, I had a feeling something was up. Sure enough, one of the commenters mentioned getting to my blog from CRAFT magazine's website.

How cool! CRAFT is a favorite magazine of mine, which I've bought since issue one. (And I do faithfully read the blog, so I'd have seen the post by Monday -- weekends are typically my RSS-free zone.) CRAFT has gone fully digital now, which I suppose is good for me, because this way I get to get a mention!

How cool! CRAFT is a favorite magazine of mine, which I've bought since issue one. (And I do faithfully read the blog, so I'd have seen the post by Monday -- weekends are typically my RSS-free zone.) CRAFT has gone fully digital now, which I suppose is good for me, because this way I get to get a mention!
Monday, April 06, 2009
The FINISHED Houdini Portrait!
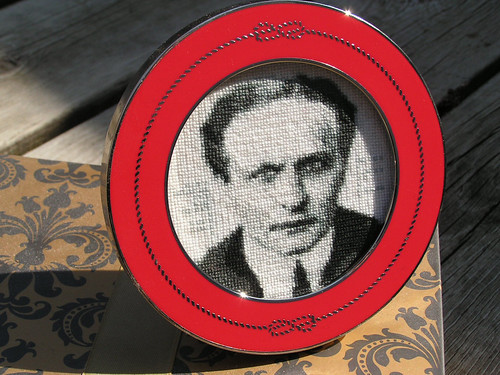
At the beginning of February, I decided to make a birthday present for Teller's birthday (yes, that Teller) which is, memorably, February 14. He's one of my favorite performers (slash-essayist-slash-teacher-slash-skeptic) and I've made gifts for him before. It's always worth it.
I had been considering a slightly more detailed than usual cross-stitch project, and this seemed like a good choice for timing. I'd given myself two weeks -- approximately two weeks more than I usually give myself -- and already had a subject in mind: a hero of both Teller and myself, Harry Houdini.
Cross-stitch is not something I've done a lot of, but creating a pattern is very much the same as creating a square-stitch beading pattern. There are three main variables to know before you start: Number of colors, resolution (aka size of beads/stitches) and finished size.
Starting with a recognizable but relatively simple portrait of Houdini, I decided to go with six shades of grey plus white, which brought me to 7 colors. I wasn't even sure if I was going to be able to find six discrete greys, but that seemed to me to be enough differentiation without going totally overboard.
Turns out, even a simple craft store like Michaels is likely to have 15 or 20 greys. The tricky part is what kind of greys they are -- blue grey? Green grey? Beige grey? I spent a good hour or more combing through the color bins, hunting for six cool/neutral greys that looked like they belonged together. Then grabbed a roll of the finest resolution cross-stitch fabric I could find, which turned out to be 28-count.
That's two variables down. Next question was what size. I already knew I wanted it to be a small, detailed piece. How was I going to present it? I had an idea that I might be able to make a round frame out of one side of a pair of handcuffs. I even had a friend ready to donate an old pair. ("They don't have a key... is that okay?") Without actually having the cuffs on hand, I took some guesses about average wrist size ranges, did the math and decided on a 2.5" across portrait. Little.
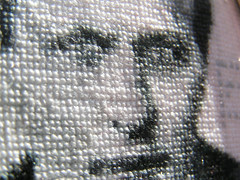
I've used Photoshop every day of my life for, like, 50 years, so doing the actual conversion wasn't difficult, once I had my variables in place. Above are the before and after images, at finished size. Of course, I separated out all the colors and printed my charts at 1 bazillion % scale so I could see the durned thing. And I still had to use super-magno glasses to be able to see the stitches at all! One strand of floss, by the way, is all 28-count x-stitch fabric can take. And sometimes even that seemed to be pushing it.
I was so excited that I gave myself enough time to finish for once! Two whole weeks! I got all my stuff together, put on my brightest light, settled into my comfiest spot on the sofa (with Sevie attendant) and proceeded to ruin my eyes and my back. For six weeks.
Granted, it's not like I worked 8 hours a day, every day... but there were more than a couple of weekends that saw double-digits of hours getting put in. Holy moly. I'm not good with guessing how much time went into something after the fact, because I'm almost always doing other things at the same time, putting in a few minutes here or there, but my gut is telling me this was something like 80 hours. Eighty? Really? Does that seem possible?
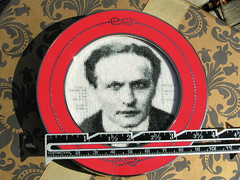
When I was about half way finished, I was at TJ Maxx doing random shopping, and in their home décor department stumbled across The. Perfect. Frame. I was so excited, I snatched it up without even registering how much it cost. Of course, this was TJ Maxx, so it turned out to be about $3. That took another problem off my mind, though -- didn't have to figure out how I was going to mount/back it inside a handcuff frame. The little red frame was not only the perfect size, but look! Rope/knot detail!
This little portrait has been a part of my life for so long, I just don't know what I'll do without it. I was hoping to make it to Atlantic City next month for a getting-rarer Penn & Teller road performance, where I may be able to give it to Teller myself. (They have their own theatre at the Rio in Las Vegas these days.) That's a bit up in the air, though, so my little project may wind up in the mail.
A couple of friends who have seen it in person have said they'd have a hard time giving it up, and suggested maybe I should just keep it. It's a tempting thought, but I couldn't do that. As is always the case when I make things for people, I can't keep it because it was never mine to begin with.
However, I do still have this big ol'roll of 28-ct fabric... Maybe Poe next.
PS
I almost totally failed to mention... for the eagle-eyed among us, yes, there is a hidden message in the image.
I had been considering a slightly more detailed than usual cross-stitch project, and this seemed like a good choice for timing. I'd given myself two weeks -- approximately two weeks more than I usually give myself -- and already had a subject in mind: a hero of both Teller and myself, Harry Houdini.
Cross-stitch is not something I've done a lot of, but creating a pattern is very much the same as creating a square-stitch beading pattern. There are three main variables to know before you start: Number of colors, resolution (aka size of beads/stitches) and finished size.
Starting with a recognizable but relatively simple portrait of Houdini, I decided to go with six shades of grey plus white, which brought me to 7 colors. I wasn't even sure if I was going to be able to find six discrete greys, but that seemed to me to be enough differentiation without going totally overboard.
Turns out, even a simple craft store like Michaels is likely to have 15 or 20 greys. The tricky part is what kind of greys they are -- blue grey? Green grey? Beige grey? I spent a good hour or more combing through the color bins, hunting for six cool/neutral greys that looked like they belonged together. Then grabbed a roll of the finest resolution cross-stitch fabric I could find, which turned out to be 28-count.I've used Photoshop every day of my life for, like, 50 years, so doing the actual conversion wasn't difficult, once I had my variables in place. Above are the before and after images, at finished size. Of course, I separated out all the colors and printed my charts at 1 bazillion % scale so I could see the durned thing. And I still had to use super-magno glasses to be able to see the stitches at all! One strand of floss, by the way, is all 28-count x-stitch fabric can take. And sometimes even that seemed to be pushing it.
I was so excited that I gave myself enough time to finish for once! Two whole weeks! I got all my stuff together, put on my brightest light, settled into my comfiest spot on the sofa (with Sevie attendant) and proceeded to ruin my eyes and my back. For six weeks.
Granted, it's not like I worked 8 hours a day, every day... but there were more than a couple of weekends that saw double-digits of hours getting put in. Holy moly. I'm not good with guessing how much time went into something after the fact, because I'm almost always doing other things at the same time, putting in a few minutes here or there, but my gut is telling me this was something like 80 hours. Eighty? Really? Does that seem possible?
When I was about half way finished, I was at TJ Maxx doing random shopping, and in their home décor department stumbled across The. Perfect. Frame. I was so excited, I snatched it up without even registering how much it cost. Of course, this was TJ Maxx, so it turned out to be about $3. That took another problem off my mind, though -- didn't have to figure out how I was going to mount/back it inside a handcuff frame. The little red frame was not only the perfect size, but look! Rope/knot detail!
This little portrait has been a part of my life for so long, I just don't know what I'll do without it. I was hoping to make it to Atlantic City next month for a getting-rarer Penn & Teller road performance, where I may be able to give it to Teller myself. (They have their own theatre at the Rio in Las Vegas these days.) That's a bit up in the air, though, so my little project may wind up in the mail.A couple of friends who have seen it in person have said they'd have a hard time giving it up, and suggested maybe I should just keep it. It's a tempting thought, but I couldn't do that. As is always the case when I make things for people, I can't keep it because it was never mine to begin with.
However, I do still have this big ol'roll of 28-ct fabric... Maybe Poe next.
PS
I almost totally failed to mention... for the eagle-eyed among us, yes, there is a hidden message in the image.
Tuesday, March 31, 2009
The Houdini Portrait
I honestly thought this was going to take a week. Maybe two. Ultimately, it was the only crafting I allowed myself for six weeks.
I need to take photographs of the finished object itself, and will probably write a little bit about creating the pattern, but that's to come. Right now I just wanted to put something up so I feel like I accomplished... anything!
Monday, February 09, 2009
Thursday, February 05, 2009
Tuesday, February 03, 2009
Bulletin Boards Quickie
Mine are about 18" across and are made from scrap foam-core (work), an irregular chunk of quilting cotton(stash), a printed cotton napkin/handkerchief (stash -- why do I have a stack of these?) and yards and yards of 1/4" elastic, most of which I already had. I confess, I did have to buy some additional black once I realized how much I was using. I also bought an electric staple gun. Maybe I was going to get one anyway, or maybe this was my excuse... Either way, how cool are electric staple guns?
Rather than cutting strips of elastic to length, I wrapped them through the center, all the way around. Used more elastic, obviously, but saved time, effort and staples. And since the staple gun was my BFF that weekend, it was my priority.
They are mounted via ribbons stapled (shocker!) to the backs and the hung on picture hangers.
Saturday, January 03, 2009
The New Year's Eve dress.
I've noticed I tend to claim that whatever my most recent project is, it's my favorite. But this one really is my favorite. Right now.
This project represented a whole passel of challenges and techniques I'd never used before. But why make something if I can't make it just how I want?
Step One:
Think about a style/design.
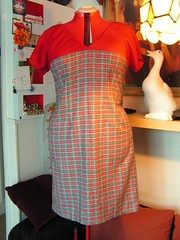
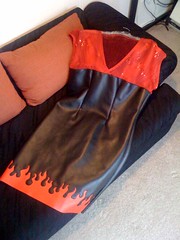
The party flyer stated "black tie optional, but suggested." I thought of a nice straight silhouette in black with some white detail, or interesting embellishment. Out of my 157 owned patterns, 24 of which are dresses, not one struck me as appropriate. Shocking. I settled on Vogue 8313, View A. The body of the dress would be snug black stretch vinyl, the upper would be sheer white (probably), and along the bottom, red flames, preferably in a reverse applique.
Step Two:
Get supplies.
Wearable vinyl is not easy to come by. In metro Detroit, there are really only two options for fabric: Joann on the low end or Haberman Fabrics on the high. Neither had a suitable vinyl. Online, there are many fabric sellers specializing in stretch/costume fabrics. I made an order from Spandex House, for both black and red stretch pleather. It came quickly, but smelled horrible. The nasty petroleum smell was almost unbearable. The pleather is washable, though, so I ran both pieces through the wash. Still smelled. I left the large uncut pieces flattened out in my sewing area for a couple of days, hoping they would off-gas. It improved the smell a bit, but there seemed to be no getting rid of it. I know my sense of smell is a bit more acute than usual, and that I would ultimately be in a smoky nightclub, so I decided to go ahead with it.
For once, Joann was not having a pattern sale right when I needed it, so I actually paid full price for a Vogue pattern (which is to say, 50% off the MSRP). Yet another element of this project I'd never done before.
Step Three:
Test dress.
Vinyl is unforgiving; you cannot sew it and tear it back apart. Also, no matter how carefully I take my own measurements, pattern measurements seem a crapshoot. I decided to make a test dress out of a large piece of woven I had in scrap. It came together quickly and fit so well that I omitted the zipper. I actually finished that dress and it's entirely wearable. (And, as always, less weird/lumpy than it looks when I hastily cram it on the dummy for photos.)
Step Four:
What about this applique nonsense?
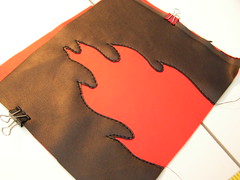
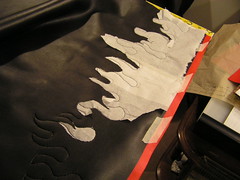
I got enough vinyl that I could cut some pieces off for experimentation. I've never really done any applique, reverse or otherwise, but I understand it in concept. I did a quick test and decided I liked the effect, but realized how difficult it was going to be following drawn lines on black vinyl. Then I remembered the freehand embroidery (aka stippling) foot I bought months ago, which I couldn't live without and then forgot I had. One of the methods for using this foot is to affix the artwork you want to "trace" to the fabric using a tear-away stabilizer. Or in my case, plain craft tissue.
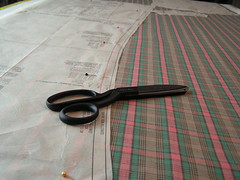
Finding the right artwork was easy for me. I'm not an illustrator, but as a graphic designer/production artist, finding the right illustration is often a part of the job. Found something I liked, made the adjustments needed in Photoshop, and printed the strip of flames on plain paper, splicing together where needed. I taped that down to my cutting table, taped craft tissue over that, and traced in pencil.
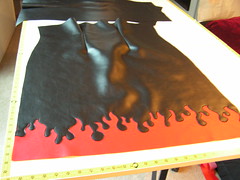
Then I made a sandwich on the cutting table of a wide strip of red vinyl, the full piece of 2.5 yards of black vinyl, and the tracing. I did not want to cut out the dress pieces before doing the applique because the screw-up factor was so high. I left it in one piece so I could whack off the 8 or 10 inches at the bottom if needed, and try again higher up.
Again, you really can't pin vinyl, so I used masking tape on the front and the back to try to keep the layers together. Especially challenging since I was maneuvering this giant piece around my sewing machine. But I threw it on and managed.
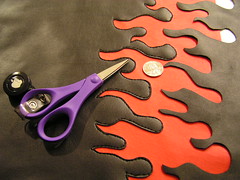
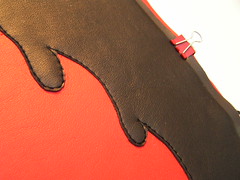
The stitching was far from perfect, but in cases like these, once your pattern is gone, no one really knows how much you strayed. Plus, good cutting can make a real difference. After only one go, I was satisfied with my flame border. I tore away the tissue and, using my favorite pair of little sharps, I cut the black away in one piece. (Gotta be able to do something with that.)
Step Five:
Cut out the dress.
This involved binder clips and careful edge pinning. Cutting the basic dress shape was crucial to deciding whether the placement and scale of the applique really worked. It worked.
I hadn't bought any fabric for the upper yet, but knew I could get that locally. Once I knew the thing was actually going to work, I headed back to the fabric store. The first two I narrowed in on were a white sheer with snowflakes (contrast, you know) and a variegated red with little shimmery spots. I couldn't use a plain sheer, that just wouldn't work. I decided the snowflakes (fire + ice) was a little too precious, and went with the red.
Step Six:
Build the dress.
The lower part of the dress could not be simpler. Additionally, I was omitting the zipper (stretch vinyl!) and the hem, so it meant four darts and three seams. Done.
The upper turned out to be more of a challenge than I anticipated, as the pattern calls for facings, which would show through the sheer fabric. Sheer is a PITA in a bunch of ways. I tested some narrow hems and the rolled-hem foot... then went back to one of my old standbys, bias binding. I had some in a color that matched very well, and it turns out, I actually really liked the way it looked at the neck. Bonus.
The two pieces went together without a hitch.
Step Seven:
Refit and finish.
I was actually initially concerned that this pattern would be too small for me, because of the whole dumb measurements thing. The vinyl dress actually fit more loosely than the test dress because of the stretch. Plus, it was really intended to be a bit more snug. Trying it on once it was all built together I decided to take a good 2" out of the waist.
After that, all that was left was stitching down the rear vent, trimming the bottom edge straight (no hemming needed) and topstitching where the top and body met. And choosing a pair of shoes.
This project represented a whole passel of challenges and techniques I'd never used before. But why make something if I can't make it just how I want?
Step One:
Think about a style/design.
The party flyer stated "black tie optional, but suggested." I thought of a nice straight silhouette in black with some white detail, or interesting embellishment. Out of my 157 owned patterns, 24 of which are dresses, not one struck me as appropriate. Shocking. I settled on Vogue 8313, View A. The body of the dress would be snug black stretch vinyl, the upper would be sheer white (probably), and along the bottom, red flames, preferably in a reverse applique.
Step Two:
Get supplies.
Wearable vinyl is not easy to come by. In metro Detroit, there are really only two options for fabric: Joann on the low end or Haberman Fabrics on the high. Neither had a suitable vinyl. Online, there are many fabric sellers specializing in stretch/costume fabrics. I made an order from Spandex House, for both black and red stretch pleather. It came quickly, but smelled horrible. The nasty petroleum smell was almost unbearable. The pleather is washable, though, so I ran both pieces through the wash. Still smelled. I left the large uncut pieces flattened out in my sewing area for a couple of days, hoping they would off-gas. It improved the smell a bit, but there seemed to be no getting rid of it. I know my sense of smell is a bit more acute than usual, and that I would ultimately be in a smoky nightclub, so I decided to go ahead with it.
For once, Joann was not having a pattern sale right when I needed it, so I actually paid full price for a Vogue pattern (which is to say, 50% off the MSRP). Yet another element of this project I'd never done before.
Step Three:
Test dress.
Vinyl is unforgiving; you cannot sew it and tear it back apart. Also, no matter how carefully I take my own measurements, pattern measurements seem a crapshoot. I decided to make a test dress out of a large piece of woven I had in scrap. It came together quickly and fit so well that I omitted the zipper. I actually finished that dress and it's entirely wearable. (And, as always, less weird/lumpy than it looks when I hastily cram it on the dummy for photos.)
What about this applique nonsense?
I got enough vinyl that I could cut some pieces off for experimentation. I've never really done any applique, reverse or otherwise, but I understand it in concept. I did a quick test and decided I liked the effect, but realized how difficult it was going to be following drawn lines on black vinyl. Then I remembered the freehand embroidery (aka stippling) foot I bought months ago, which I couldn't live without and then forgot I had. One of the methods for using this foot is to affix the artwork you want to "trace" to the fabric using a tear-away stabilizer. Or in my case, plain craft tissue.
Finding the right artwork was easy for me. I'm not an illustrator, but as a graphic designer/production artist, finding the right illustration is often a part of the job. Found something I liked, made the adjustments needed in Photoshop, and printed the strip of flames on plain paper, splicing together where needed. I taped that down to my cutting table, taped craft tissue over that, and traced in pencil.Then I made a sandwich on the cutting table of a wide strip of red vinyl, the full piece of 2.5 yards of black vinyl, and the tracing. I did not want to cut out the dress pieces before doing the applique because the screw-up factor was so high. I left it in one piece so I could whack off the 8 or 10 inches at the bottom if needed, and try again higher up.
Again, you really can't pin vinyl, so I used masking tape on the front and the back to try to keep the layers together. Especially challenging since I was maneuvering this giant piece around my sewing machine. But I threw it on and managed.Cut out the dress.
This involved binder clips and careful edge pinning. Cutting the basic dress shape was crucial to deciding whether the placement and scale of the applique really worked. It worked.
Step Five and a Half:
Choose fabric for upper.I hadn't bought any fabric for the upper yet, but knew I could get that locally. Once I knew the thing was actually going to work, I headed back to the fabric store. The first two I narrowed in on were a white sheer with snowflakes (contrast, you know) and a variegated red with little shimmery spots. I couldn't use a plain sheer, that just wouldn't work. I decided the snowflakes (fire + ice) was a little too precious, and went with the red.
Step Six:
Build the dress.
The lower part of the dress could not be simpler. Additionally, I was omitting the zipper (stretch vinyl!) and the hem, so it meant four darts and three seams. Done.
The upper turned out to be more of a challenge than I anticipated, as the pattern calls for facings, which would show through the sheer fabric. Sheer is a PITA in a bunch of ways. I tested some narrow hems and the rolled-hem foot... then went back to one of my old standbys, bias binding. I had some in a color that matched very well, and it turns out, I actually really liked the way it looked at the neck. Bonus.
The two pieces went together without a hitch.
Step Seven:
Refit and finish.
I was actually initially concerned that this pattern would be too small for me, because of the whole dumb measurements thing. The vinyl dress actually fit more loosely than the test dress because of the stretch. Plus, it was really intended to be a bit more snug. Trying it on once it was all built together I decided to take a good 2" out of the waist.
After that, all that was left was stitching down the rear vent, trimming the bottom edge straight (no hemming needed) and topstitching where the top and body met. And choosing a pair of shoes.
Friday, January 02, 2009
While I'm talking about the site...
There's another feature I use here that some people may not have noticed.
I use Google's RSS reader regularly. When I come across items of particular interest that I want to either share or remember for myself, I share through the public aggregator. The most recent 10 items appear here, on the RH navigation, along with a link to a whole big fat list of other crap I've shared over the decades.
Hey, no one can ever say I don't share.
I use Google's RSS reader regularly. When I come across items of particular interest that I want to either share or remember for myself, I share through the public aggregator. The most recent 10 items appear here, on the RH navigation, along with a link to a whole big fat list of other crap I've shared over the decades.
Hey, no one can ever say I don't share.
A word about the calendar.
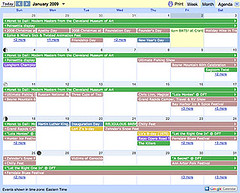
At the bottom of my blog is a calendar. It's always down there at the bottom, no matter which of my pages you're looking at. It's the calendar I use to keep track of things that might be interesting to me, so it is updated faithfully. Specifically, the green items (and the purple, which are out of town/rodeo events) are things I myself have placed on the calendar -- other colors come from some of the other local calendars I subscribe to. Click on any entry and details will pop up.
If you see something on the calendar you might want to do, and you know me (heck, even if you don't -- as if people who know me read my blog ;) ), call me! Or email me, txt me, something. If I haven't mentioned it or asked you to go, it isn't because I don't want to go with you!
I do a lot of things at local galleries and music venues and craft fairs, random stuff around town, and sometimes surrounding states. When I invite people out, 95 or 97 times out of 100 they say no. Like most people, I'm sure, I'm doing a couple of things a week, so that adds up to a lot of being told no. This may be absolutely common in most people's lives, but I admit, it's gotten to me.
So, if you see it on the calendar, chances are I put it there because it's something I might want to do. And if you think you wanna go, and maybe even with me? Call me!
If you see something on the calendar you might want to do, and you know me (heck, even if you don't -- as if people who know me read my blog ;) ), call me! Or email me, txt me, something. If I haven't mentioned it or asked you to go, it isn't because I don't want to go with you!
I do a lot of things at local galleries and music venues and craft fairs, random stuff around town, and sometimes surrounding states. When I invite people out, 95 or 97 times out of 100 they say no. Like most people, I'm sure, I'm doing a couple of things a week, so that adds up to a lot of being told no. This may be absolutely common in most people's lives, but I admit, it's gotten to me.
So, if you see it on the calendar, chances are I put it there because it's something I might want to do. And if you think you wanna go, and maybe even with me? Call me!
Wednesday, December 31, 2008
Proof of Concept
Here's a tease.
I spent the last couple of weeks conceptualizing a dress for a New Year's Eve party. Nothing major, just utilizing about 6 different techniques I've never used before. Well, I finished it today (since I plan on wearing it tonight -- why finish it two weeks ago when I could wait until today?). That's all I'm going to say at the moment. ;)
A quicky for the sewing nerds.
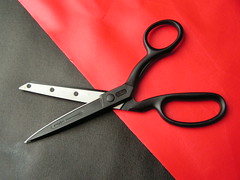
I bought my first pair of Gingher shears the other day. Now, ain't I a grownup? Sure, they're just the lightweight aluminum model, but I feel so much more ssssserious now.
Tuesday, December 23, 2008
Animal omens.
Whenever critters unexpectedly cross my path, I always consider it a good omen. Always.
Last night when I got home from work, it was after dark and about 12F actual degrees (windchill unreasonable). The first thing I noticed was Sevie acting weirder than usual, which is saying something. His meow was a little deeper and he was extra-twitchy. Then I noticed something had fallen off the TV, a small figurine. I thought I'd probably brushed the table on my way out that morning. When I saw some things knocked off my kitchen windowsill as well, though, I knew something was up. So I hunted around the house, finding nothing. Whatever it was, it must have found its way back out again.
After I had dinner and cleaned up, I finally sat down to watch TV at around 10pm. Within a couple of minutes, I thought I saw some movement in the periphery -- which, I hesitate to admit, I actually experience quite a lot in that house. (Oh the hauntings, the hauntings.) I got up to stick my head in my dressing room at which point a small bird flew straight at me. I was kind of expecting that, but it's funny how even knowing it's coming, I ducked down with a panic as though I were being shot at. The bird flew around the corner and straight into my work studio. At least that room has a door.
I closed him in and thought, hm, how does one catch a wild bird? I sat down on the sofa for a moment to consider my options. Within a minute, the bird simply walked out of the work studio and into the living room as if to say, "Okay, this has been fun, but could you just open a window now?" Of course as soon as I moved, it started flying around the house again. I grabbed a fleece jacket figuring maybe I could throw that on it, but before I even tried, I opened my front door and the big glass doorwall. When I followed the bird back into my dressing room, it whizzed past me and out the big door.
I'm a little disappointed I didn't get a chance to take a picture of it. I wanted to, and would have gotten my camera before opening the work studio door, but the bird thwarted the plan. (And obviously I don't know how to close doors.) It was small, but probably bigger than a common sparrow, in earthy colors with a blue band behind its eye.
After everyone was safe (where was Sevie through all of this?) and the house warmed back up, I started thinking about bird omens.
A scan through online searches always seems to come up with nothing but bad bad bad omens, for everything. I don't buy it. Since it's all myth and symbolism anyway, why not make up something good? So, here's the omen I made up, which I've decided this little bird in my home was to mean.
When surprised to find a bird in your dwelling
Pay heed to the omen this sign is foretelling.
No doom, no gloom, no luckless portent;
No reaper lurking with wicked intent.
Take heart that lost friendship will blossom anew,
For writ on its wings are a friend's thoughts of you.
Last night when I got home from work, it was after dark and about 12F actual degrees (windchill unreasonable). The first thing I noticed was Sevie acting weirder than usual, which is saying something. His meow was a little deeper and he was extra-twitchy. Then I noticed something had fallen off the TV, a small figurine. I thought I'd probably brushed the table on my way out that morning. When I saw some things knocked off my kitchen windowsill as well, though, I knew something was up. So I hunted around the house, finding nothing. Whatever it was, it must have found its way back out again.
After I had dinner and cleaned up, I finally sat down to watch TV at around 10pm. Within a couple of minutes, I thought I saw some movement in the periphery -- which, I hesitate to admit, I actually experience quite a lot in that house. (Oh the hauntings, the hauntings.) I got up to stick my head in my dressing room at which point a small bird flew straight at me. I was kind of expecting that, but it's funny how even knowing it's coming, I ducked down with a panic as though I were being shot at. The bird flew around the corner and straight into my work studio. At least that room has a door.
I closed him in and thought, hm, how does one catch a wild bird? I sat down on the sofa for a moment to consider my options. Within a minute, the bird simply walked out of the work studio and into the living room as if to say, "Okay, this has been fun, but could you just open a window now?" Of course as soon as I moved, it started flying around the house again. I grabbed a fleece jacket figuring maybe I could throw that on it, but before I even tried, I opened my front door and the big glass doorwall. When I followed the bird back into my dressing room, it whizzed past me and out the big door.
I'm a little disappointed I didn't get a chance to take a picture of it. I wanted to, and would have gotten my camera before opening the work studio door, but the bird thwarted the plan. (And obviously I don't know how to close doors.) It was small, but probably bigger than a common sparrow, in earthy colors with a blue band behind its eye.
After everyone was safe (where was Sevie through all of this?) and the house warmed back up, I started thinking about bird omens.
A scan through online searches always seems to come up with nothing but bad bad bad omens, for everything. I don't buy it. Since it's all myth and symbolism anyway, why not make up something good? So, here's the omen I made up, which I've decided this little bird in my home was to mean.
When surprised to find a bird in your dwelling
Pay heed to the omen this sign is foretelling.
No doom, no gloom, no luckless portent;
No reaper lurking with wicked intent.
Take heart that lost friendship will blossom anew,
For writ on its wings are a friend's thoughts of you.
Subscribe to:
Posts (Atom)