Sunday, September 25, 2011

Embroidered Mitred-Corner Placemats

All right, let's see how this works... Trying a new blogging app. The Blogger web interface is a little incompatible with iOS.
[EDIT: Didn't work well at all. Formatting this post was a MESS. Does anyone have a good iOS blogging app recommendation?]

A couple of weeks ago, I went to California to visit friends and see their new home in Santa Barbara. After spending a very pleasant long weekend there, I knew just what I wanted to make for them as a thank you/housewarming present before I was even on the plane home.


There are a few steps involved in converting a piece of art into a PES file for use with my embroidery machine. I'm just going to walk through the steps I personally used on this project. There are a few different methods. I work with Photoshop and Illustrator professionally on a regular basis, so it makes the most sense for me to start with creating my design in Illustrator. That's my first image here. (B-K represents their last names.)

After I've got something I like there, I start pasting elements from Ill into Wilcom Designer. And that's when the tweaking begins. The often very...very extensive tweaking. In the second image, you can see the splines for all of the objects. It's important not only to get the shapes right, but they need to be appropriate for stitching, which has a much lower resolution than you'd see on screen. Very fine details are difficult to reproduce and may need to be adjusted or discarded entirely. Next, choose stitch types (mostly either satin or tatami) and density, and order. You want to minimize jumps, because you're just going to have to go back and trim them all out anyway. This design software has a lot of advanced features -- much more advanced than I am! -- including what's called "branching," which essentially combines certain stitch objects for efficiency. The blue image is the 3D preview of the finished design.
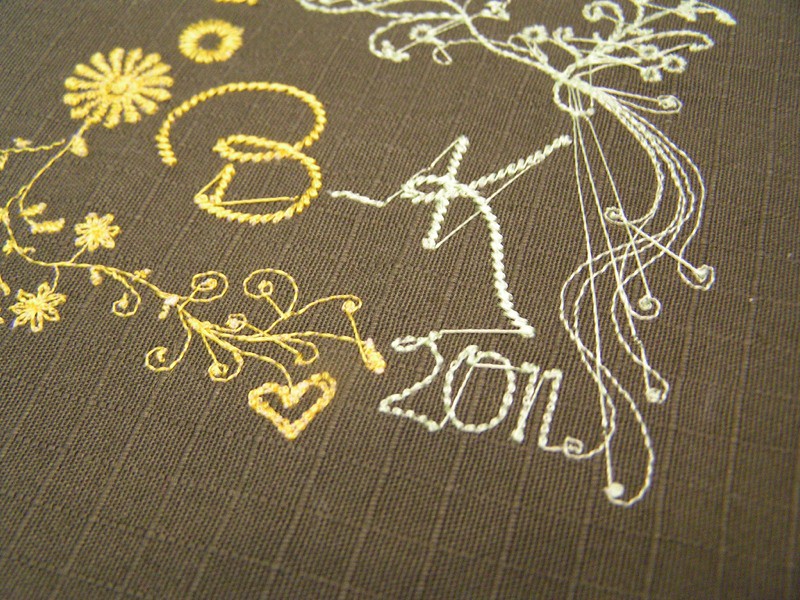

Next come the stitching tests. It's going to be pretty rare that something stitches out satisfactorily the first time, so be prepared with some extra fabric. The fabric I chose for the placemat tops was a deep olive green ripstop of a sort, with a grid sewn into it. This appealed to the precision-craziness within me. I chose two different threads, unsure which color I'd prefer. I have a love of combining orange and green, but I also found this pretty, soft, minty pastel thread that I needed to give a try. One of my final stitch out tests was a color comparison. I went with the green.
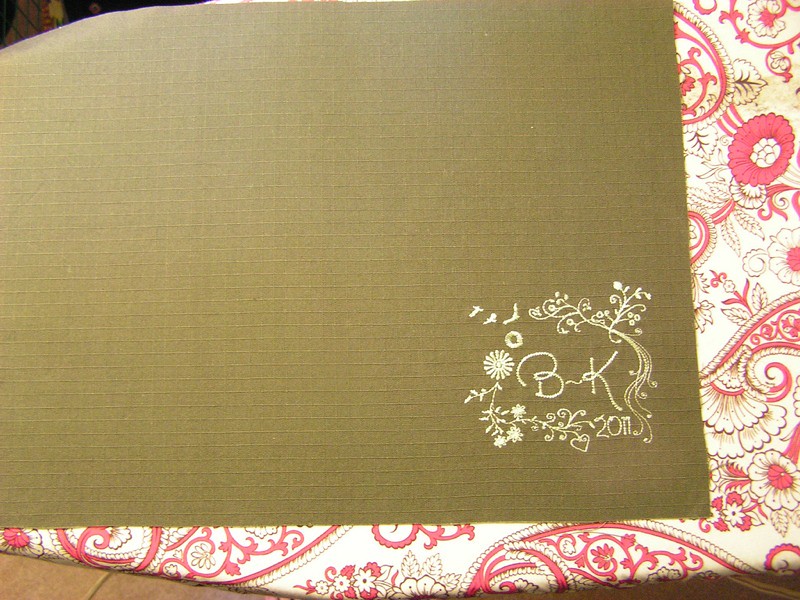


With the design conversion finalized, I cut the tops and embroidered the design in place on each one. I decided the finished placemats were going to be 12"x16" with a .5" border on each side. That means the tops were cut at 11"x15" (plus seam allowances) and the backs -- a pretty quilting flannel in springy greens -- were cut at 13"x17" (plus seam allowances). The extra size on the back piece wraps around the front to make the border. I'm going to show you how that happens.
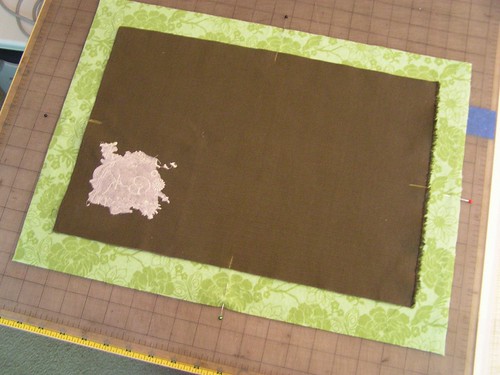
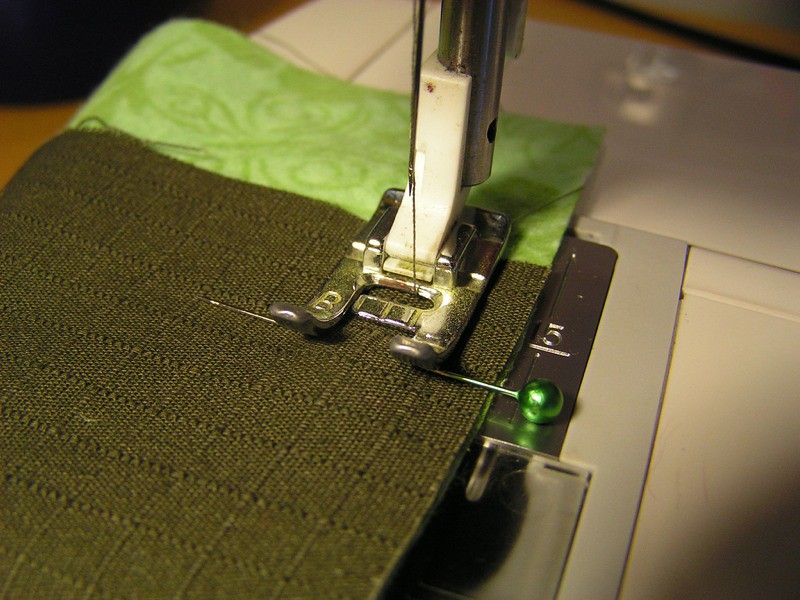
First, mark the centers of all four edges of both pieces. Starting on the edge of your choosing, with right sides together, match the center and the raw edges of just that one side and pin.


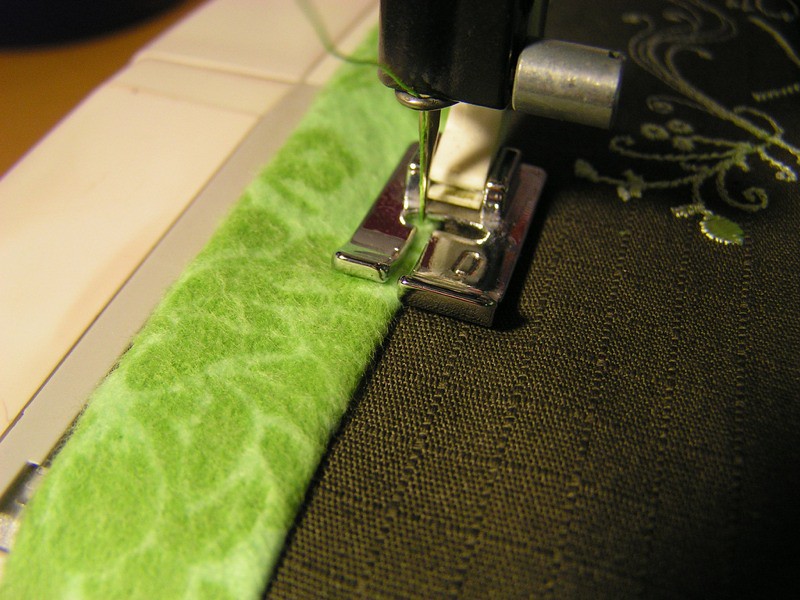
When you sew that edge, start at the seam allowance distance from each edge. In my case, .25" matched up with the grid, so I was .25" from each edge of the dark green top. Then when you get to the other side, once again stop at the seam allowance.
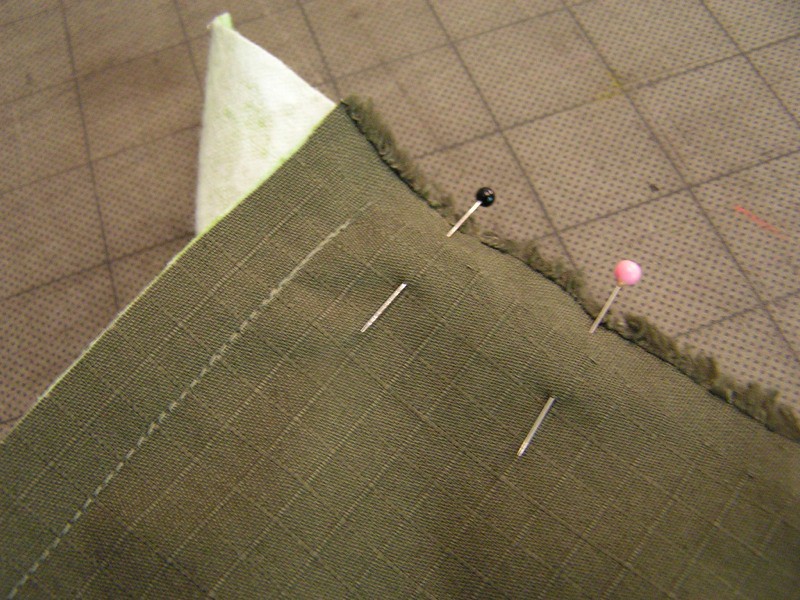
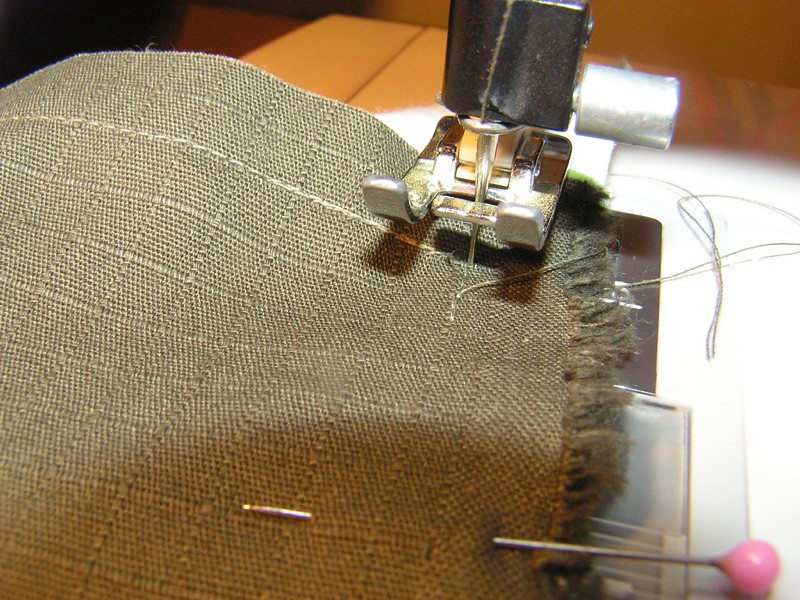
Then move to an adjoining side and do the same thing -- match the centers and the raw edge. It's going to leave extra at the corner, which it's supposed to. When you're lining up the edges, just be careful to smooth the backing out so you don't wind up stitching through that extra corner piece. Start where the stitching on the other side left off, and stitch down to -.25" (seam allowance) of that edge.


Do this on all four edges, making sure to leave a gap on one side to turn the piece through. Now, when it's all done, it's going to look like a mess until you turn it around. See? A mess. That's okay, trust me.

You're going to mitre the corners now. This is the only "tricky" part and it's not really tricky.
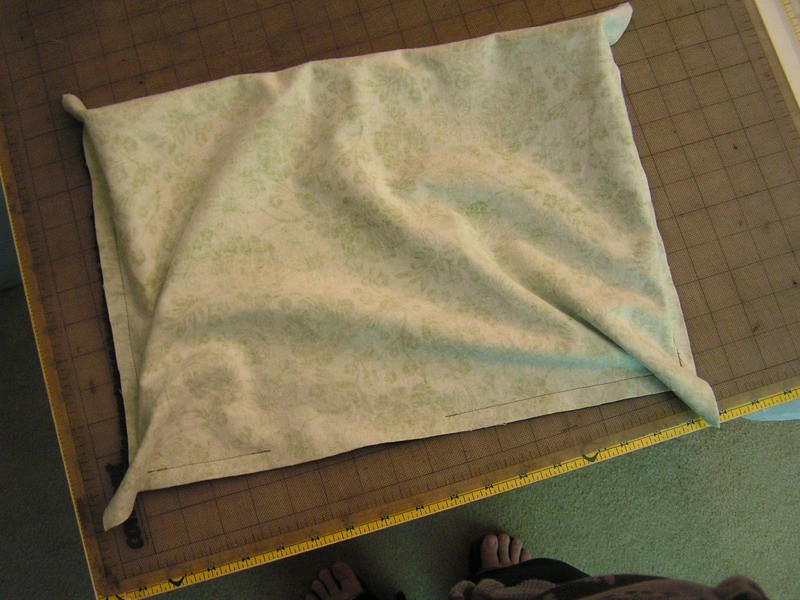
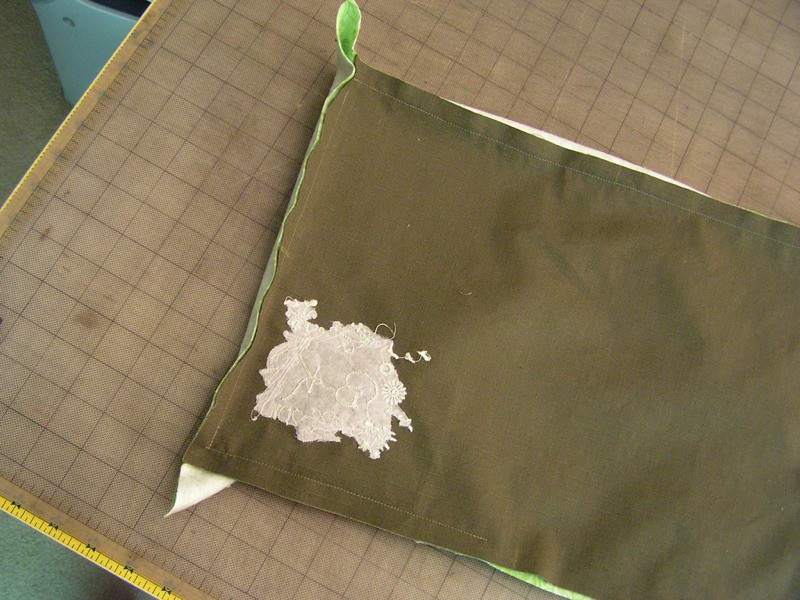
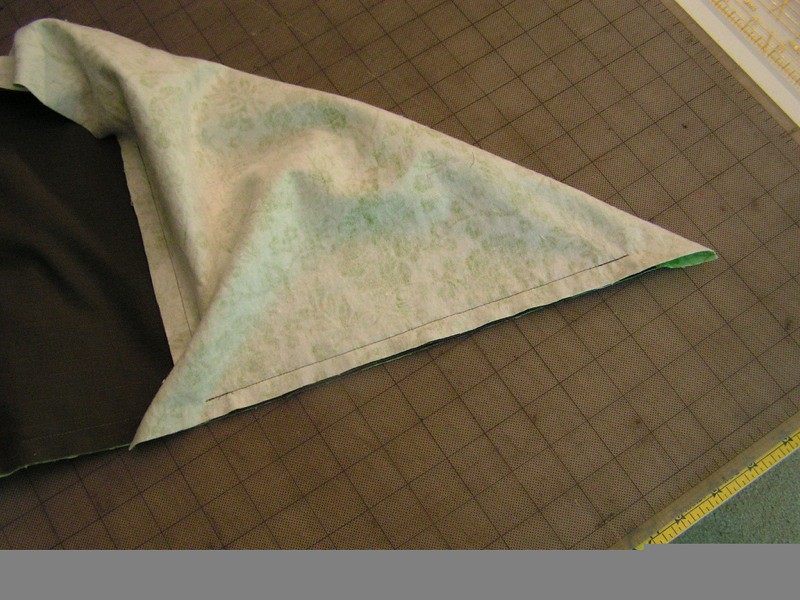
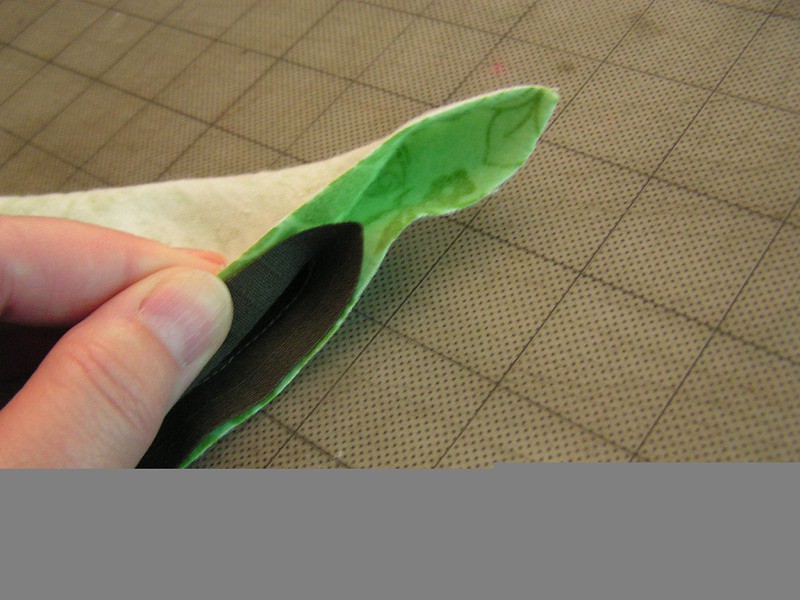
Lay the piece flat with the top piece facing upward, and bring the right hand edge down to the bottom edge, folding the lower right corner cleanly in half. This creates the sandwiched material in the lower right corner. It's a little awkward to explain, but it makes sense when you do it yourself. If everything fits together well, the corner should smooth out nicely.


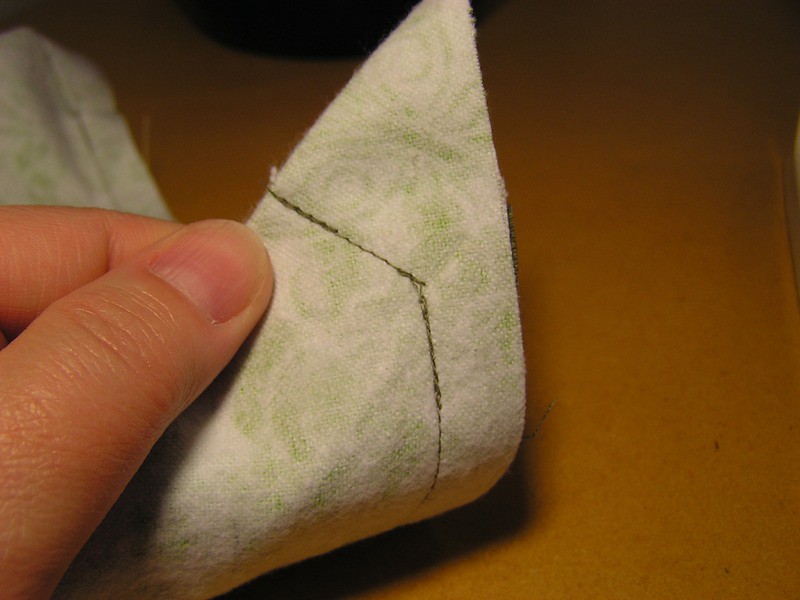
With the stitched seam to your left, use a ruler to mark a straight line from the end of the seam stitching to the folded edge of the backing, at a right angle to the folded edge. when you stitch this line, you should be going through two layers of the placemat backing ONLY. If everything lines up correctly, it should meet the stitching perfectly on the other side as well.


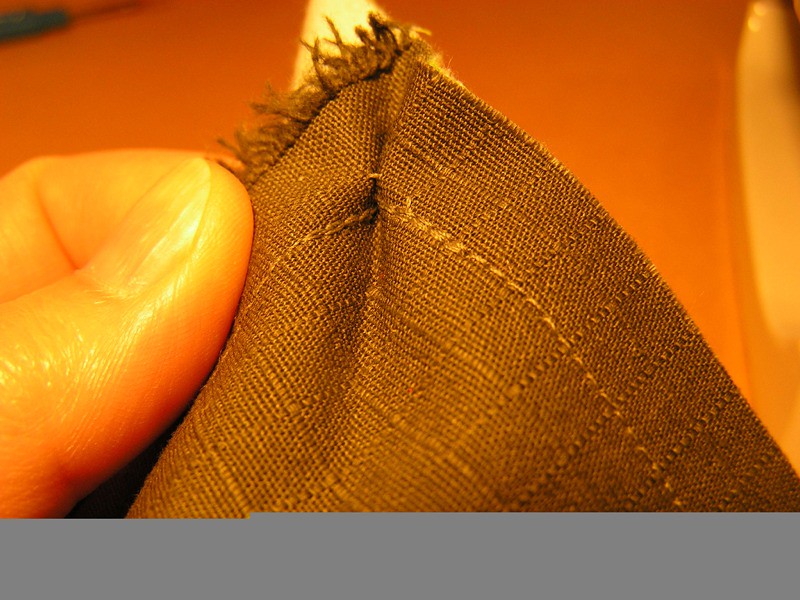
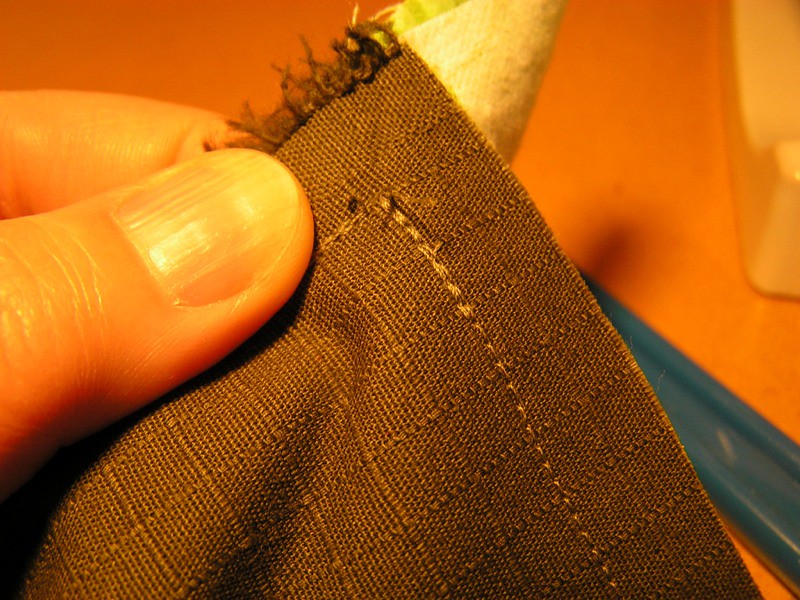
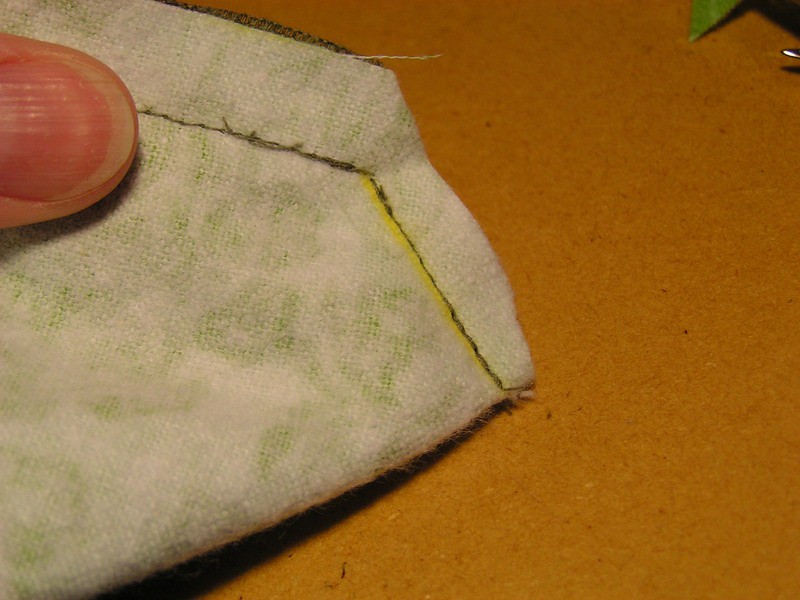
If things don't line up quite right, you'll be able to tell when you unfold the piece. If the corner looks hitched like this photo, the corner won't mitre correctly. So snip any extra stitches so that the top piece lies flat.

Do that four times, all the way 'round, and that's it, your corners be mitred. Go ahead and trim the extra fabric from the corners


Now you turn the piece around through the gap you left on one edge, and smooth everything out again. I use the blunter end of a chopstick to turn the corners. Be careful because if you stress the fabric too much, you may wind up popping the seam. Because I'm using flannel, the corners don't have to be super crisp, because...flannel just doesn't behave that way. Smooth and adjust, smooth and adjust... You should feel the edges and the corners resolving themselves to the limits of the stitching. And now you press. When you get to the edge with the gap in it, make sure you fold the opening to look even with the rest of the sewn seam.


Then top stitch on the border side. Makes everything tighter and closes up that turning gap.
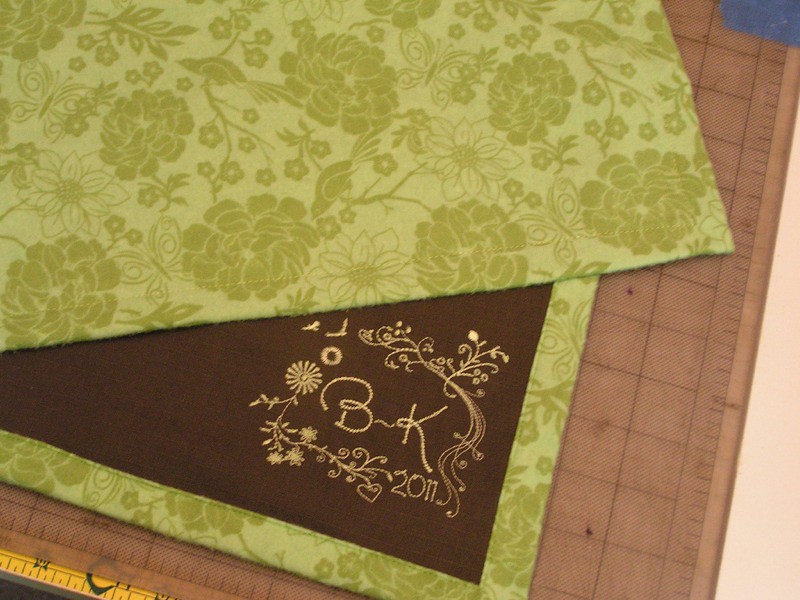
That's it! I made a total of six, mostly over a weekend. Stitching the embroidery took the longest time, so I did that bit by bit during the week. I also washed all the fabrics first so that they'll be usable/washable placemats.

Monday, June 20, 2011

I'd like my life back, please.


This is still what it feels like, living at my house. I didn't realize until the other day how mental it's making me not being able to sew or craft or create or, at this point, even just sit in my own living room and watch television.

Wednesday, June 15, 2011

Three makes a collection!


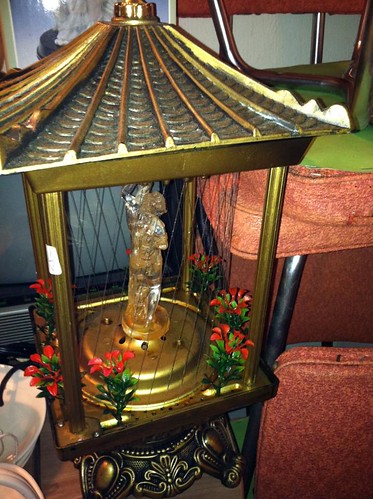
Estate Rain Lamp by shefightslikeagirlPretty bad timing for this acquisition (see: house torn UP!), but once again, my good friend Colleen came through with a sweet-ass score for me; my latest rain lamp.

I was at lunch when I got this MMS with the message, "At estate sale, $15, you want?" I said HELL YES without asking any more questions. I could barely see any detail on my iPhone, and from what I could see it looked pretty rough, but for that price, I decided it was worth the risk.

A couple of days later, I got it from her, and was a little surprised. The pagoda top is plastic, as well as the base, which was disappointing but not too shocking; it's clearly a late-model cheap knockoff. (Which at least makes it much lighter-weight than my other two.) More of a surprise – and delight – however is the goddess. She's transparent. !! This, I had never seen!

As soon as I got her home, I filled the base and plugged her in. There are two lights; one under the pagoda and one – you guessed it – under the transparent goddess herself. And they are switched separately.

The lights both work, but unfortunately, there was no pump action. Not so much as a hum.

Since I'd ultimately wind up taking the thing apart anyway, to make sure that nothing internal was gummed up, I set to unscrewing bits and bobs to take a gander at the pump assembly. This is when I was presented with a couple more surprises.

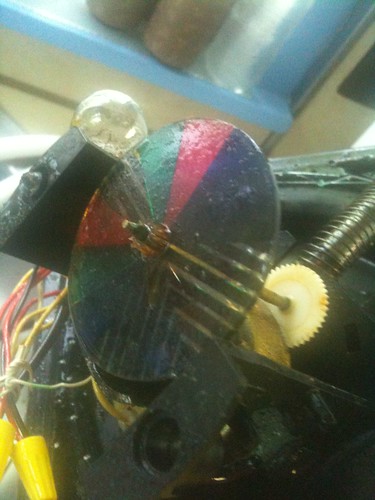
For one thing, the pump isn't just a pump; it's a small motor assembly, running a couple of gears. Oh yes, to my absolute horror, the transparent goddess, she... she rotates. Or would, in an ideal world.

What I found next mitigated the pointlessness of the revolving goddess. Between the lower bulb and the underside of the goddess base was a tiny little color wheel. Oh come ON!

Now I have GOT to get this thing working. I mean, it's like the tackiest possible version of an already tacky object! It's also the first one I've gotten that I haven't immediately been able to get working, so my inner MacGyver is all riled up, wanting to safety-pin-and-electrical-tape something together.

Plus, this is my third rain lamp, which officially makes me a collector.* And let me tell ya, I don't collect junk.

*A well-established fact. Ask anyone you know. This number was originally given to me when I asked a half-dozen people "how many animal skulls in my living room before it's a 'collection'?"**


**Okay, to be fair, a couple people answered, "Too many. However many you have, it's too many."

Monday, May 16, 2011

What I'm doing now...

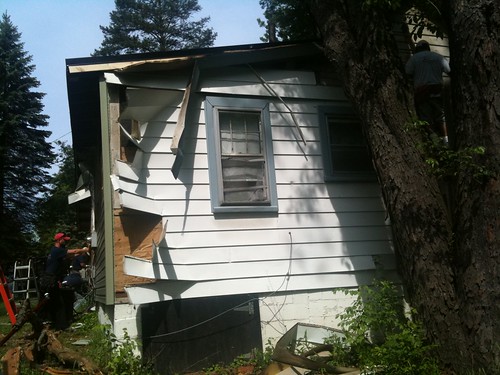
Trying to have some sewingfuntimes, but this happened. So yes, my answer to everything lately has been, "I wanted to do that, but a f*cking tree fell on my f*cking house."

Thursday, March 10, 2011

Another contest? Not really.

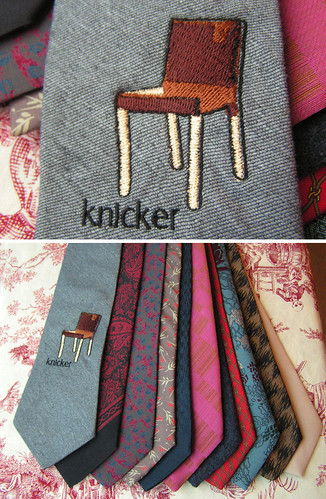
Blu Dot "Knicker" Chair Tie by shefightslikeagirl
Blu Dot makes really good-looking, modern furniture. They are currently running a promotion whereby wanna-be Blu Dot furniture recipients offer goods, services, all sorts of things, in exchange for one specific item from the Blu Dot catalog.

This is right up my alley, because not only do I dig their stuff, the barter/trade philosophy is one I can really get behind. So over the past few days, I've taken an example from their catalog, the Knicker Chair, and converted it for machine embroidery. I chose the chairs because they lend themselves well to the vertical nature of ties, and there are about 9 of them, which seemed like a good number to work with.

The way Blu Dot has set up the website, visitors can thumbs-up a bid to deem it "swap-worthy," but the final decision is made by Blu Dot. Scanning through the selection of winners, they clearly have a good sense of humor, and appreciation for art and originality.

Oh, by the way, this is the sofa I'd like to get. I recently realized that in the past year or so, at least 8 or 9 of my friends have overnighted on my sofa. This seems like a kinder alternative.

Friday, February 04, 2011

Sneak Peek

I've been working the past week or two on an outfit... in my head. I've drafted as much of the pattern as I have been able, and had been looking for just THE fabric. Earlier in the week, I found it; Midnight Pastoral by Alexander Henry. My compliments to Hart's Fabric for getting my Tuesday order to me by Friday. That gives me a whole weekend – I can get a lot done in a weekend!

Tuesday, January 25, 2011

ugh

I hate it when people do this... And I hate it when people disclaim doing something they hate by saying "I hate it when people do this"... But the site needs a redesign, since it's really just been a placeholder since migrating to Blogger's new template software. It's kind of unbearable right now, which is part of the reason I haven't posted anything – NOT because I haven't been doing anything! I have a multi-event costume in the works right now, in fact, and just finished a nice commercial skirt pattern. But, uh, no real posting until I get this sorted out for real.

I guess I'm just making excuses for the people who still wander in here and think "jebus, this is hideous!" Yes. I know. And not because of the eye-searing colors – I LIKE those!

Thursday, October 28, 2010

"Totally Stitchin'" Frank-N-Tote Winners

I didn't win anything.

I'm not bitter or anything, so I'm not going to say that one of the winners is a canned design and one looks like someone/something peed on it.

Monday, October 18, 2010

I'm in a contest here...


Hey, I'm in a contest right now, if you feel like voting for me. :)

The good people at Babylock are running a two-level contest right now for Halloween-themed bags. I've entered my Bride of Frankenstein bag, made for a swap a couple of years ago. I say it's a two-level contest because the grand prize winner will be chosen by the Babylock judging panel, and the entry with the most visitor votes will win a bag full of sewing goodies.

The contest page is here, and if you want to vote for me (from now until October 24), search for SheFightsLikeAGirl and give me some stars. I mean, you know, if you want to. ;)

One way or another, I'll post the results here in a week.

Sunday, September 19, 2010

A follow-up I forgot to make!

I realized the other day that I never posted the finished project that I teased in this post. I think I assumed I did, because I've worn the dress at least three times.

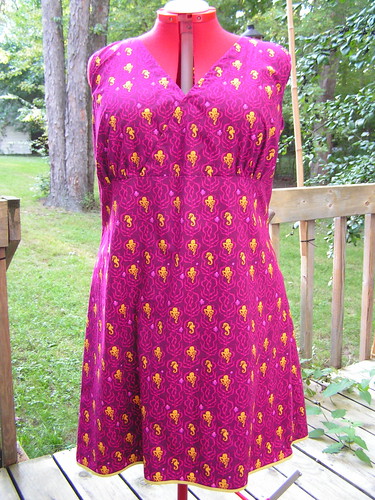
I like the idea of making a Birthday Dress for myself, something maybe a bit outside my usual "style." (haha I have a style.) Because my birthday is in July, I have sundress-y options of which I might not ordinarily avail myself. In 2009, I knew I'd be spending my birthday in Vegas, at the Penn & Teller show on the night of, so something vivid was definitely called for.

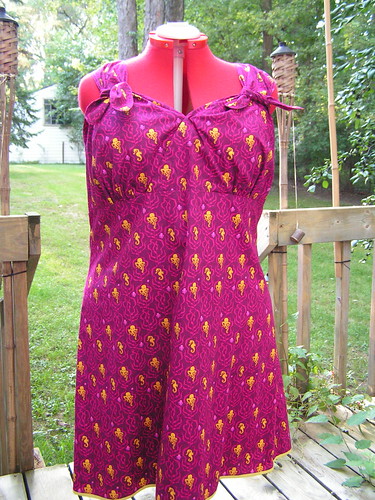
They've become so popular these days, I'm almost loath to admit it, but I have a long-term love affair with all things Cephalopod. The good thing about them becoming such rockstars on the crafting scene is the availability of some super-sweet fabrics. Last year I discovered the "Mendocino" collection by Heather Ross. There were a couple of colorways, but you know I'm going to pick screaming fuchsia/orange whenever that's an option.

This also marked one of the few times I paid full price (faint!) for project fabric. I remember being so nervous when I started cutting it, you'd have thought it was my first time.

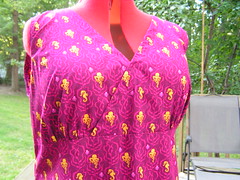
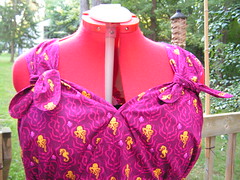
I chose a simple dress with no sleeves and an open neck, the now out of print Simplicity 5074, out of my stash. I've got a bit extra to work with in the Up Top department, which I tend to remedy by lengthening the bodice, but I didn't on this dress. On the other hand, it's probably a little too big in the 24 that I made. The sleeves actually have little flanges or something, as I recall, but I omitted those and just did a regular narrow hem on the arm openings. Also omitted the zipper, of course. It pulls over easily enough. I wound up whacking about 6" off the length, finishing with this lovely bright yellow narrow bias tape.

There is also a little bit of gapping in the cross-over in the front, which could just be tacked. Additionally, I made two little ties of matching fabric to tie off the thick shoulder straps. It changes the fit and look of the dress greatly. Much more bombshell this way. Wearable the other way, too; simply more casual.


The dress is comfortable and makes an entrance, to be sure (particularly if I wear it with orange tights and red shoes, like last time), but the fabric itself is a bit stiff. If I wear it with leggings, which of course I always do, it wants to stick to my legs. It's a great cut for my shape, though, so I could imagine making it again, out of something a bit more flowy. And possibly less octo-y.

(Ugh, that last picture is kinda terrible. I'm not as lopsided as Heddy seems to be here.)

Tuesday, September 14, 2010

Mending with a Stippling Foot

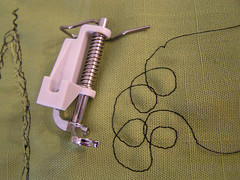
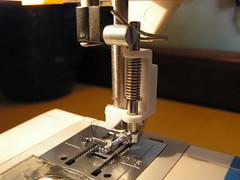
This is my stippling foot. I just had to have it... and then not use it much. But it's one of those tools which, when you need it, there is no substitute. Its first major project was the Vinyl Flames Applique NYE dress. This time, it was mending a vertical tear in the leg of a pair of blue jeans.

The foot attaches to the machine in place of the ankle, with a spring-loaded lever that goes over-top of the needle-mounting screw. The picture at left shows the foot installed on my machine, with the needle off. With the feed dogs down (inactivated), the open-toed presser foot presses down on the fabric on the down-stroke, and is lifted off the fabric completely on the up-stroke. This allows you to move the fabric around freely. The stippling foot is also referred to as a free-motion or freehand embroidery foot, as it allows you to essentially draw any shape you like, in any direction. (Sewing nerdness complete.)

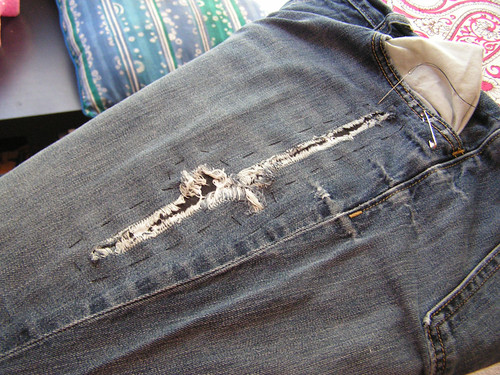
Recently, a coworker gave me a pair of jeans with a long tear down the front of the left upper thigh, which I'd apparently at some point agreed to mend. (I have no memory of this... but what the hell, I'm a giver.) She had a quadrupled piece of skull and crossbones quilters cotton pinned behind the long tear, showing how she wanted it. "Why don't you just hand-sew it?" I asked her. She laughed.

I finally had some time today, so I took a closer look at the pants. I hadn't given it much thought when she gave them to me, but when I looked at them, I realized they would have to be sewn sideways because of the position of the tear. Erm, that's not how sewing machines work... then I remembered the stippling foot. I decided what I would do was sew several rounds around the tear in a sort of scribbled stitch (good lord, that sounded like I was possessed by Seuss there for a moment).
First, I unpinned the layers and ironed everything. Then I replaced the four layers of cotton behind the tear and hand-based. I decided to sew a bit outside of the tear; there wasn't much denim actually missing from the tear, but it seemed like she wanted the skulls to show, so I left it open so she could either trim it out, or just leave it free to fray like crazy (up to the machine stitching).

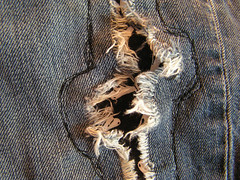
Then I slid the leg onto the machine and traced around the basting, bunches of times, following the basic shape of the tear. I could have gone really crazy, using a more contrasting thread, and stitching a lot more, and scribblieringly, but at this point, she has no idea what I'm doing to mend them, so I didn't want to go overboard. Looking at the jeans now, if they were mine, I'd definitely have done more. We'll see how she reacts. (No, wait, why am I even saying that? I'll give them to her and never see them again.) After a few rounds of stitching, I trimmed the extra skull fabric from the inside.
These are clearly well-loved/-worn jeans, as there are a couple more (less scandalously-placed) holes and some threadbare spots. Since I was at it, I took a chunk from what had been trimmed off and made a small patch for the other side, scribble-stitching that from the top side. Trimmed the edges and pulled a few threads so it'll ravel nicely, too. Cute, right?


Oh dear. Why do I have a feeling a bunch more holey jeans are going to wind up dropped off at my desk?

Okay, I admit. After I made this post and looked at the pictures, I decided to do more, longer, looser scribbles to soften the whole shape. Why do something if I'm not going to do it all the way?

Sunday, September 12, 2010

What? Not another skull dress!

Yes, another skull dress. I don't do it on purpose, I swear.

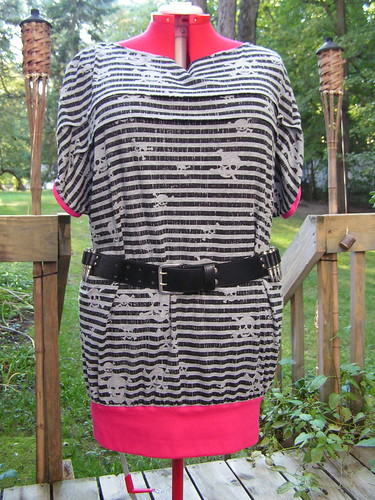
I found this adorable stripey skull knit on the clearance table and bought the remainder, not sure what I was going to make. I want to learn to work with knits more, though, since they're so nice to wear.

I dug through my patterns to find something that could support so much... stripeyness. I thought Butterick 5327 was an interesting shape, but the way I'm built, bat-wing styles make me completely waist-less, rather than being nearly waist-less. So I decided to make a tunic out of it to lengthen the whole bodyline. At the same time, I had my eye on Simplicity 2998, and decided to work in a detail from that design.

I started with View C and just extended the lower hem to just past my ass. I went on a hunt for a good, strong pink knit, which I found in a nice rib. I decided to make the strip 4" high, and just long enough to hug my upper thigh area. I gathered the lower edge of the tunic, folded the pink in half, and overlocked the 3 raw edges together. The shape as it came together was pretty good, but those dropped shoulders bothered me. Again, with my build, my shoulders are a bit sloped, so those sleeves were just making me look lost.

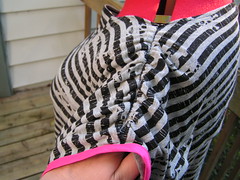
I shortened the sleeves and then ran elastic gathers along the shoulder to pull the whole thing into an itty-bitty short sleeve. Then I found a matching pink pre-made bias tape and ringed the armholes – you know I loves me some bias tape, and I wanted to make the pink more highlighted.

So there you have it! I really like the pleat detail at the upper front and back, even though it does get a bit lost on this particular fabric, and the loose neck. It's a super comfy dress, though, and I've worn it at least three times now, including to the Psychedelic Furs (with a big belt) and to a festival last night (with a long-sleeve zipper-front sweater).

Bear with me...

I've been hanging on to the oooooold blogger template for a long time, because I'd done so much customization. I'm updating now, though, which means I'll be redesigning and moving shit around for the foreseeable future. Fun! Same dumb old content though, rest assured.

Wednesday, September 08, 2010

The future from the past.

Before going to see the Mighty Mighty Bosstones last week, I was excavating the depths of my wardrobe, and unearthed a gorgeous green retro suit which I hadn't worn in maybe a decade. In the pants pocket (yes, they fit, more or less) I found a big silver ring with a black cats-eye stone that I used to wear all the time (which also still fit me) and this fortune.

I didn't wear the suit, but I had both the ring and the fortune with me for the show. After my usual night of having a bouncing good time and being approached by no one, I pulled my keys out of my pocket, and the fortune came out with them. I let it blow away across Detroit.

Friday, September 03, 2010

Just bragging.

This past weekend was the People's Art Festival. I haven't missed one yet (of the whole, what, 4 there have been?), and as always, MOTORCITYBLOG had a big presence there. Art, music, fashion show, beeeeeers...

I had scanned through the vendor list the week before, and while I knew there were lots of awesome artists expected to show, there was one artist in particular whose work I was chomping at the bit to see in person; Emi Slade.

Everyone knows I'm a sucker (heh) for the cephs, and they are more popular than ever in arts and crafts right now. Emi's works are extraordinary though, and I couldn't wait to see them.

It seems like it's been a long time since I've brought home some original art, and after visiting Emi's booth literally 4-5 times – bringing another person with me each time! — I finally plunked down my ducats for this beauty. The colors! Just perfect for me.

Not only are Emi's works super-cool, while they are fantastical, they are clearly, and carefully, modeled on real-life creatures. This made them even more special to me, and added to the notion that they could swim off at any moment.

Just gushing to be supportive and to brag, I swear this isn't a paid ad. :)

This fella is actually installed on a small plate stand on a shelf in my living room, which I'll probably get better photos of later. Until then, my iPhone snaps will have to do.

Until it eats Sevie at least...

Saturday, July 10, 2010

How I spent my birthday this year...


A little off my usual subject matter, once again.

I'm at the end of my annual Birthday Week sabbatical, and I just wanted to show off a little bit of what I did during my time off. Well, not what *I* did exactly. :)

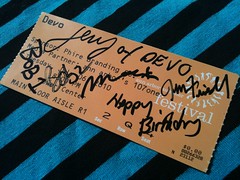
My birthday was Wednesday (07-07). Tuesday night, I saw, and then met, DEVO.

Fantastic.

There's a more in-depth, far dorkier version of the story here, if you're interested. :)

Wednesday, June 30, 2010

New RH Navbar Option

I've been doing a lot more writing/contributing to MOTORCITYBLOG.net over the past year or so, and I'm notoriously bad at promoting (or mentioning) when I do anything... so I've added my DC-in-Detroit icon to the navigation bar on the right there, which will lead you straight to my original content. Hope you enjoy. Or at least do not die from the overwhelmity.

Tuesday, June 15, 2010

Machine-Embroidered Quilted Coasters

A good friend of mine ran off and eloped last week, and I wanted to make something monogrammed for them, something useful. Since I had already decided to sneak in and leave them some champers and glasses, coasters seemed like a good idea.

They got married at a big tiki party in Florida, so I also wanted to do something that tied in to that. I lit upon a design using Adobe Illustrator.

With the embroidery software, I broke it down thusly:


For the first time in a while, I actually took pictures during the process! Mostly because I was doing something I'd never done before, and there are a few different ways of doing it. I went the somewhat non-expected path.

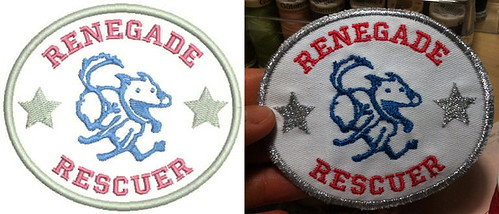
Typically, when doing an applique/patch/coaster/whatever, you would put down the die line and then cut out the field fabric and affix it to some stabilizer within the shape. I'd done this with Kelly's Renegade Rescuer patches with varying levels of success.


The concern is that the precut piece will shift around, even with adhesive, and when it's time for the satin-stitched edge, some wovens will blow out at the edges. Additionally, I intended to use a piece of felt under the fabric front, and another piece of felt at the back. Just seemed like too many opportunities to shift around. I saw one tutorial that approached this from a slightly different angle, and decided to give that a go.

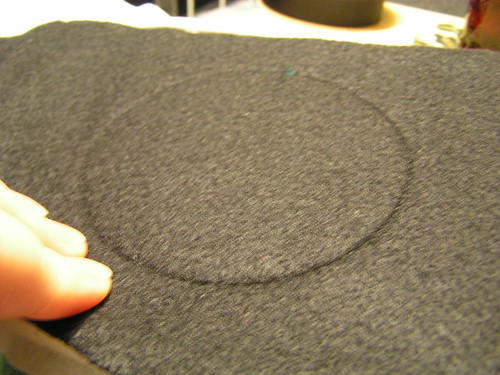
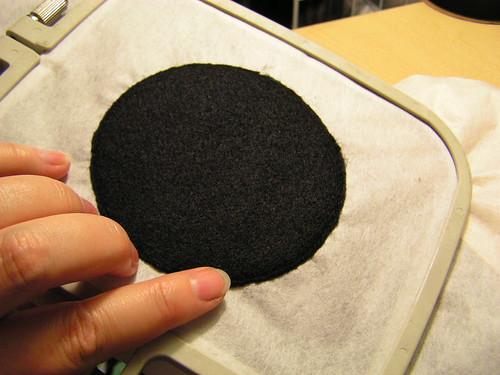
I started with a layer of tear-away stabilizer in the hoop (the tutorial I saw used a heavier water-soluble stabilizer, but I didn't have any) then floated a piece of craft felt and then the upper fabric, a quilting cotton, all adhered with temporary spray adhesive. (I recently realized -- again? -- how often I make sure my fingers are in my crafting pics, for scale.)


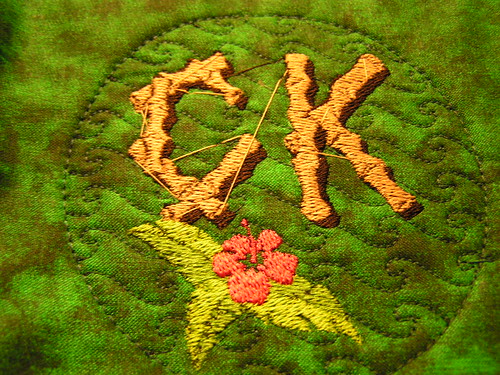
The first stitching is the outer shape, just to hold everything together. Then the quilting, to take advantage of the thickness of the felt. I've never done that before, and I think it turned out really cool.


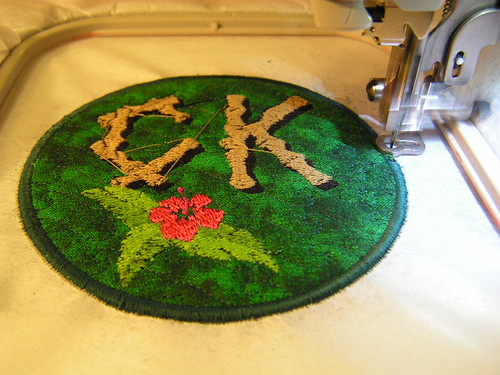
Then the design gets laid down in five six colors.


After that, I removed the hoop from the machine and floated another piece of craft felt to the back (more adhesive). Then another trip around the perimeter to fully attach the back piece.


I should mention: when I did the layout, I made sure to make this layer, the stitching that holds all of the final layers together before trimming, very close to the inside edge of the final satin stitched border, rather than right in the middle where it would be by default. In other words, that stitching will still be covered by the satin stitch after the final border, but is far enough inside that when I trim out all the fabric, the raw edge that will necessarily be left will ALSO be covered by the satin stitch.

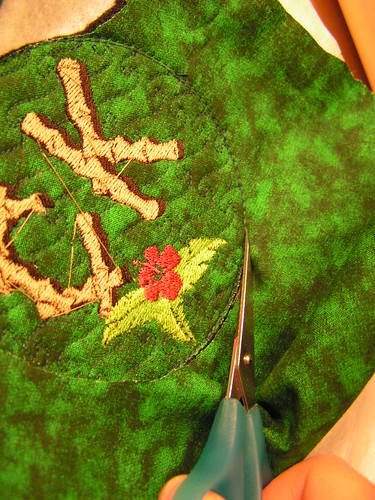
Next comes the pain in the arse: Trimming the shape without unhooping the whole thing. This is where applique scissors would come in handy. Yeah. Sure would. I have a little pair of sharps that I got with the machine, and they served me pretty well.

Gotta get close to that stitching. Be careful: snipping the stitching on the front is not a big deal, but you want to make sure you don't cut through the stabilizer. Try not to snip through the stitching at the back though.


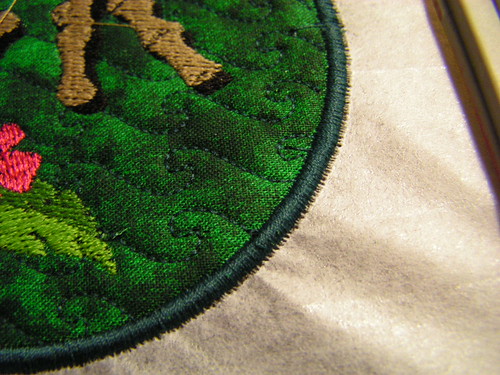
Snapped the hoop back into the machine for the final layer, the outer satin border.


All of the edges nicely encased!


Then I popped the coaster out of the stabilizer and found my nice clean edges to be full of little stabilizer bits. D'oh! This is where I added a step, not mentioned in any of the other tutorials: Fire.

Since the thread I used was 100% polyester, it was an obvious choice. I lit a small candle and ran the fuzzy white edge quickly through the flame, all the way around. Perfect!


Honestly, they look better in person than they do in that photo—in the pic it looks like you can see more white than is accurate. And anyway, it's certainly nothing a green Sharpie couldn't handle. What's most important is that there was no FUZZ.

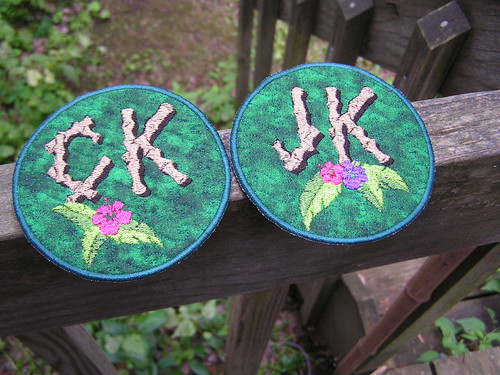
And the two finished coasters (much truer to color)!

Web Statistics