Thursday, June 27, 2013

Embroidered/Cut/Sewn Felt Rob Doll

My latest favorite project!

Rob Doll by shefightslikeagirl
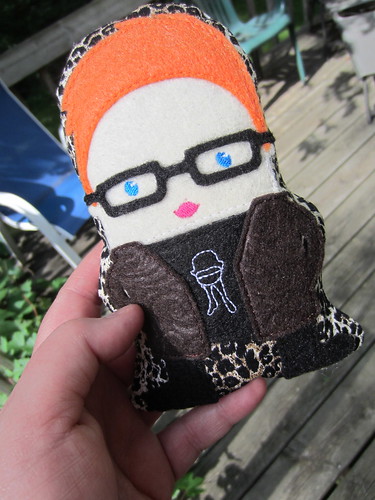
I have a friend, Rob, who moved out of my town a few months ago. I'd had this project in mind right about since he pulled away. There are some people who lend themselves easier to cartooning than others — Rob is one of the easy ones. He has several easily-distinguishable characteristics; bright blue eyes, black eyeglasses, an adorable strawberry mouth, and most horrifyingly of all, he's a natural ginger.

I'd never made a doll of a person before, but the setup came to me quickly. And it started in Adobe Illustrator.
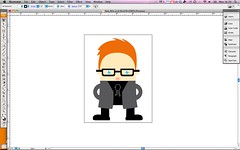
Rob Doll

I had intended to hand-cut the felt for the  [counting] 6 pieces that make up the illustration. As I was contemplating how I would transfer the cutlines to the felt (probably by printing on plain paper, lightly spray-adhering the paper to the back side of the felt, and scissor-cutting along the lines), something came to my attention: The Silhouette Portrait (and the bigger one, the Cameo). Silhouette was in the midst of a big blog giveaway, and I must have entered to win the thing about 100 times at 20 blogs over the course of a week. By the time all the sweepstakes were over, I hadn't won, but I was convinced I was buying one, especially when I found out fabric-cutting was an on-label use.

The included free Silhouette Studio software does a lot, but it doesn't do what I really needed, which was to import Illustrator (vector) files, while maintaining editability. The upgraded Studio software does, however, and does it quite well.
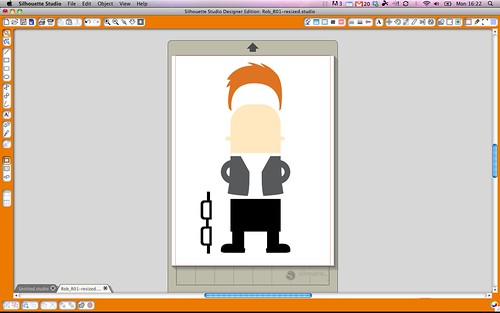
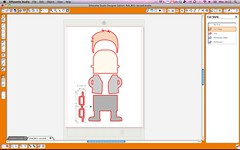
Rob Doll
Once the illustration was imported and exploded (kaBOOM!), I had to tell the software what to cut. As each piece was still a vector object, defining the cuts was as easy as a click.

Rob Doll At my local Joann, I picked out some felt colors that I thought suited him well, including a nifty embossed brown felt for the jacket. (I was thinking plaid, but that just wasn't going to come together well enough.)

Then it was cuttin' time!

The Silhouette Portrait I got was the fabric-cutting bundle, which included two types of fusible interfacing and a fabric-specific cutting blade. Looking around the site, I didn't find any recommendations for felt, which as you know, is a different animal from your typical quilting cottons. I think because the fabric bundle is a relatively new thing, there isn't yet a lot of chatter about it, at least not where I looked. When I didn't find the details I was looking for, I decided screw it, I'll just forge ahead.

Silhouette sells two kinds of fusible interfacing, one intended for the cleanest cuts, and a slightly lighter weight version intended to be more easily sewable. I did a test of the clean-cut version fused to the back of a sample of craft felt (which is relatively thin) with the fabric blade set to the deepest setting, 10. It cut beautifully.
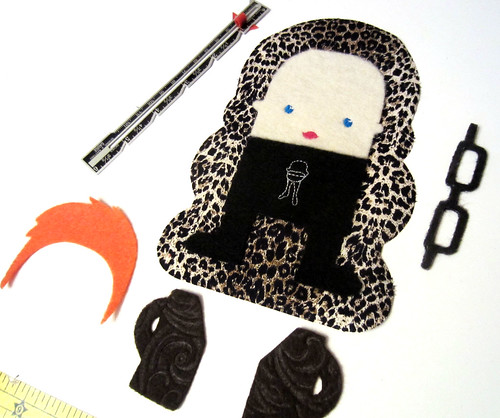
Rob Doll
My intention was to fuse the layers of felt together, so I decided to try cutting with two-sided Wonder Under, which has a similar feel to the Silhouette interfacing. Basically, the felt (or fabric) just needs something extremely stable to keep the fabric from distorting or pulling under the blade. The Wonder Under did the trick, even with the skinny parts of the eyeglasses. I had to clean up some of the fuzzy edges a teeny bit, but that was worlds better than cutting it all by hand. I also expanded the whole outline (in Illustrator) and used that to cut a shape for the background field out of a swank leopard cotton.

Now, about his sweet little face.

As I've mentioned hundreds of times, I have an embroidery machine (hi, Rudy!). I intended to embroider the little details of the eyes and mouth right from the start. What I had to figure out was how to do it to register the shapes between the embroiderer and the cutterer. What I wound up doing was executing the embroidery first on a big piece of fleshy-colored felt. Then I took advantage of an awesome feature of the Silhouette Studio software, the print-and-cut.

The way that works is that you print your design from your inkjet (or whatever), including registration marks in the corners (which Studio automatically puts in place). Then, you stick your printed paper on the cutting mat, and the Silhouette actually scans the page for the registration corners, and then cuts appropriately. I'd tested out that feature a couple of times, and found it remarkably accurate and consistent. I printed the face shape, with eyes and mouth in place, on plain paper with registration marks. I stuck that down in place on the carrier mat, then spray-adhered the Wonder Under-backed embroidered felt on top of the outline, inside of the printed registration marks, registering the eyes and mouth (on a light table).

Got it?

With that in place, the Silhouette scanned the registration marks, and cut the face out correctly, first-go.
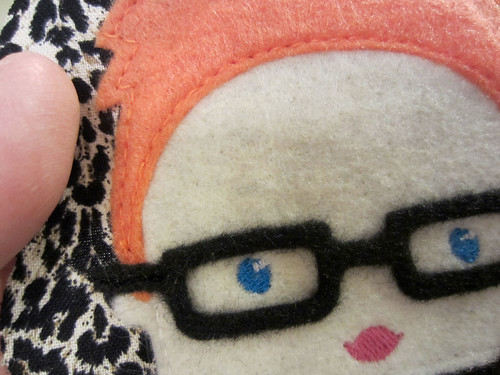
Rob Doll

Have you ever seen anything more adorable? No, you have not.

At this point, it was just a matter of sandwiching the layers together, in place on the leopard backing, and pressing it together to adhere the Wonder Under.

Or so I thought.

I wasn't happy with the level of adherence from the Wonder Under alone, so I decided to hand-stitch around the perimeter. That lasted about 4 stitches before I realized how much of a mess that was going to be. It's not that I don't enjoy hand-stitching — I actually do — but it takes ages, and I'm not always good about keeping the stitches even. Believe it or not, I'm much better at doing extreme details with my trusty Husqvarna (hi, Nigel!). Using matching threads, I stitched around the hair, face, jacket, and shirt/pants.

Oh! I forgot about the shirt!
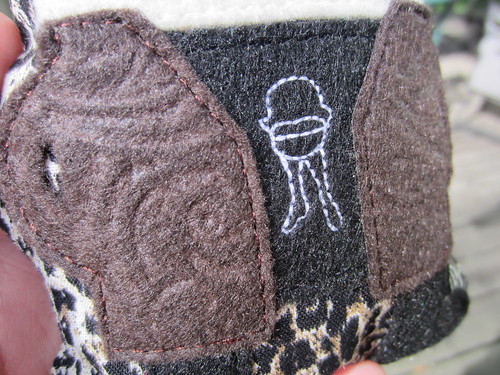
Rob DollI couldn't just put him in a plain t-shirt, so I wanted to find a good symbol that would read at only 1" high (and skinny). Rob is a bigtime movie guy, and I happen to know that his favorite movie is The Discreet Charm of the Bourgeoisie. Not exactly privileged information; he has a tattoo of the poster image on his arm.

I took the image, broke it down to one color, outlined it, and converted it for embrawdry. As the registration was less tricky for this part — it just needed to be centered — I cut the shirt/pants shape out first before embroidering the obviously-simplified icon.

Now firmly stitched down to the background shape, I stitched, turned, and stuffed in the traditional way. And voila! My little Rob doll.

I found a little snap-top container that he just fit inside, coffin-style, and sent him off to Rob's new home on the other side of the country.

Yes, of course I gave it away. I wanted to make it for Rob, and so it needed to wing its way to him. I hope they're very happy together.
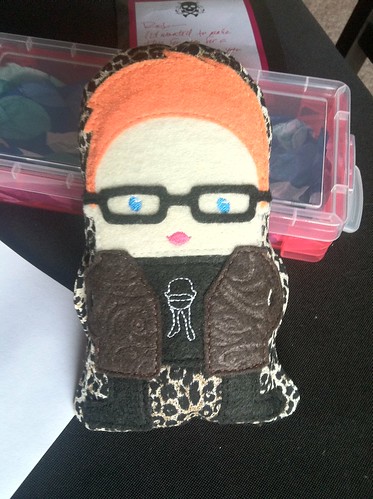
IMG_8775.jpeg

PS The Silhouette Portrait, which is the smaller model, is tiny and lightweight. Portable enough that I could find a place for it in the sometime-chaos of my work table.
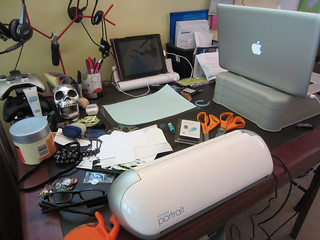
Rob Doll

Friday, June 14, 2013

Spent the weekend in Chicago with the Stranglers...

For those interested, I wrote an extensive column about going out to Chicago to see the Stranglers last weekend, 7-8 June. The column, an audio clip of JJ Burnel speaking with me, a video of the band, and my photoset can be found at my other blog here.

Never let it be said I'm not a content producer. :)

Sunday, June 09, 2013

The Stranglers Embroidered Jacket

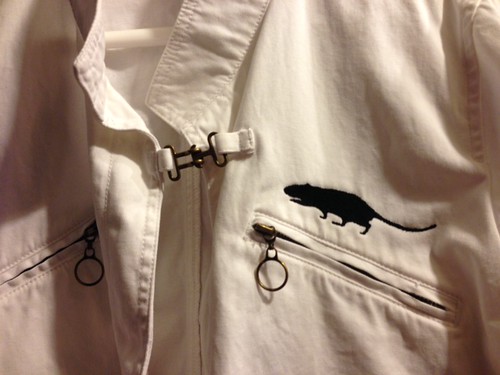
Rattus Norvegicus by shefightslikeagirlYesterday I created a machine embroidery version of the iconic rat image from The Stranglers debut album, "Rattus Norvegicus." I had purchased this vintage white denim jacket at resale for exactly this project -- I didn't expect hooping the jacket to be such a major PITA! That zipper complicated everything, but that's exactly where I wanted the rat to be. Eventually I got it hooped up, and the stitching looks great.

The Stranglers are easily one of my top-5 all-time favorite bands. I saw them their last time in Detroit, which was twenty years ago (ow my mortality)! I've been super-excited for this show for months now, and wanted to make something to wear that was appropriate and an in-joke wink.

I'm happy with how the stitching turned out, risky as it was, jamming the jacket in that hoop. I woke up this morning super-excited for this show...which is now postponed until September. D'oh!

ADDENDUM:
I was too excited to see The Stranglers to risk somehow missing them when they come back through my town in the fall, so I drove out to Chicago this weekend to see them. I had originally intended to drive out Friday morning, see the Friday night show, and then head home Saturday early afternoon, but the show promoters were so fun, friendly, and generous, they invited me to come to the Saturday show as well -- which I did, thus giving this jacket a two-day debut. And I have to say, it was a smash hit. I didn't expect that the band would be selling their OWN embroidered jacket -- a very cool black work jacket (which I am somehow forgetting whether it was Carhartt or Dickies) -- which prompted a couple of people to ask me "how'd you score a WHITE one?"

I kept telling everyone it was a "limited edition...of one."

Friday, June 07, 2013

Check out this monsterrific new game...

A good friend of mine is doing something really cool, and everyone should see it.


He has designed this board game -- his second -- and he's doing the Kickstarter thing to fund it and get it out to The Peoples.

Ben is a monster guy; he knows almost as much about monsters as I do. And this game is all about monsters: zombies, vampires, werewolves, and worst of all, post-apocalyptic dudebros. It's called Undead Apocalypse, and it looks pretty sweet. I don't understand much about how it plays -- I don't play these kinds of things -- but it LOOKS, as I say, pretty sweet. It's worth it for the werewolf figure alone. 

Yeah, okay, I admit I'm biased... not because Ben is a friend of mine, but because I'm a secret werewolf. Evidently.

Werewolf
Werewolf
Grab the avatar image below to show that you are on Team: Werewolf
Which Apocalyptic Leader Are You?

Wednesday, May 08, 2013

Batty Bag

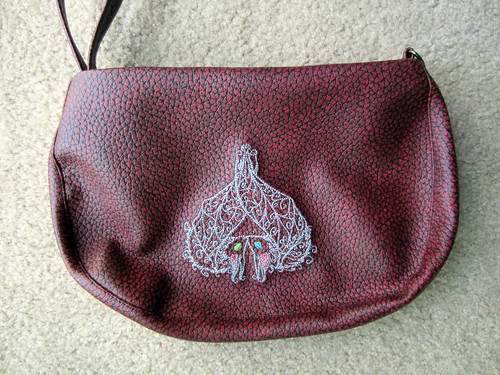
Batty Bag by shefightslikeagirlIt seems that however many bags a person has, she'll always have a couple of go-tos. In my case, there's this painted denim bracelet-bag that I got at a resale store which tends to be my first choice for nights out. Not because it's fancy, but because it's small (but just the right size for needs and extries), indestructible, and the bracelet closures mean I can cram it on my wrist and not worry about it for the rest of the evening, no matter how blurry it gets.

The problem with that bag is that the motif -- "LOVE HURTS" -- is, how can I say it, very ... shit, what's that dooshy t-shirt brand? You know the one I mean. Yeah, it's very THAT. Plus the metal bracelet rings can get a little uncomfortable.

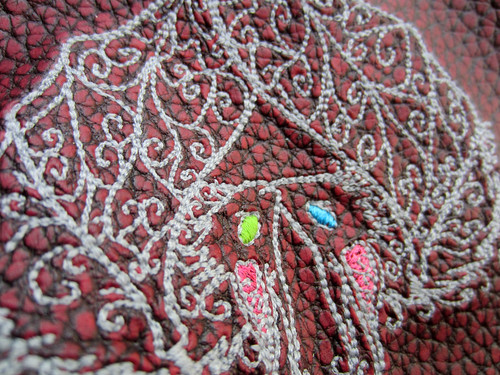
Batty BagSo, I sketched out a similar design, and took a couple of swings at it myself. After 3 or 4 prototypes, I decided to go whole-hog and try it in vinyl. (Those of you who work with vinyl will understand that it's a very different [faux] animal.) I'd already embroidered on vinyl with my dear Rudy and knew it was a great base for open designs. I had this adorable scrollwork bats design from Urban Threads (of course), and after editing the eye-colors, I stitched it out on some pebble-texture upholstery vinyl I had lying around.

And it turned out so! good!

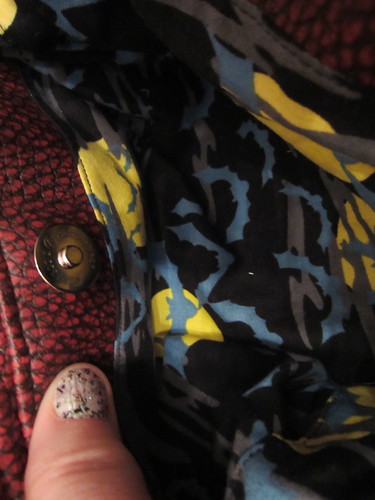
Batty Bag InteriorI assembled it with some night bats quilting fabric I had in the stash, and added a magneto purse snap for a little extra security.

It needs a little tweaking to deal with the multiple folded vinyl layers, but this version of it is very usable. The way it works is that it can be carried as a regular wristlet, or -- and this is my favorite -- the wrist strap can be fed through a D-ring at the opposite side to round the bag off and make it bullet-proof.

It's a killer little bag that I don't have to worry about losing, falling open, or setting it into something wet. If only I could say the same thing for the rest of my wardrobe.

Batty Bag


Tuesday, March 26, 2013

2 New Leggings...Pairs

2 New Leggings...Pairs by shefightslikeagirl
Man, I love this spandex. LOVE. IT. I'm going to make another 100 pairs of leggings from this stuff, because it's perfect summer wear. You know how some fabrics just always feel cool? Not because they are flowy, or ventilated, or wicking, or any other weird thing... it's just magic. Like the way powdered sugar feels cool in your mouth. Slinky spandex has that same kind of effect. And the new printed patterns? Spectacular. I whipped these up this weekend.

PS Just because catalogs show women wearing leggings with nothing more than a t-shirt, doesn't mean that's how they're supposed to be worn. They're just trying to show the goods, just like they do with pantyhose. You'd wear a skirt (or something) with pantyhose, right? So, wear something over your leggings, too, for crissake.

Embellished Skirt

Embellished Skirt-Embroidered Harris Quote by shefightslikeagirl Embellished Skirt-Front Embellished Skirt-Back Pocket Embellished Skirt-Back PocketBeen putting stuff together for my latest convention, the American Atheists 50th anniversary con in Austin, TX, this weekend.

I always feel better-represented in new environs when wearing something I made. I made a new shirt for this trip, with some beautifully soft knits, but it's not all that exciting to anyone but me. The main piece is actually an embellished skirt.

As I've mentioned before, I'm just crazy for my embroidery machine (my dear Rudy). One of the major challenges in working with it, though, is lettering. It's very difficult to get exactly the right tension balance for any small/detailed stitch work, but lettering is particularly devillish because any flaw is so screechingly obvious.

But I loves me some words, so I decided what I wanted was a great quote, on an awesome background, added as a detail to a skirt I already own and wear (so it'll be more than a one-time-garment).

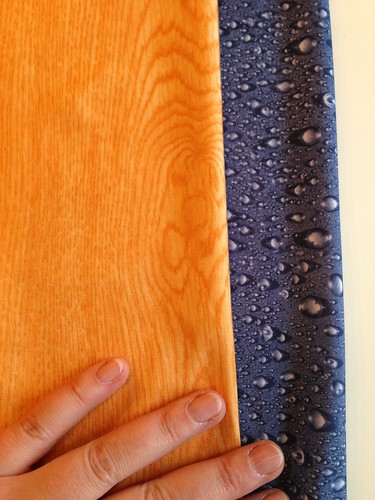
I started with the fabric. The last time I was at Joann, I'm pretty sure I'd looked for this "universe" fabric and didn't find it. So I wasn't even thinking about it when it jumped out at me from the quilting department. I just love the colors and the...impossibility of the design. Grabbed a yard. Next came the skirt. The last time I purged my closet, I gave a friend 27 skirts that I no longer wore. I'm not exaggerating, that's the real number (she never wears pants, so this was a windfall for her). Even so, I have a whole rail of skirts left -- what can I say, they're the easiest thing to make, and now that I have a system down for making slinky leggings, I wear skirts pretty regularly myself.

Point is, I had a lot of options.

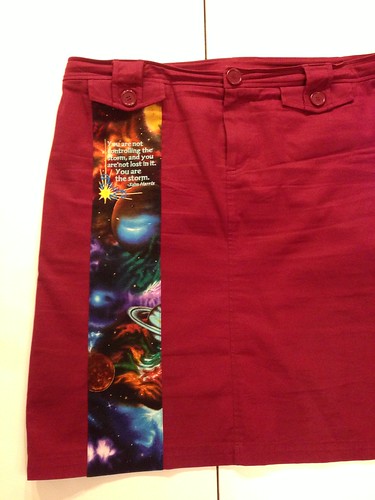
I chose this burgundy denim, as it coordinated nicely with the jeweltones in the quilting fabric.

Next, the quote. Speaking of options...
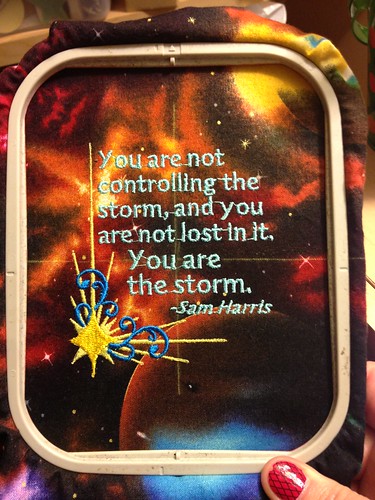
There are a lot of writers and thinkers whose words I would happily wear. Because ol' Rude has a 100mm x 100mm size limit, I needed to find a favorite that was pretty short, but still related to the overall design AND the conference. This Sam Harris quote from "Free Will" is one I especially like (whether or not it jibes with the overall point of the book...discussion for another time), and struck me as being quite apropos.

I found a nice little embellishment, edited it, made it 2-color, fit the quote in (I don't want to hear anything about the kerning JIM), and stitched away.

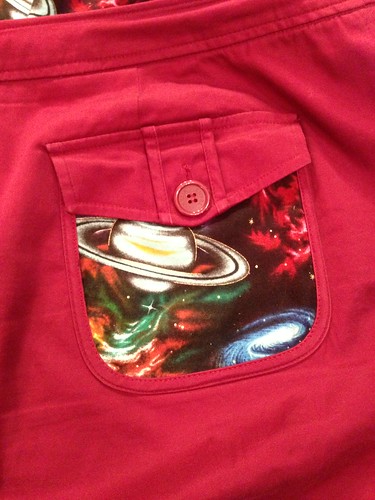
The finished apx 4" trim was intended to fit along the lines of one of the pockets in the front. The pocket is still completely accessible, and buttonable. With that stitched down, I decided to take a couple of particularly cool illustrations from elsewhere on the leftover fabric and place those into the back pockets.
Again, the pockets are functional and buttonable. All I did was rip the inner stitching from the trim around the pocket (that Gingher seam ripper...manoman), carefully trim a piece of the quilting fabric to fit under the edge (with a hem at the top pocket opening) and restitch the trim. They look perfect. [pat pat]
So if any of you heathens in Texas this weekend see this walkin' by, be sure to say hello.

Oh! I forgot to mention my favorite comment when showing a friend what I was working on. He said, "My, you have a lot of space in those back pockets." Wakka wakka!

Saturday, January 19, 2013

Moment of fear...

Have you ever had it happen where you are alone, but in public, maybe having a quick lunch at a local cafe, when something startling happens, something to make the entire cafe jump -- like perhaps a large boom sounds outside, or the power suddenly goes off -- and immediately when it's righted, everyone looks around in embarrassed relief, and maybe you lock eyes with a stranger and shrug and giggle in a "whew! aren't we silly!" sort of way?

I think what that moment is really saying is "I thought for a moment that we may have only had 90 seconds left to live, and I'm letting you know that you are the one I'd have spent that time humping."

Thursday, January 17, 2013

chicken man

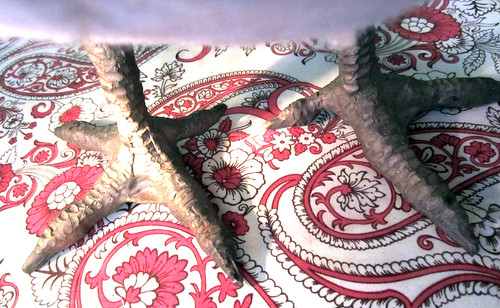
feets by shefightslikeagirl

Chicken Man (with apologies to EAPoe)

It was warm in fall and far from home,
      in a port city down by the sea,
where was met a man fully stark of dome
      whom people would gather to see;—
And this man knew not how fate would lead
      to him giving a chicken to me.
I was a guest and he was well-known
      at this conference down by the sea,
but I watched him speak and my notes read "rrrow"
     as he stood on the dais before me.
By evening I knew would come the event
      that would introduce he and me.

The evenings were ours to explore the streets
      of the old city there by the sea,
to talk of hoodoo and grisgris and far-flung adventures
      and the nature of reality.
So that in the depths of the lengthening night
      I asked him to come with me,
to further explore the growing affection
      even a three-legged pig could see.

We laughed in the dark and continued to talk
      although long days had made us giddy—
yes!—that must be the reason that he exclaimed
     "I have slain a monster!" with glee.
"Tell me, tell me!" I begged, as he pressed me downward.
      "Read my fucking book" growled he.

So the conference ended, and our paths diverged hence

     me to my hollowed-out city—
     he to his red-dusted kitty—
And neither the angels of providence
      nor demons of productivity

Could ever dam our excited exchange
      via every technology.
 

Then on my favorite day, the PO wrote to say
     that they held a package for me.
In the midst of the crowd, I laughed out loud;
      the man had sent a chicken to me.
Of posters and postcards, of ties and surprises,
of the strangest exchanges and best interchanges,

     I will always hold dearest my plump Little Betty—
     and the man who gave a chicken to me.
 — July 2012

Wednesday, January 09, 2013

Were I made a different way

Were I made a different way
My homes could have been more peaceful.
    no falling walls
    no trembling beds
    no murmuring just outside

Were I made a different way
My nights could have been less eventful.
    no peering giants
    no banded snakes
    no shadow men at my bedside

Were I made a different way
The hauntings could seem endless.
    the temperature jump
    the vibe in the air
    the force holding me in place

Were I made a different way
The terror could be relentless.
    the weight as it sits
    the hand on my shoulder
    the leaning in close to my face

Were I made a different way
To believe would be so easy.
    in profligate myths
    in fanciful notions
    in the weakest, most superstitious fears

As I am made the way that I am
I know that it’s all chemistry.
— 8 January 2013

IMG_2266

Tuesday, January 01, 2013

NYE 2012/2013 Snake Headdress

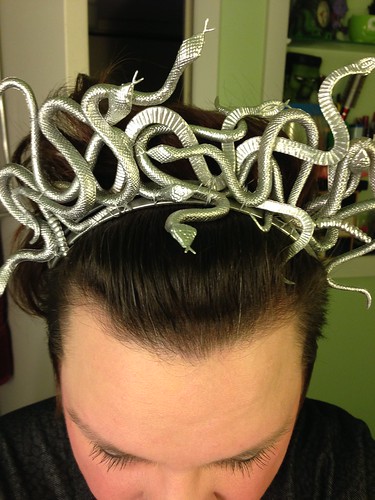
NYE 2012/2013 Snake Headdress by shefightslikeagirl
I woke up feeling poorly on New Year's Eve morning. Everyone has been sick lately, but I knew I wasn't dealing with the flu that's been going around. What I didn't know was how long the blech was going to last, or whether I should commit to plans for the night. Turns out, I felt much better by early afternoon.

This meant I had to get serious about whether I was going to a party I'd been invited to...and if that meant I was going to make something special to wear. Isn't that 80% of the point of a New Year's Eve party? Besides, I figured making something would help motivate me to actually GO.

Based on something I'd seen online somewhere (don't ask me, I spend so much time looking at random pictures I could never retrace my steps), I decided a snaky headdress would be neat and...unrelated enough. So I dragged ass to the dollar store and got supplies.

A side note to that trip. As I was standing in line at the Dollar General, checking my email on my iPhone 5, I noticed the woman standing next to me, also checking her email on her iPhone 5. In line at the dollar store on my iPhone, next to a woman on her iPhone. Of the several ways of reacting to that situation, I decided to silently congratulate us both on our priorities.

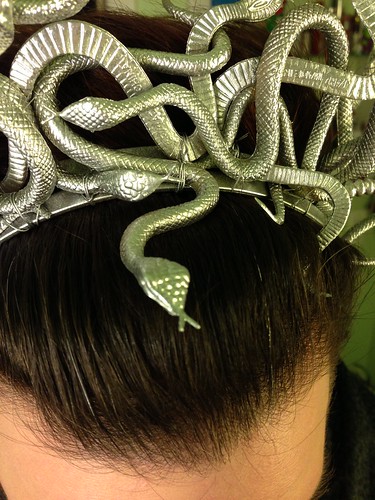
NYE 2012/2013 Snake Headdress So, basically, snakes, wire, plastic headband, chrome spray paint (which never ever EVER dries on soft plastic, so don't paint rubbery snakes and then set them on anything like, say, your flesh, while wearing a necklace made to match, as you will have a big silver paint print on your chest by the time you get to the party, even if that does wind up a pretty funny story).

I have to figure out what to do about that, actually, the never-drying situation.* I'm wondering if maybe I lightly dust them with talc, or even dry-brush some black or dark grey acrylic on them...and then I stop thinking about it because, seriously, how often am I going to wear this? I'll just store it pointing upward so the snakes don't fuse to anything.

When I arrived at the party, the general response was, "Cool, you made that, right? ... Nice blouse, you made that, too, right?" My reputation precedes me, dontcha know.

*The answer is primer. There probably isn't anything I can do about plastic I've already painted: the headdress is always going to be tacky. I did a test last night with a similar toy and a spray primer, which I then finished with the same Krylon chrome spray, and it turned out great. The reason I'm so devoted to finding a solution is because Krylon chrome spray paint is awesomely chromey. It just seems to never cure on plastic. Now I can chrome all the toys I want -- and that IS going to happen.

**I spoke too soon. While the initial drying phase worked out well, after the plastic/primer/Krylon piece had set for a few days, it also become unusably tacky. Quest continues.

By the way, here's something I've recently concluded. Posting whole how-tos on this site is pointless. They're time-consuming, and I don't think anyone actually looks for/reads them. I keep my own notes for techniques that I need to reference, so anyone with questions will just have to ask.

Monday, October 29, 2012

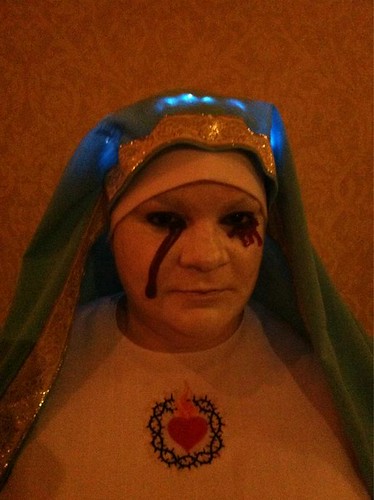
Weeping Virgin Mary Statue

There's a whole post coming about this costume...!

Always a busy time of year; doubly-so for crafty types.

Friday, September 21, 2012

The downside of unusual materials.

Ripper by shefightslikeagirlI do enjoy working with unusual, and sometimes difficult, materials. (See Fur Hat, Vinyl Corset.) It's part of the reason I learned to sew to begin with.

However, another thing I tend to do is put things together backward or upside down.

Sometimes I'm just not paying very close attention. After all, I'm sewing for relaxation (nice excuse, eh?). Sometimes, construction instructions (what's your function?) are not clear. This time it was a matter of me losing track of which was the right side... which led to me sewing a facing on the wrong way. I'd say screw it, I'll put it together inside-out, since it's that difficult to tell... but I'd already sewn another detail on the outside.

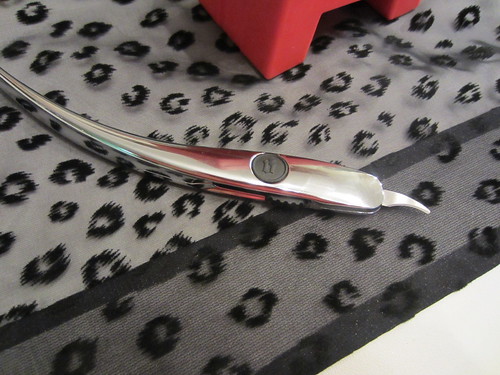
I sew things upside down often enough to have invested in Gingher's awesome switchblade seam ripper a little while ago. Today's fabric is soooooo sheer, I didn't have much hope to removing the facing, even with the flashy little blade. Turns out, I was right. There's no way I'm removing that facing without destroying the edge of the shirt front.

There are a couple of lessons for me to take away from this. First, pay attention more when doing no-turning-back processes. Second, I don't think I was fully committed to making this shirt.

And again, because this is a leisure activity — particularly in this case, simply being a shirt out of a sale fabric I thought was neat, for no special event — I am comfortable ditching the project. I'm a little pissed at myself, yeah, for screwing up, but if I were more committed to the project, I'd find a way to make it work. Believe me, I'd find a way. When I realized there was no way I was ripping the facing, my overall reaction was "screw it."

Which means... screw it.

I'll unpin the pattern tissues, pile up the cut pieces and scraps, and put it back into my stash. I'll find something else to do with this nifty sheer textury fabric, but this shirt ain't it.

Now, back into the pattern database!

P.S.
Speaking of distorting and ruining fabric, don't forget to pre-shrink your fusible interfacing. I didn't preshrink this cut (I don't know, I thought it was sufficiently advanced technology that it wouldn't need it) and I could literally see the interfacing shrinking as I was ironing it to the collar.

Here's all you need to do. Get a dishpan, fill it with the hottest water that comes out of your tap, throw your fusible interfacing yardage in there, and leave it until the water cools off. Then hang the interfacing to dry overnight. Trust me on this.

Thursday, September 20, 2012

Furry Behornedness

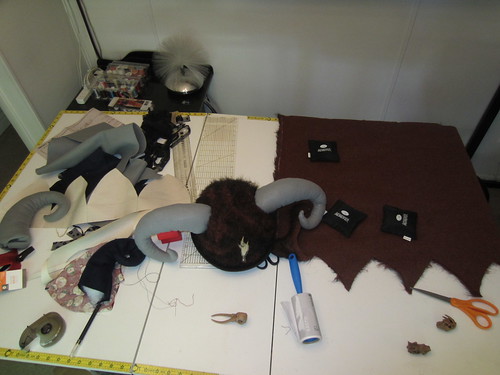
Furry Horn Hat by shefightslikeagirlI made another hat. I'm not sure why I like hats so much... maybe because I have ultra-short hair, so they're easy for me to wear.

This time it was for the concert of a Finnish folk metal band called Korpiklaani, aka Wilderness Clan. They're something to experience, really. They have this whole drunken naturalism thing going on that I just love. So, of course, I wanted a hat with horns on it. Yes, in fact, I have made hats with horns on them before... but this time the hat was going to be worn to a notorious local concert hall, one with metal detectors and eager security guards. So I had to make it plush.

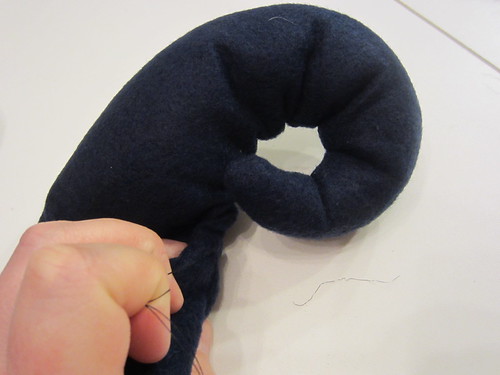
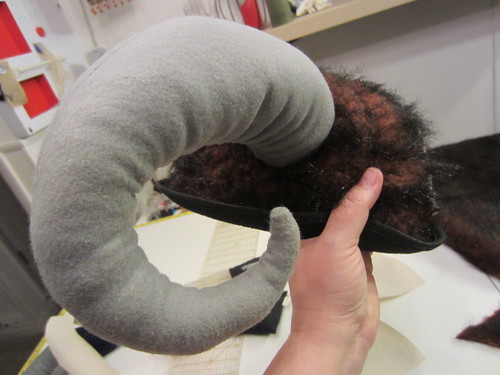
First I had to figure out how to do the type of horns I wanted. I knew I could just sew a curved shape, but I wanted more dimension to the horns. Instinct told me that if I sewed the flat horn shape and then did a running stitch along the inner curve, I could gather the thread to not only make the curve more pronounced, but to distort the shape a little so that the horn curled forward.

A quick test in felt proved the concept.

Furry Horn Hat
Exactly!
I had just that day been given a bag full of nice-quality felt (thanks, Jim!) so I sketched out a flat horn shape for a matched pair.

Furry Horn Hat

Trace and cut, sew flat, turn and stuff. Honestly, this was the easiest part. Then I got comfortable on the sofa and ran a long straight stitch on the inside curve — short stitch on the outside, longer stitch on the inside — and gathered them nice and tight and matchy.

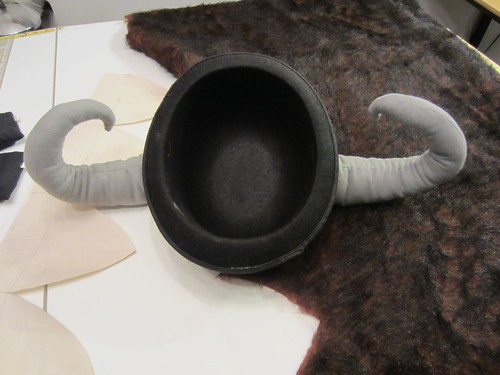
Initially, I was just going to sew the horns directly to this cheapy bowler I got at Target for around $6. But it needed more. And I have this big bucket of faux fur in my fabric closet...

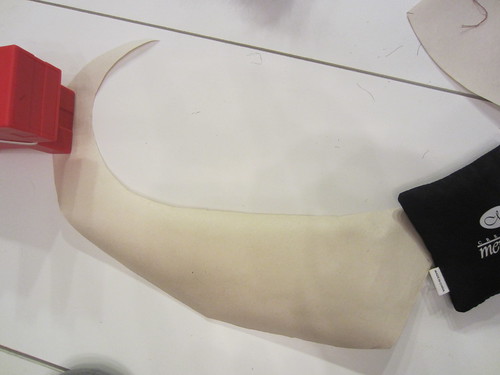
I know essentially what a hat looks like when it's flat — all pointy curves, not at all what you'd expect. But since I was starting with a physical hat, I needed to figure out how to make the measurements specifically to this object.

I took some of the craft paper I have lying around and wrapped it around the hat, squishing and taping where appropriate. Then I sketched in some curves and made some measurements. Have I mentioned how excellent Adobe Illustrator is for figuring out geometry? It's spectacular. Even when I'm not using it to create and print a pattern, it's a great tool for just figuring out how measurements divide out etc.

This is what that winds up looking like.

Furry Horn Hat

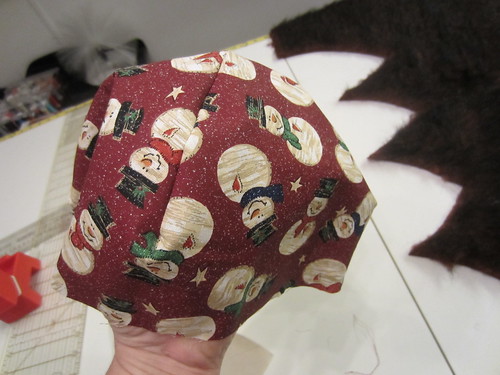
Before cutting into the "good fabric," I did a tester in a throw-away fabric; in this case, Christmas quilting fabric from a bucket-o-fabric I inherited from dognosewhere. Stitched it up and slid it over the crown of the bowler to at least make sure it was a usable start.

Furry Horn Hat

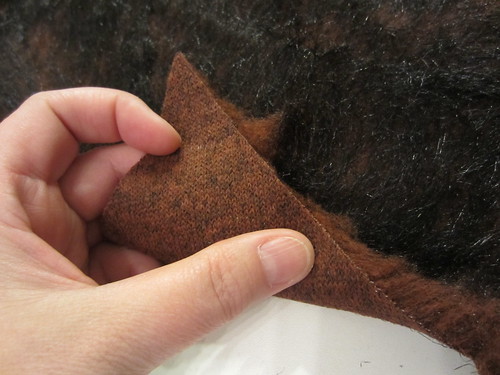
For those of you who haven't worked with faux fur, let's just tackle this: You're going to make a mess. There are ways to mitigate said mess, but you ARE going to make a mess. Usually, what you want to do is trace your pattern onto the reverse of the faux fur and then cut the pieces out using a craft knife. This minimizes how many fibers you shear along the way. Sometimes you may want to grade the fur before you sew your seams as well. I didn't do this, which was fine, but after the seams were sewn, I did have to take a chopstick and pull the fur out of the seam allowance to blend the fur back together.

Furry Horn Hat 

In this case, the backing on my faux fur was knit, so cutting with a craft knife was not going to work, because it would wind up stretching and getting all effed up. Instead, I traced the shape on the reverse, per usual, and then used a very small, very pointy, very sharp pair of scissors, and sort of parted the fibers while I was snipping. Then I carefully took the whole mass — both sides — outside and shook the living crap out of them. I really like this faux fur because of the simulated over- and under-coats, and because of that knit backing. It makes it more mouldable as there is a little stretch.

Cut and stitch, being careful to keep the fabric from getting jammed in the machine because the layers were so thick.

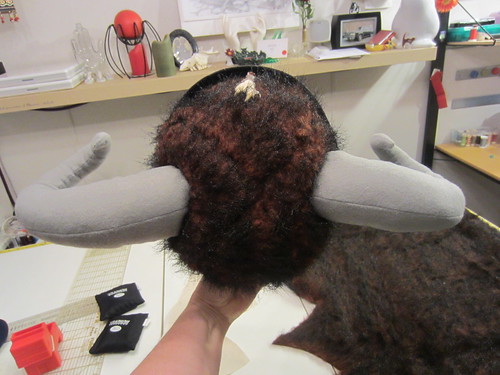
At this point, I slid the furry crown back on the hat, inside out, and adjusted and adjusted and adjusted. One of the advantages to doing this in the furry fur is that the lines do not have to look precise, the shape just needs to conform. I had to flatten out the seams at the very top so it was more bowler and less puff-ball-ski-hat, but eventually I got it.

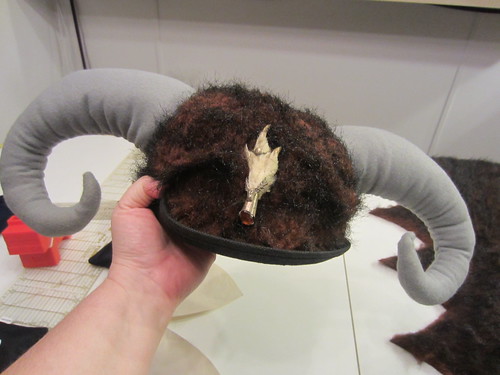
Once I was happy with the fit, I put the skin on the hat and put the hat on my head, then stood at the bathroom mirror positioning felt horns. That was fun. Once they seemed appropriately placed, I unskinned the hat, got comfortable on the sofa again, and hand-stitched the horns through the felt and fur. Then fluffed everything back up, put the behorned fur back on the bowler, got it all centered, and then hand-stitched the (raw) bottom edge of the fur tightly against the angle where the bowler crown met the brim.

Then I danced around the house in it for about 10 minutes. As one does.

Furry Horn Hat Furry Horn Hat Furry Horn Hat Furry Horn Hat

I wanted something as a crest on the front, and remembered an old Scottish grouse foot pin I have, which seemed perfect. The finished hat is quite lightweight, and not as warm as I was afraid it might be.

When I got to the ticket window to check in, the guy looked up at me and said, "Have you come to take me to Valhalla?" I laughed and told him we'd talk after the show.

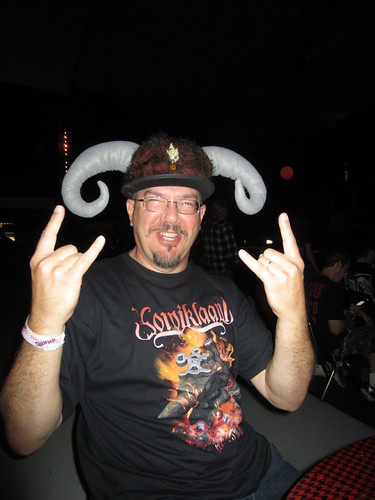
In case you're wondering what the thing looks like on a human, here's the closest I've got; my friend Paul who was at the show with me.

Furry Horn Hat
Our lovely model, Paul.

Tuesday, May 01, 2012

Twitterfeed Test!

Pardon me a moment while I test-drive Twitterfeed and some updated email options.


Friday, March 16, 2012

Nessie Tie

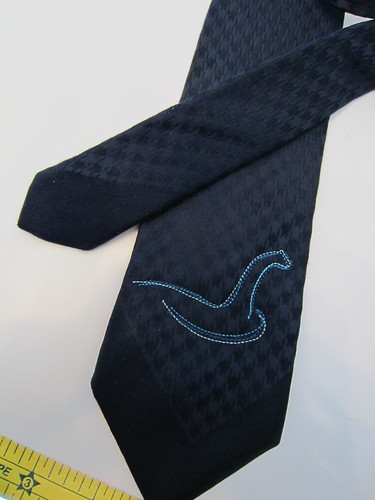
Nessie Tie by shefightslikeagirlIt hasn't really been this long since I've made anything, but a few of the things I've been working on have been gifts, so I didn't want to post any photos until the items had gone to their new homes.

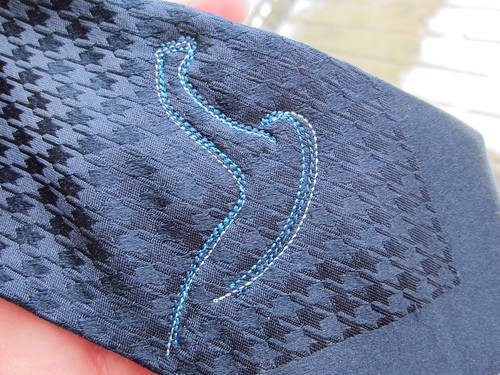
One such project is the tie at the left, the Nessie tie.

I wanted to customize a cryptid tie for a friend who happens to be an expert on such things (monsters, not ties). I knew it would have to be a simple and immediately-recognizable design to fit the space available, which would be less than 2" wide at max. I first considered the Big Three: Bigfoot, the Loch Ness Monster, and el Chupacabra. (I could certainly have gone more obscure – I also had a look at Champ and Ogopogo.)


I decided the most appropriate – and iconic – image would be the 1934 "Surgeon's Photograph."

Starting there, I did a quick trace of the basic shape in Adobe Illustrator. My first thought was to do a wet-brush style in two colors. With a little bit of fidgeting around, I arrived at a design I quite liked.

As lovely as this effect is, it simply wouldn't translate well to machine stitching, not at that small size. I tried. It was a mess. So I reconsidered the style to something lighter. Some of the most successful designs I've stitched out on ties are sketchy/scribbly. That style works well at small sizes, and doesn't torture a tie's surface (which tend to be a bit puffy).

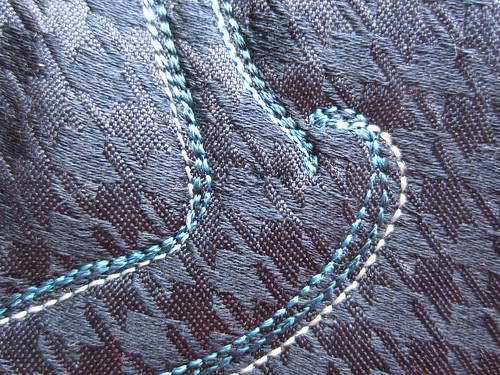
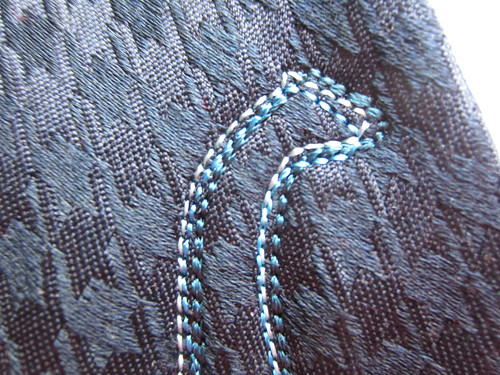
And so, I reconfigured the shape to three basic lines, as though it had been traced out on a slip of paper. The tie I had selected is a nice navy houndstooth, so it seemed keeping in blues was appropriate for a whole host of reasons. With the addition of a little wake to contextualize her, Nessie was ready for stitch-out.

This is the nerve-wracking part. Often, when doing a custom piece of embroidery, I'm starting with a flat piece of fabric, which will later be integrated into the finished project. But when I have to start with the item and stitch directly on to it, it always makes me nervous. Ties are a PITA, because of the amount of engineering that goes into them, but the stiffness/smoothness of their surfaces tends to take stitching beautifully. After a couple of tests of the converted pattern, I hooped up the tie and let Rudy do his thing.

In addition to the positions being altered, the weight and spacing of the lines are varied. This gives the design an even more organic, sketchy impression.

The stitching took very nicely, and the tie was well-received. Hopefully I'll soon get a follow-up photo of the Nessie tie in her natural habitat.

Nessie Tie (detail)


Nessie Tie

Saturday, November 12, 2011

iPad Carry Bag

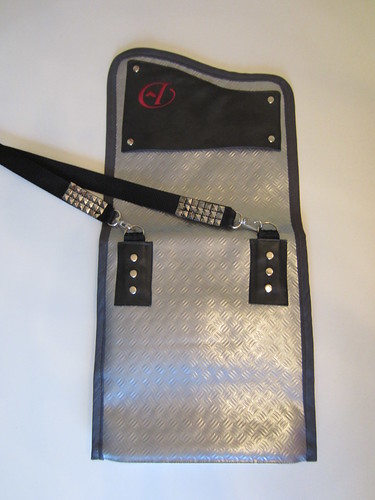
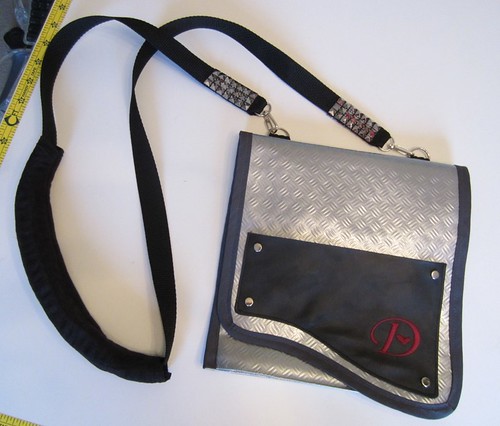
Before CSICon last month, I decided to make a bag sized just for my iPad, iPhone, new camera, and one or two other essentials. Something with an extra-long strap so I could wear it cross-body and low on my hip.

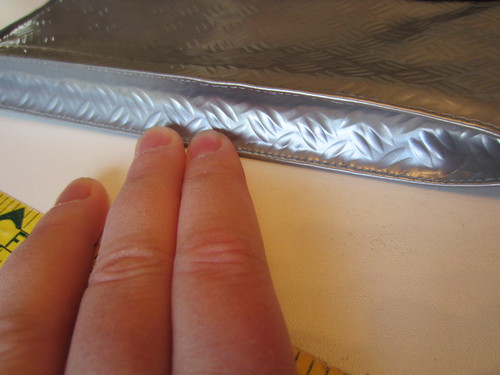
I had a big chunk of this very cool, but very stiff, diamond-plate embossed vinyl. I'd been trying to figure out something to do with it for a couple of years. Originally, I was hoping to make a corset with it -- how cool would that be! -- but it's just too stiff. It's a good weight for a light-duty bag, though.

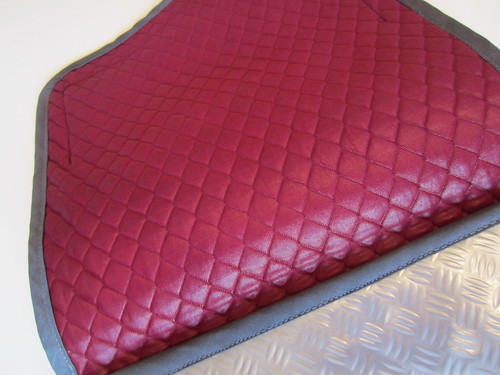
I also had a couple of yards of this quilted burgundy knit which I'd intended to use for a nice fall skirt, which hasn't yet happened. Well then it's fair game! I figured it would be satisfactorily padded, particularly since the iPad never comes out of its leather case.

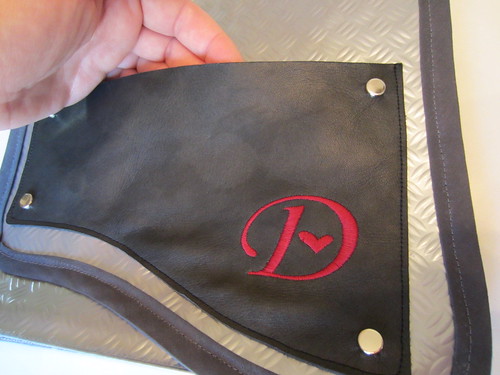
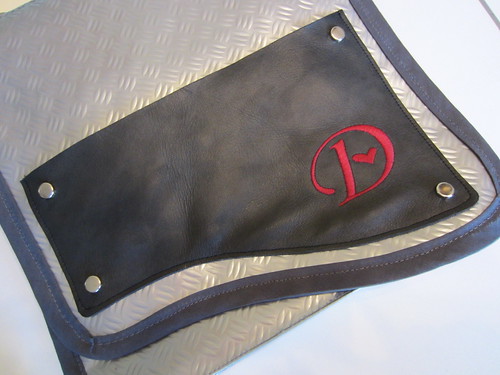
I decided the best design would be an envelope style with a bottom gusset to accommodate the iPad thickness. The leather patch on the front is embroidered with a nice juicy D and a heart, for me. :) I left the top of the patch open so I could slip some business cards etc. therein.

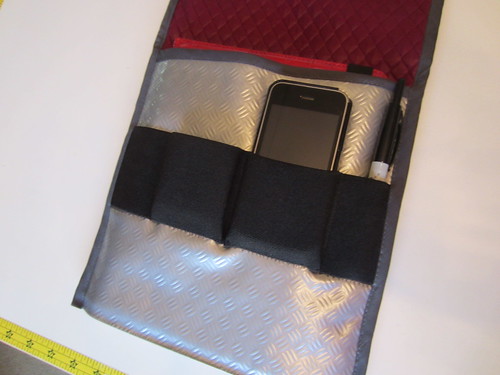
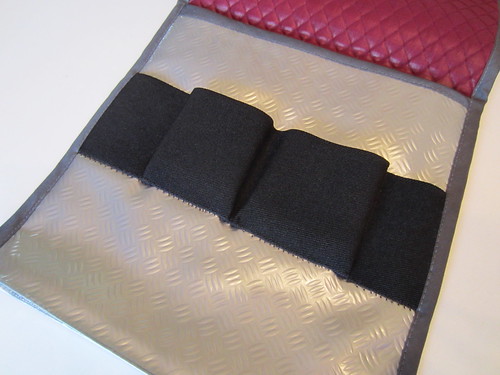
I also made a gusseted strip out of 2" elastic, made to measure for my iPhone and camera. (Camera not shown in place, for obvious reason.)

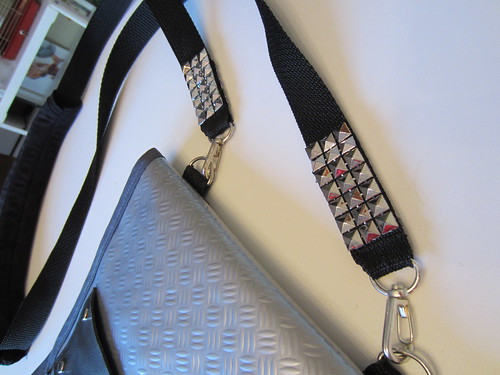
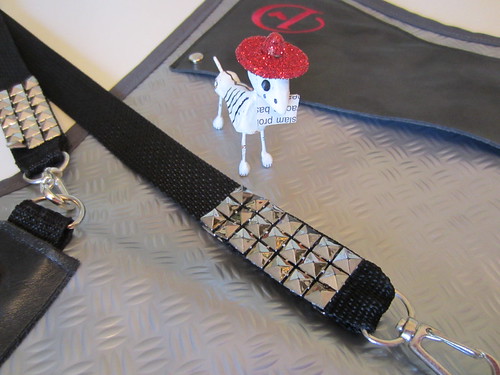
After careful measurements, the strap (plain 1" poly webbing, with diamond stud trim added) was sewn to the rear exterior, then the leather detail was added over top.

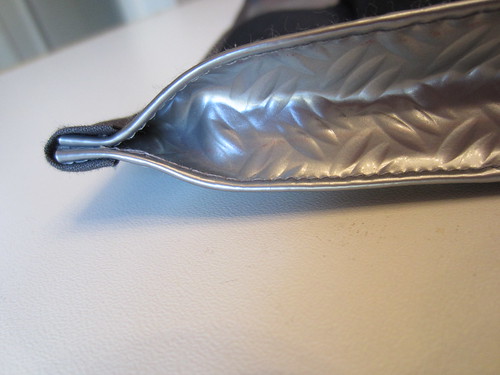
The interior and exterior were adhered together and then folded over at the bottom, then back up for the gusset. Then the outer edge was finished all the way around with purchased double-fold bias tape.

That's pretty much it! Simple design with a few added details. I carried it through the week, just right for my electro-accessories, and a couple extras.

Web Statistics