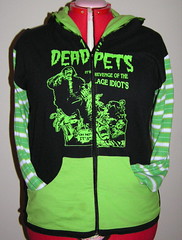
This is definitely one of my favorite projects of recent memory.
The inspiration came from this craftster post. Craftster is fantastic, by the way. You'll get overloaded with ideas, techniques and inspirations and love it.
The finished hoodie started life as one Dead Pets concert t-shirt (friend's garage sale, $5), one acid green t-shirt (Value Village, $.80), one black t-shirt (drawer, $0), one green stripy sweater (Value Village, $3.50), one yard of woven trim (Joann, about $1.50) and one 24-inch zipper (Joann, $2.50).
When I saw the green sweater, I knew it would make great sleeves, but it had short-sleeves. Until you cut your own, it's easy to underestimate how much fabric sleeves take -- pretty much the entire width of a front panel! Fortunately, the length of the sweater was enough that I could make one sleeve from the front and one from the back, using the bottom hem at my wrists.
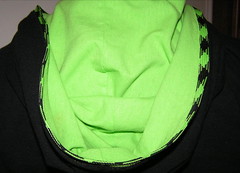
While I was planning this project, I found this great woven black and green trim at Joann, and decided I had to find a way to work it in. It wound up trimming the front hood edge.
I finished the hoodie one week ago, and I think I've worn it three times already. It's a great way to make t-shirts more wearable -- I have bunches that I like, but I never just wear a t-shirt alone.
This is a long story which I believe is much more interesting to the person having experienced it (me) than to anyone hearing it. And besides, if a picture is worth a thousand words, a little snippet of video is worth millions.
So let's keep it to a timeline:
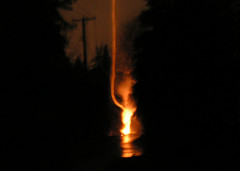
0230 15 January Freezing rain has been coming down for a few hours. Inside my house, awake, watching a movie and doing some needlepoint, I hear a BZZT and see a faint orange flash through the window in my front door. After unplugging everything in the house, I go outside to investigate. That's when I see the two downed wires on my driveway, flashing, crackling and carrying on. I call 911.
0245 15 January With the presence of mind to grab my digital camera and put it into video mode, I am standing in the turnoff section of my driveway, waiting for the fire department and documenting the zap-and-smoke show. That's when this happened:
Yes that's me and my rarely-heard yelp there. My two favorite comments about this video are "You sound really cute when shitting yourself!" and "I've never heard you sound so innocent." Aww.
0248 15 January The fire department arrives, stops at the end of my driveway with floodlights trained on the pole and my driveway, and sits there. For about 6 hours. I come in and out of my house during this time, in the freezing rain, hoping someone will come and tell me something. No one does. I return to my house, change into dry clothes and attempt to nod off in the 50-degree living room. It doesn't work. Until around...
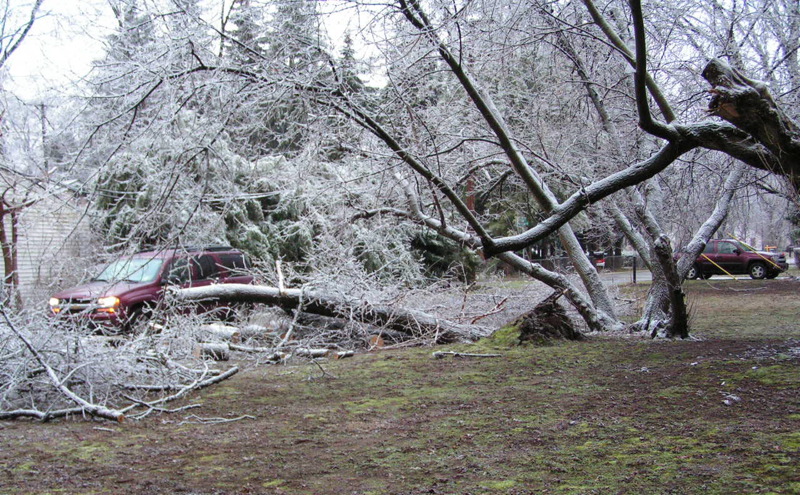
0830 15 January After I finally doze off for a minute, I'm awaked by what sounds like a harsh alarm clock buzz. My first thought is that my power is back on and my alarm clock is going off. Then I remember I don't have an alarm clock, and I'm on my feet at a run. Something new is going on. I step outside with my camera once again, to this:
Those of you who have been to my house should recognize this as the view from my front door, a post I was reluctant to leave. Realizing the fire truck was no longer at the end of my driveway, I make my third call to 911. "Where did my truck go?" I ask the dispatcher. "I show them at your location," she tells me. "I'm looking right now... they're not here." "Oh, well, hang on, let me call them. ...pause... Apparently they had to go for gas. They've been there for six hours." "I'm well aware of that. I've been here, too." Which is how I also knew that the tree now lying across my driveway had not been there the night before. It didn't break -- it simply toppled out of the ground at the roots.
I still have no idea what it was going on at that pole, but it took until noon on Monday for the power company to show up and do something about it. In the meantime, the lights in my house which were on soft dimmer switches were flashing like in a haunted house. Oh, and a fireman finally greeted me at my door, telling me that I should stay inside with the door closed. At 4pm that day, I was finally told it was safe to leave... Although that was easier said than done, with 4 trucks in my driveway. Taking matters into my own hands, I cleared some downed branches and drove across the far side of my yard to get to light and warmth.
Miraculously enough, when I got home Tuesday night, my power was back on, and the electrical, telephone, cable and fiber optic communications lines (whatever those are used for) had all been restrung. Of course, there's an entire tree's worth of hastily-chopped, frozen wood in my front yard... But at least I can finish my needlepoint.
This is the view at the end of my driveway on the night of January 14th. Much more I want to say about this, but for now, just try to imagine walking out of your house and seeing that. For six hours.
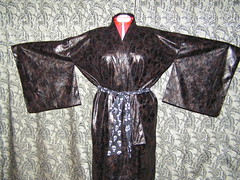
Last week I decided I wanted to try working with one of the faux leather "home decorating" fabrics from the local Joann. They are very interesting to look at and to feel and are typically pretty cheap. I wanted something simple which would show off the texture without details that would create too many layers of the thick fabric. I chose a kimono, as this crappy picture with a random scarf at the waist shows.
I already had the sewing pattern (Simplicity 5839), which apparently approaches kimono fabrication from a fairly traditional viewpoint. This included a lining which was very integrated into the construction, but which I wanted to omit. This meant some pattern editing on the fly -- skipping the lining made it simpler in some ways, but trickier in others since I couldn't actually use the instructions. The most complicated portion (and I hesitate to say "complicated" since the whole garment is traditionally quite simple) was the sleeves. But the sleeves really do make the kimono. (The outer corners really are radiused as they should be on those sleeves... Just doesn't show in the crappy picture. Did I mention the picture is crappy? I did? Carrying on then.)
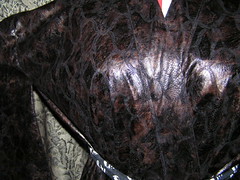
I chose a black/brown printed faux leather lightweight upholstery fabric from the clearance table (ultimately <$3/yd), with a fairly dense, plain knit backing. After folding it and flipping it around a little at the store, I decided it would be sufficiently floppy to make a garment, light enough to actually wear, while stiff and glossy enough to at least look like it was trying to be leather.
Cutting was easy and no-ravel, and the stitching went well with longer stitch-lengths and a Teflon foot where needed. Seams could be trimmed very tightly and left unfinished because of the plasticky nature of the material, and it took topstitching like a dream. The only problem I had was my own fault, when it came time to attach the neck band. I tore the thing off and restitched it at least 3 times. Grr! Too many layers moving at different speeds was the culprit. Once I figured out a way to keep everything cruising together, it went just fine.
I intend to wear it with either a large mesh/elastic waist cincher or a corset (to be named later). I was considering making some belting out of regular webbing covered in the same faux leather, terminating in some big silver buckles, and attaching 2 or 3 of those to the kimono, but I'm reconsidering putting anything permanent on it. I think I'd like to be able to wear different obi-substitutes as the mood strikes me. (As if I'm going to be wearing this thing every weekend. In this weather?!)
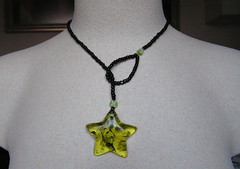
Another quickie. Sometimes it's difficult to figure out what to do with large focus beads like this composite star that I got at a bead show probably 2 or 3 years ago. I tend to like making fiddly little elaborate beadwork, but the large singular objects always get my attention! A couple of weeks ago, I decided it was finally time to make something with it, and here's what we got -- a simple lanyard with black glass beads, small green stars and, of course, the big central star, intended to sit flat on the breastbone.
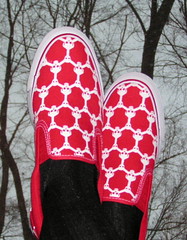
If you need any further proof that the subversive is mainstream, here it is: Red and white skull slip-ons that I bought at Burlington Coat Factory today for $12.
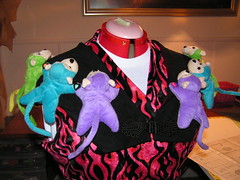
This is the end result of the monkey carnage, the Monkey Capelet. I had intended to wear this to a monkey gallery event, but wound up losing patience and leaving it at home after I'd already finished it. (The flame dress that's modelling it has also since been finished.)
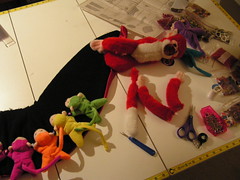
...than the doing. But THIS time, it was actually hilariously fun. I was sitting on the sofa tonight, about half an eye on the telly, while the other 1.5 eyes were surgically removing the arms and tail off this stuffed monkey.
No reason, really. I just felt like torturing something. I'm only sad that it couldn't scream.
Actually, I'm making a monkey project. The little rainbow of monklets are also involved. Something will come of it... something.
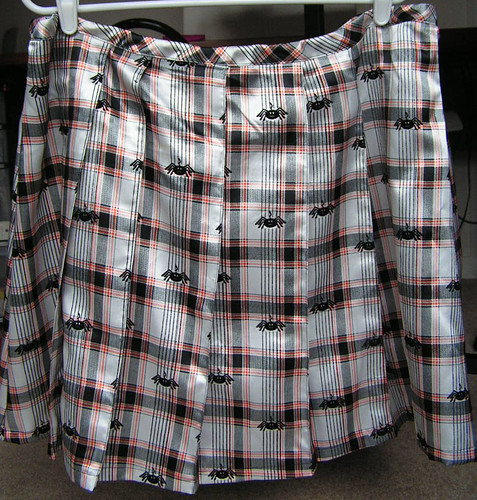
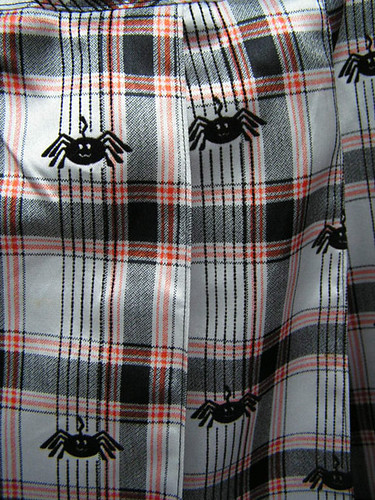
When I saw this plaid fabric with black flocked spiders, I knew it had to be a pleated skirt. I've never done pleats before, so it was a good progressive choice.
Because it was almost experimental, I decided not to worry too much about matching the plaids across the panels. Unfortunately, accidentally, one side panel matched when I cut it, and the other didn't. Exactly the wrong position -- either they should both match or they should both NOT match! Once I'd folded all the pleats in, I realized no one but me (and anyone who reads this) would notice, so I soldiered on.
I changed the waistband from the pattern, as it originally included a drop-waist, which didn't make sense for this fabric. The other part of the experiment was that I decided to stitch along the mountain folds of the pleats so they would be forever crisp (especially since this fabric was not ironing well). It worked very well, and it's something I will do again, to be sure.
After having had a heavy/stressful/unpleasant week, by Friday I had decided to be more lighthearted if it killed me. Within my first hour at work, one of my coworkers came to me sing-songing "I have a present for you!"
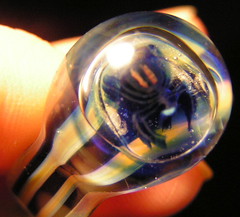
And she dropped into my grubby little mitt a hand-blown glass ring of blue and yellow stripes with a clear dome on top -- with a teeny little glass spider inside. Cutest thing ever! But I have big fingers, so I knew it wasn't going to slip right onto my ring finger, which is exactly what it did. Softened all the edges on the week.
Not easy to photograph, for obvious reasons. But it's really great, and I foresee a lot of me sticking it into people's faces in the future.
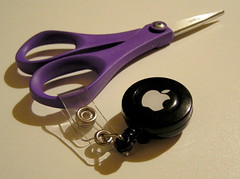
It's not unusual to attach commonly-used tools to a clip of some sort to keep within reach. It occurred to me tonight how extra-dork is my scissors-leash.
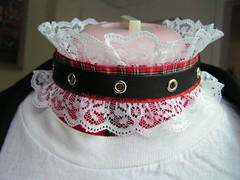
Sometimes the simplest things are the most gratifying. I made this choker from a scrap of lace, plaid ribbon and pleather grommet tape (not visible is the ribbon-crimp closure) literally minutes before leaving for the event to which I wore it. The plaid ribbon almost perfectly matches my knee-high plaid boots -- I was going to say "as a bonus," but that's why I BOUGHT the ribbon.
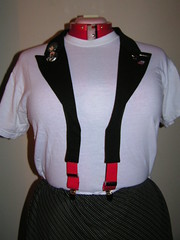
Once again, I failed to take a Before photo, but here is the After. This started life as a black double-breasted (thrift store) jacket that I bought for probably $4. I surgically removed the lapels and inner edges (plackets, more or less). Then my old favorite, bias tape, was employed to finish the raw edges. (There are SO many layers involved in a blazer, PLUS heavy duty interfacing. No way it was getting folded over.)
After figuring out how long to leave the front bits, I took a pair of red (thrift store) suspenders, cut them down and inserted into the open ends of the cut-down and folded inward plackets, and stitched them in. Add Alex and Hannibal buttons and voila! (The pins on the left lapel are from the Dirty Show art show that the lapels went to last night.) It's one of those items that people look at without really seeing until suddenly they realize... there's no jacket!
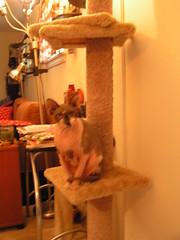
This cheap thing was on sale at Meijer, so I grabbed it. Got it home, found out how cheap it really was and how it didn't quite fit in the space the way I thought it would. By the time I'd turned around to grab the box to repack the thing for return, Sevie was attacking it like a crazy person. So it stays.
He's such a monkey. Look at how his tail is wrapped around his front foot.
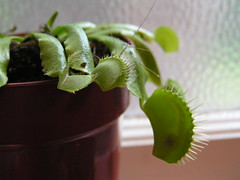
This is my Venus flytrap, Fred. I almost called it "Phred," but I already had a dog with that name. That black spot on the big trap in the lower right was a small black spider that Sevie found for me to give to Fred. But the best thing about this picture is the closed trap in the center. You see the spindly filaments jutting up and to the right? Yep, legs. That spider I found myself and initially tried to feed to one of the larger traps... but it didn't spring. So I gave it to the little trap, which was happy to oblige.
Fred is going to have to go dormant soon, for the winter. Spoils all my fun.
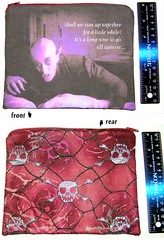
This is another item I presented for sale at the Detroit Urban Craft Fair, August 2006. The front side features a frame from the original (and fabulous) "Nosferatu" and a quote from one of the title cards: "Shall we stay up together for a little while? It's a long time to go till sunrise..." This was printed with my Epson injket on white muslin. The back side is two-layered with a skull lace overlay, and the whole thing is lined, oh-so-spookily, with the same red rose fabric. It closes with a red polyester zipper.
This was a good challenge for myself, which I thought turned out pretty well.
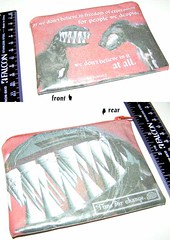
I designed some zippered wallets/change purses intended for sale at the Detroit Urban Craft Fair, August 2006. Each wallet featured an original design (mostly using modified stock art/illustration) and a strong quote, mostly of the "free thinking" variety. Each piece also features a small logo on the back which says "Time for change," next to a little maze/brain.
Once again, I printed plain white muslin on my Epson printer; one piece for the front and back, folded at the bottom. I sealed the outsides with heat-fusible vinyl and assembled the wallet with a vinyl lining (change is dirty!) and a colored coil zipper.
I was turned down for the fair. But this particular wallet found its way to my friend Dave.
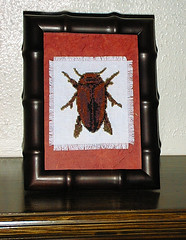
This cross-stitch project started life as an illustration of a beetle called Cleoptera. I decided I wanted to convert the illustration into a cross-stitch pattern to make for Teller's birthday in 2000.
Photoshop is a good tool for this. I think there are plug-ins available, but I just did it by hand. I decided I didn't want to use more than 6 colors, so I reduced the image's colors and resolution until I had a pixellated version of the art. Then I just followed the chart on cross-stitch canvas, mounted it on a small piece of handmade Japanese paper, and mounted the whole thing in a faux bamboo frame. I was very happy with how it turned out and wish I had taken better photos. As always, Teller's thank you note was very appreciative.
This is the bag I started with, about a year ago. I had gotten an Epson inkjet printer, specifically for this sort of project, and this was my first attempt at printing fabric using the DuraBrite ink system.
I started with a piece of artwork I'd nabbed from Worth 1000 some time ago; a hand-colored Bride of Frankenstein still. After deciding what size the bag would be (basically big enough for my phone, wallet and keys), I printed the panel and assembled a very simple lined bag with a zipper at the top.
I was very happy with the way it turned out and started printing pieces to use in a variety of projects, including the one I want to talk more about following. (By the way, after more than a year, the Elsa bag is still brightly-colored.)
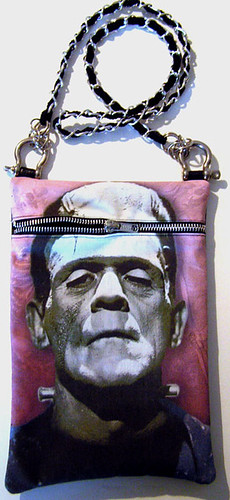
With the Elsa bag in mind, I decided to do a sort of companion. But this time, I wanted to use the zipper as a design element in addition to a closure.
I started with the classic Frankenstein portrait and created a piece of artwork (on my Mac) featuring hand-coloring and some more details in the background. They show up much better in person, where you can see there are cherubs, a skeleton, etc., behind him. Some of the colors are quite subtle and were difficult to photograph.
After deciding on a size (again, basically big enough for phone/wallet/keys), I drafted the pattern entirely in Photoshop, splitting open his head and adding allowances for the zipper insertion. Then print, cut, stitch, line, flip, tada! It's got a pleather back panel and embroidered linen in the interior (black with multi-colored lizards--a very cute leftover scrap). The hardware attachments are rope cleats of some sort scored from Lowe's, and the chain handle is scavenged from a belt. It's all adjustable; in fact, I made two different chain straps, one for across-body and one for over-shoulder (shown--there is a narrow webbing woven through the chain, and a small chainmail piece at each end). I also finished it off by a little bundle of lock and key dangles on the zipper pull, after I had already taken the photo.
Now, here's the really funny part of this. I had made it specifically to carry to a tattoo convention in Toronto this summer. At the same time, though, a website I sometimes visit, Pattern Review, was having a handbag contest. And it was a "season" theme! I decided that Halloween was a season, and I entered this bag almost as a lark. As I'm sure you can guess, people who spend a lot of time on sewing websites tend to be more Holly Hobbie than Halloween, and when I post my goofy things, the best I can typically hope for is to be ignored.
The contest was decided by visitor/member votes, and boy was I surprised when I found I had tied for the win! The other winning bag was exactly the sort of thing I had expected to take the contest--a beautifully-constructed floral clutch. I was so glad to see the other visitors evidently had more of a sense of humor than I'd privately given them credit for. (I won a gift certificate for a sewing pattern site, incidentally, which is a little ironic since I didn't use a pattern for the bag.)