Tuesday, March 11, 2014

Paul's Yeti Mug-Warmer

Paul's Yeti Mug-Warmer by shefightslikeagirl
Just a quickie.

A friend had a bday party this weekend, and I spent a good week or two thinking of what to make him...before I actually came up with an idea the night before. Typical!

(To be fair, my sewing machine was also out of commission for two weeks.)

Paul is an infamous Bigfoot aficionado, as well as a tea drinker. I'd already gotten him a Tea Rex infuser last time I was at the DIA for the Samurai exhibit (which is gorgeous, BTW — go see it as soon as plausible!) I'd also seen neat little knit/crochet mug warmers, which I thought would make a nice combo with the tea infuser. I'm not a knitter/crocheter, but I knew I could sew one.

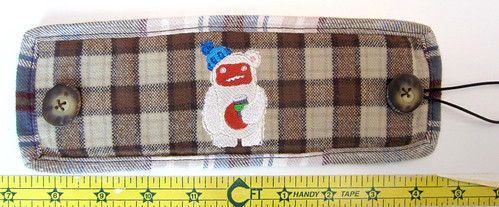
Paul's Yeti Mug-WarmerI also knew that there were a couple of Bigfoot machine embroidery designs in my collection, from my favorite purchased embroidery source Urban Threads. The Latte Yeti was the obvious choice. As for fabric, Paul is a huntin' kinda guy, so I dug up some flannel shirt scraps I had for the main body, with a strip of felt in between for insulation.


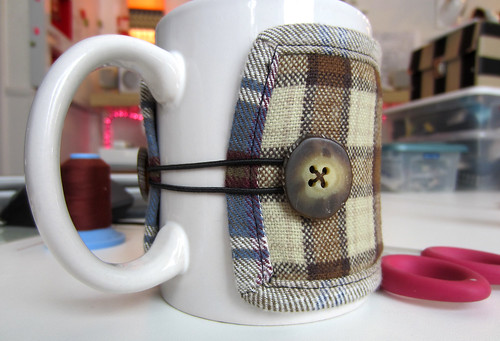
Paul's Yeti Mug-WarmerI decided to use a self-binding technique that's often used on receiving blankets, which I've done a couple of times before. (See my embroidered placemats post for more details.) Starting with a standard mug, I measured around the body, omitting the handles, and then the full height. The flat mug warmer is about 9" x 3", which then wraps around the mug, and then is held in place with a round elastic.

Typically, one of these might be quilted as well, but it turns out to be such a small project, that between the size, the embroidery, and the plaid, quilting struck me as a little overkill.

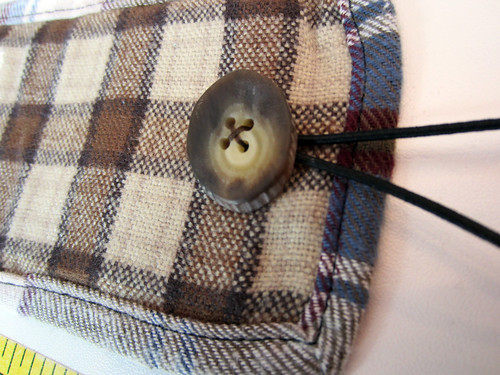
The buttons are faux wood made from...honestly, I don't know what. Resin maybe? They were a couple I had in the Big Box O'Buttons that you know we all have.

Here's what it looks like, snuggly* around a generic/standard coffee mug. It wasn't the Bigfootiest gift he got that day, but I'm pretty sure it was the only one made by hand.

Paul's Yeti Mug Warmer

*Just fully recognized the difference between "snugly" and "snuggly," and it made my day.

Thursday, March 06, 2014

The Anatomy of an (Embroidered) Electric Eel

UPDATE:
Craftster Best of 2013 Winner


UPDATE:


I did a project this weekend which serves as a great example of the typical steps I take in order to create a machine embroidery pattern. I'm going to break it down into steps.

Step 1: Inspiration, aka, I am invited to a special event.
In this case, it's a fundraiser for the Belle Isle Aquarium, as they attempt to bring back an electric eel to the country's oldest public aquarium. When I make something for myself, it almost always starts as a special event to which I want to wear something I made. I feel positively naked without something I made.

Step 2: Research/concept.
Electric eel, that's easy. I mean, it's easy because electric eels are awesome. (That reminds me, I gotta email John that video of the electric eel accidentally killing that alligator.) Turns out, electric eels are more catfish than eel. I don't feel like I need to know the whole biology of the creatures, but I want to at least know what they look like, and what their distinguishing features are. Assumptions are the enemy. (If there is one thing in my life that defines me as a "skeptic," if not a crafter, it's that statement right there.)

So I watched a few videos, looked at a bunch of pictures, and thought about how I would represent it. I veered both literal and figurative.

I think electric, I think lights. Although cartoonists love to show them with lightning bolts and beams coming off of them, electric eels don't actually light up at all themselves. (Bioluminescence is a whole different thing — if you haven't looked into it yet, do yourself the favor! Natural bioluminescence is incredible and fascinating and gorrrrrrgeous, all at once.) However, they can be used to power lights. Every year, a new video comes out of an electric eel powering a Christmas tree (usually in Japan, dog love 'em). I love lighting things up, as is proven by the fact that I have a small drawer with 6 or 8 little LED light strings tucked away for future use. I set a couple of those aside.

My first concept was to take a western-style shirt with front yokes, and do a cartoony eel with lightning bolts embroidered on either side. Those sorts of pics kept coming up in my searches, and I even found a couple of Tesla-riding-electric-eel illustrations to choose from. To my immense shock (heh), I did not have a plain western-style shirt in my stock. (And by "stock" I mean "closet." And by "closet" I mean "the third bedroom of my house which serves as my dressing room.") I had neither the time nor the inclination to make a shirt from scratch, neither to buy one, so that idea was out.

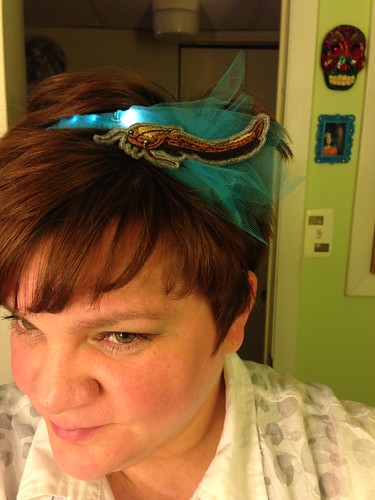
Second thought was to do a hairpiece. I have very short hair, so putting things in my hair/on my head is always a pretty high priority. (Wait, that's not really a short hair thing is it? In any case, I do.) Since I've practiced/developed a pretty good technique for embroidering on felt, making hair decorations has become a favorite quick-and-satisfying go-to project for me. I decided on a headband. With lights.

Step 3: Illustration.
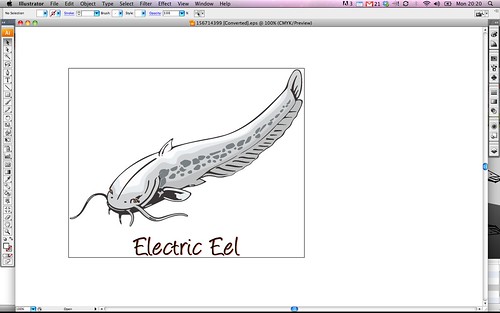
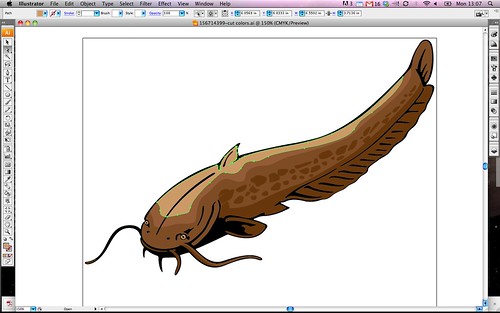
Because I was going to an aquarium to be speaking with docents and other experts, I abandoned the fanciful "electric eel" concept for the more accurate. I was a little surprised to find a couple examples of vector clip art specific to the electric eel; frankly, they are neither attractive nor especially interesting to look at. As is so often the case, personality wins out, and interested some people enough to do realistic representations. I acquired this one from Thinkstock as a vector illustration, shown here opened in Adobe Illustrator.

Electric Eel

Step 4: Color assignment.
Electric eels are brown. Just...brown. As you can see, the clip art there uses 6 different shades of grey, making the shading look more variegated than do the actual eels. At this point, I can decide whether I want to choose as many colors as I need to suit the design, or to limit the design to fit the colors available (or feasible).

I checked my grandmother's antique spool cabinet where I keep my good thread to see how many browns I had available. When it comes to thread color palettes, there are a couple of things to consider in addition to color, specifically weight and sheen. Because we're talking eel, I wanted to use only shiny threads, so I stuck with 40 weight rayon/viscose. (This is merely one of many niggling details that I will overshare.) This left me with 4 browns, plus black for the outline and details.

The background is the final significant color choice. As I said, I've had great results embroidering on felt, which is both weighty enough to stand alone, and non-raveling to allow for a clean border. I checked my stash for something maybe a watery blue...and found a stone-embossed medium grey, which struck me as a good background for this bottom-dwelling creature.

Knowing what I know about aquariums (one of the first things I look for when traveling to a new city is whether they have an aquarium where I can spend an hour or two), I anticipated the lighting to be fairly low, the bulk of the ambient light coming from within the exhibits. This would allow the browns to blend in to each other, without the whole thing getting lost in total darkness.

Step 5: Re-illustration.
With an idea of what the animal actually looks like, technical and feasible restrictions, it was time to colorize and simplify the original illustration. I've talked about using Adobe Illustrator before, and how it's one of my favorite crafting tools. It was an absolute must for me to be able to use Illustrator as a primary prep tool before starting an embroidery pattern, for this reason.

Starting with the original, I selected the areas to be colored, simplified some of the details (remember, we're talking about a 4" x 4" maximum area, and embroidery machines don't have nearly the resolution of your desktop printer), and removed overlaps. In some cases, stitching one color over another is acceptable — even desired. But what we have here is large areas of solid color on felt, with details on top of that. More than 2 layers of heavy stitching overlapped tempts a big ol' mess of broken needles and thready birdnests.

Electric Eel

Step 6: Import and edit and edit and edit.
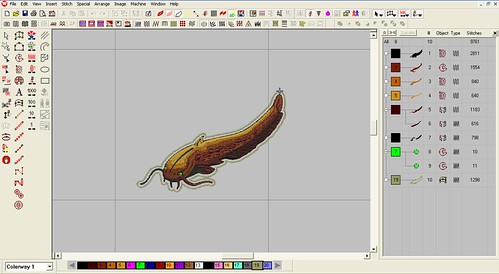
At this point, I saved the Adobe Illustrator file from my Mac to a thumb drive to sneakernet over to my totally-unplugged-from-everything-because-it's-so-old-it-will-just-crash-everything Dell laptop, where I reopened it in Illustrator on the PC. The illustration was resized to under 4", and then reduced by another 85% for resolution reasons I don't quite understand. From there, I selected one shape at a time to copy and then paste into the embroidery software. The software I have does a great job of auto-converting a basic shape, so that's where it all starts.

Copy a shape, paste a shape, convert a shape. Next...

Then, of course, each shape is going to need ordering and tweaking. After...honestly, I don't even know how long it took because this is the part where I tend to go all zen and start fidgeting with things at 800%...and this is where we wind up in the embroidery software.

Electric Eel

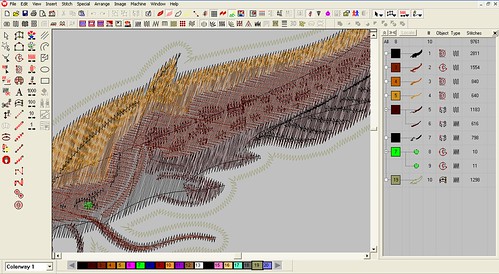
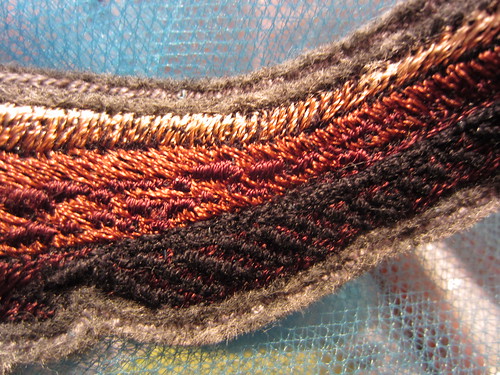
This is the stitch view. One thing that is significant/fun about embroidery, vs typical graphic design, is the textures available simply by stitching the same color in a different direction. This software simulates/supports this, and so I wanted to take advantage of the option to give more dimensionality to the slippery critter.

Electric Eel

Rather chaotic, no? The panel on the right side shows the stitch sequence. It's very important that the objects are stitched in the right order; sometimes for layering, sometimes just to minimize jumps between areas. The 8th and 9th objects are simply green circles for the eyes. The 10th object is a satin stitch outline which serves as a fence for me to cut around when he's all finished.

You may also notice that black gets stitched twice, first as the background/outline, and then as additional detail. I actually used two different blacks for that — lightweight bobbin black for the background/outline, and 40wt for the details, so they'd stand up as the spines would.

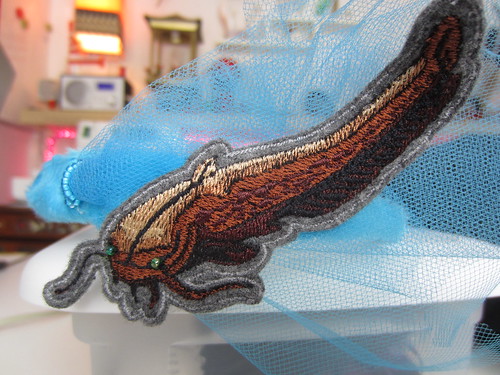
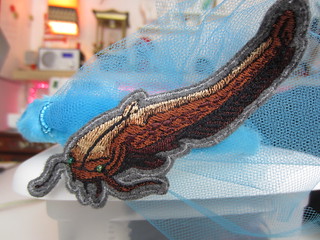
The final outline was done in a grey matching the felt to give me a border to follow for trimming. Here it is all stitched out and trimmed, with green glass beads for his eyes, and human hand for scale.

Electric Eel

Step 7: Finishing.
I already had a headband picked out for this project, a two-bar deal with some scrolly connectors between. This meant it was wide enough to support what I wanted, with openings for me to stitch through.

I don't really have any photos of this step, but trust me, it's not very interesting. I had a 7-light LED string from Ikea in the drawer which I stuck through the openings, and stitched in place with regular thread. (I will never understand why people will choose messy, unreliable hot glue when hand-stitching is so much easier and non-destructive.) I wanted a fabric to go over the lights to represent water, and to diffuse the white LEDs a bit, so I chose this short-pile blue faux fur I had. A large part of that decision was down to it being what I had on hand, but additionally, the swirly pattern looked pretty cool and watery over the lights.

I hand-stitched the fabric down, trimming and ladder-stitching as I went (while watching some non-"The Thing" arctic-station-gone-wrong movie). I pulled two of the lights through a small slit in the fabric so they would be extra-bright right next to the eel, to show him off a little. Then I took a tuft of light blue tulle, of which I have several yards for completely unknown reasons, and put that down for a little splash and for something to stand the eel against. (Yeah, there are a few beads in there, too.)

Electric Eel

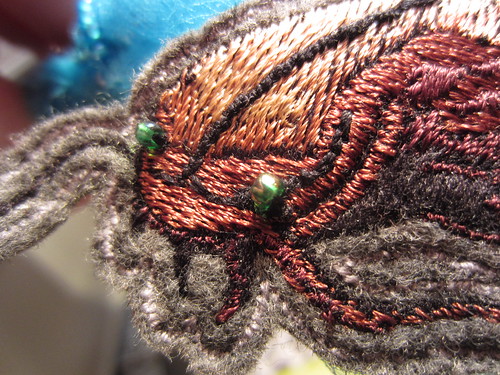
Here's a close up so you can see what a difference layering and varying the stitch direction makes.

Electric Eel

And his adorably alien little face.

Electric Eel

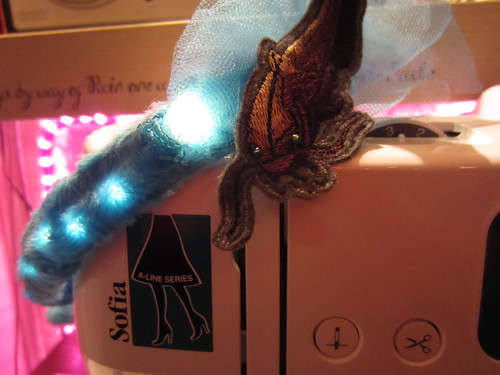
With the lights on, in a fairly accurate simulation of the light at the event.

Electric Eel

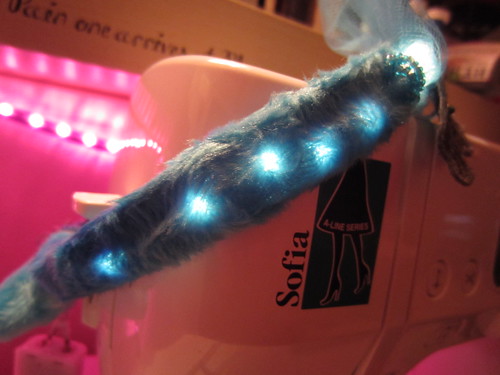
The "underwater" lights.

Electric Eel

So there you go, the anatomy of the ultimate in one-time-use wearables. Oh, it's perfectly capable of being worn again and again, but where am I going to be inspired to wear an electric eel on my head again?

hahahaha Considering that I wear eyeballs and skeletal birds in my hair on a regular basis, this is actually not so hypothetical a question...

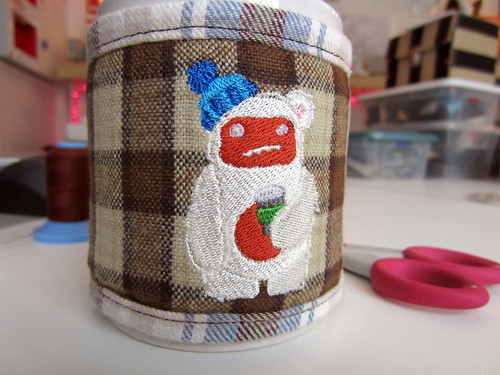
photo.JPG

Wednesday, March 05, 2014

CRAFTSTER BEST OF 2013

Craftster Best of 2013 Winner

Woohoo!

It's always so great to be recognized by one's fellows, and to be able to add this badge to my blog tickles me to no end.

Electric EelWhat's being honored is my machine-embroidered electric eel project, wherein, after 3 years of machine embroidery, I finally took the time to document the (or my) entire process of digitizing a project.

I didn't realize it was listed in Best of 2013 until just today, because there is SO much wonder on craftster.org, that in my browsing of project after project, I genuinely forget to check back in on my own posts. If any of you reading practice any kind of crafts and are not yet a craftster.org member, you should go join up. I've never met a more creative, cheerful, and most amazingly of all supportive, group of people in any other venue.

I've been posting at craftster for so long, I've actually been awarded a Best of once before...in 2007, for this dress. Yep, I'm old skool: I've been on craftster since 2004 in fact!

Saturday, January 18, 2014

Where to put all these hair decorations...

Hair Things Mount by shefightslikeagirlI just want to show this thing real quick.

I've mentioned before how much I like making things to stick in my hair. Not too long ago, it got to the point that I needed to devise some method of storing them all — in other words, how to get them all off the window sill in my bathroom.

They tend to be a little oddly-shaped to play well with most of my initial ideas, which included those cables on which you hang photos/notes, magnetic knife bars... okay, those were all of my initial ideas. So I headed to Ikea to either find a photo cable, or a better idea.

I did find the photo display, but it was pretty short and over-priced for what I was going to do with it. So I continued my trek to what is usually my ultimate Ikea destination anyway, the As-Is department.

Hair Things MountThat's where I found this big metal screen. It's about 24" x 31", and I'm not positive what it was intended for, but I suspect some sort of industrial shelving. It was <$5, so even though I couldn't see in my mind where on earth I had enough wall space for it, I grabbed it anyway, figuring I'd sort it once I got home.

The one wall that was both big enough and out of the way enough turned out to be in the hallway outside of my bedroom. So up it went.

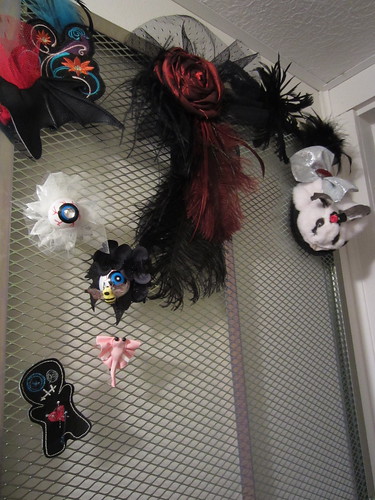
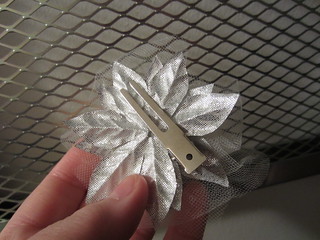
The beauty of this solution is that it's steel, so the things which I mount with magnets stick right to it, and then the grid itself is big enough that anything with a clip on the back can just snap right on.

It's not, at this moment, the prettiest thing in the house, but it does the job perfectly. At some point, if/when I paint that back hallway (which means after the bathroom gets torn out, most likely), I'll probably paint the whole screen. But for now, it's a perfect utility solution.


Hair Things Mount
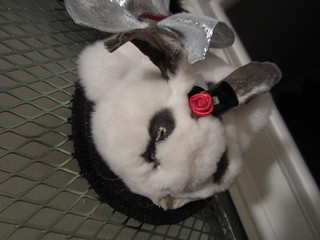
Oh, and here's a quick look at a couple of things I've made recently. The thing up there that looks like a rabbit? That's a rabbit. It was my New Year's Eve hat this year, featuring some red foil streamers (since removed) and a rabbit wearing a top hat.


Hair Things Mount
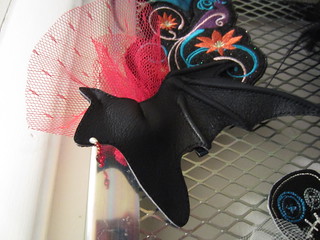
Last weekend, I made a little leather bat (on the wing) for a party at the Detroit Film Theatre, celebrating their 40th anniversary with a showing of the 1931 Spanish-language "Dracula." A bat with some red beaded droplets seemed like just the thing.

Saturday, November 30, 2013

Mouse Jawbone Necklace

Mouse Jaw NecklaceYou may (or may not, really) be surprised by the huge number of results one gets by searching "taxidermy" on eBay. A lot of what you'll get is bones and skulls, cleaned and ready for whatever nefarious purposes your little mind may conjure. This is how I accidentally came across a listing for 20 mouse jaws.

As fascinating as some of the options are — have you seen a camel skull?? — I generally avoid buying things like that at a mass marketplace like eBay. Part of what I enjoy so much about my personal skull collection is how I come by them; right now the majority have been gifts, followed closely by estate sale finds, and then skull-based artworks.

But 20 mouse skulls? For $5? My curiosity got the better of me.

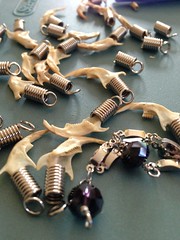
This is how they arrived; (mostly) cleaned, unbleached, big ol' rodent nibblers intact. I looked at them for a long time, figuring out what I was going to make of them.

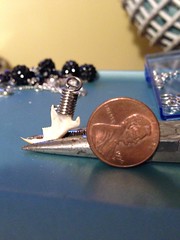
Mouse Jaw NecklaceUnsurprisingly, the bone is extremely thin, particularly at the mandibular notch. Initially, I wanted to wire-wrap each jaw, but that turned out to be impossible, because I couldn't lever the wire — no matter how thin or soft — around the bone without it crumbling. Instead, I went with some pre-wrapped wire coils I had, which are made mostly to use as cord ends.

Mouse Jaw NecklaceIt was necessary to glue them in place, using a thick super glue gel, which helped to fill in the empty space and further stabilize the extra-thin part of the jawbone. Each tiny jaw had to be carefully centered and placed, and then propped up for a minute or two to allow it to set in a good position.

This was a fun way to spend a chunk of an afternoon.

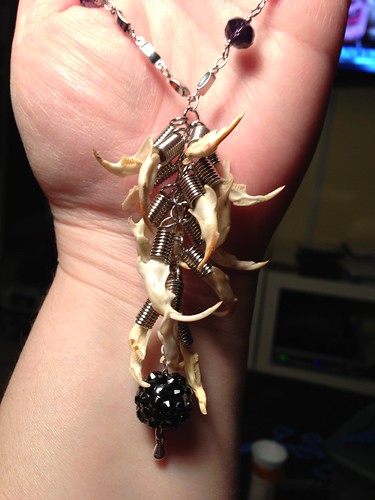
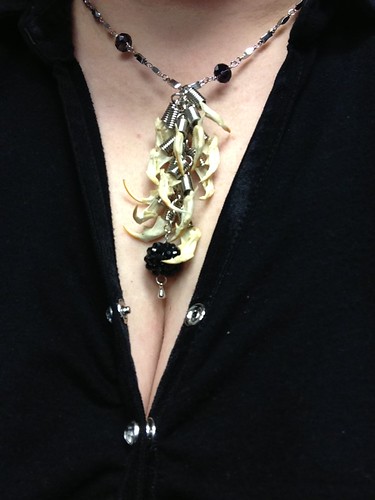
Mouse Jaw NecklaceOnce they were all glued in, including any loose teeth, I attached all of them to a short length of chain, as a fall. To give the fall some visual and literal weight, I added a faceted black beaded ball which I strung on an eye pin with a metal teardrop at the bottom. That whole assembly was then attached to a silver chain, which was decorated with deep red faceted oblong glass beads, which are effectively black under most lighting. I hung the fall off-center for a little added interest.

This is a piece that has to be worn with a certain type of top. In this case, a black knit with snap-front. The chain itself is simple enough to wear with a collared shirt; it's the centerpiece that needs a frame of its own. It never fails to draw a lot of commentary when I wear it, usually including variations on, "Really? REAL mousejaws??"

Mouse Jaw Necklace
Of course! Only authentics for me!

Wednesday, November 20, 2013

Gma's Stash Box

My grandmother — Carol, Ma, Gramma, Grams, GG, and, I'm sure, countless other variations — died this spring, 2013, at the age of 90, a strong and hale woman her entire life, and mentally aware to the end. She was the mother of 8; grandmother, great-grandmother, and even great-great-grandmother to I don't know how many, but I'm sure she did.

Grams was a Dust Bowl/Depression kid in the Great Plains, so she knew not to waste. She was also the daughter of a seamstress, so making, remaking, and conserving were in her blood. Plus maybe a touch of the hoarding.

I was out of town for Gram's funeral. She was a materialist (and not just the quilting kind) and a realist, and, like my grandfather who died the year before, would have found a funeral to be an unnecessary fuss. Of course, we know that funerals are for the survivors, so since it wouldn't have resonated with me, and wouldn't have meant much to her, I didn't make it. That was the weekend I went to Chicago and had one of the best weekends of the past decade, and there's no question in my mind that she'd have rather had me go do that.

At my birthday party the following July, my sisters brought me a hat box full of Grandma stuff, cherry-picked from her crafting stash. I mistakenly called it, with all good humor and appreciation, a "box of random stuff" and was corrected that no, my sisters picked these things out for me intentionally. Which made it a gift not only of/from my grandmother, but also of/from my sisters. Any time you select something with me in mind, and make the effort of getting it into my hands, it's very special to me, be it a diamond ring or a wad of embroidery floss.

The party was in full swing, so after lightly looking through the bits and bobs in the hat box, I set it aside with my (increasingly out of control) crafting stash. It's been there since, visible and safe but not really explored, until last night.

Cleaning and organizing after a sewing project, I looked at the big round box and decided it was time to dig in and see what was really inside.

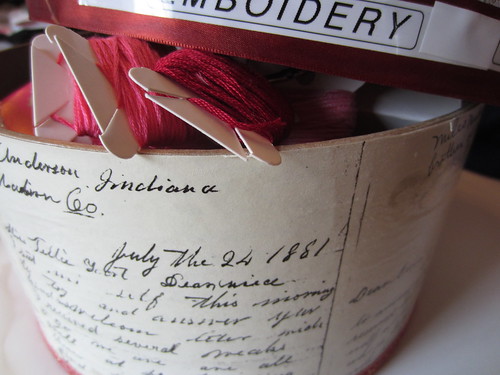
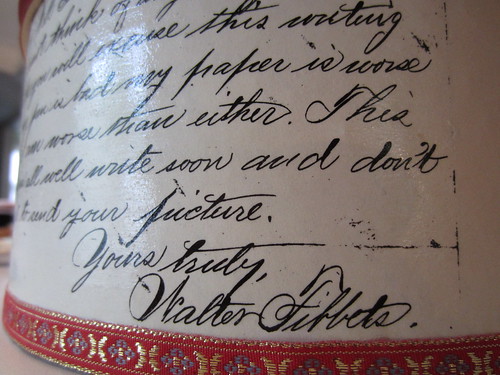
mostly embroidery flossI have to start with the box itself. It looks like the sort of pressed paperboard affair you'd get at a big craft store, papered on the outside with copies of old hand-written letters. Americana at its finest. And that's what it is — except these old hand-written letters were put there by my grandmother herself, photocopied from her collection of our family's history.

She wasn't only a natural lodestone for history; she went out and did the research herself. As a kid, I remember a regular topic of conversation being what new things Grandma had discovered about our family. And really, most of it not even her family, but rather my grandfather's line, the one she'd married into. But it mattered to her not because it was her blood in the past, but because it was important to her blood in the future.

I don't know much else about the way-back of my family, but because of her work, I do know I have unbroken documentation back to the American Revolution, when a young Hessian soldier named Kasper, hired by the British, decided these Colonials were on to something, and defected. He changed his name, married an American girl, and settled in to family life in Tennessee.

Just like that, we became German.

Before Gram's research, we'd thought for generations that we were Scottish — the current form of my last name is Scottish. But a couple centuries of re- and mis-spellings back, our last name was about as German as it gets without umlauts.

yours trulyThe letters on the outside of this box are, as much as I can read them, mundane letters between family members — mundane until I take a moment to reflect that one of them is from 1881, and the original was in my grandmother's possession. I'm embarrassed to say that I'd never taken much interest in the research and documentation that she did, but I'm also happy to be able to say that she did it, we have it, and you can bet I'll be looking through all of it soon.

True to the labeling on the outside, the box mostly held embroidery floss and silk ribbon. I already have too much of the stuff myself, and none of it was especially precious. I set that aside and dug for better treasure.

Gramma did a lot of beadweaving, what she called "tatting" from the old lace-making practice she and her mother both enjoyed. Over the years, she'd given me pounds and pounds of her excess beads, especially when she got older and working with the tiny seed beads I love became increasingly difficult. In the box were not only a few small zipper bags of glass beads, but a couple small strips of worked netting and right-angle weave. There's no real indication where these pieces were going, so I don't know if they were projects that were forgotten, or maybe just bits of practice. In my beadweaving days, it wasn't unusual for me to aimlessly fiddle with bead and thread to practice, learn, or keep myself busy. I've never had to wonder where I got this tendency from, but holding those pieces in my hand was a solid reminder.

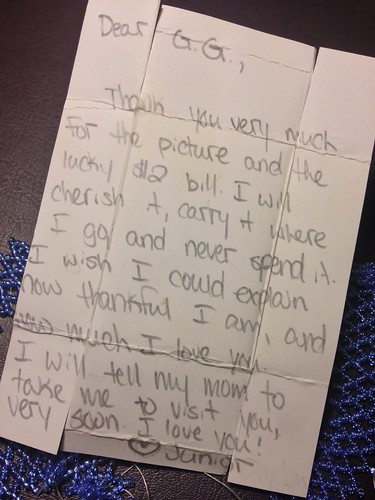
I found one of these unfinished objects, a long, light blue netted strip, in what I recognized as a box made from a greeting card. Reduce, reuse, remake, I told ya. As any crafter would, Gram had her share of specialty plastic storage, but I can't count how many small bundles of beads I got from her closed up in little boxes she made from Christmas and birthday cards she'd gotten. After fondling the silky netted strip (my love of the feel of woven glass beads continues!) I looked inside the boxlid and noticed handwriting in pencil. So I unfolded it:

Junior
Dear G.G.,
Thank you very much for the picture and the lucky $2 bill. I will cherish it, carry it where I go, and never spend it. I wish I could explain how thankful I am, and how much I love you. I will tell my mom to take me to visit you, very soon. I love you!
(heart) Junior

This changed the timbre of everything I was doing.

Up to this point, I was really just organizing my stash, pushing things around, seeing how much of the stuff in this box I could actually use. Then, there in my hand was what in a hundred years someone would consider another mundane letter between family members — except that these family members span four generations, and they're my family, the family I know.

"Junior" is my nephew, although doesn't call himself Junior any more. He's Daniel now, and is in his 20s. He wrote this card as a young teenager, maybe a little before (there's no date anywhere on the card).

"G.G." is, of course, my grandmother, his great-grandmother: his mother's mother's mother.

I took a quick iPhone pic of the note and MMSed it to my sister. She messaged me a few minutes later, after she also sent the picture to Daniel. "He still has the $2," she told me.

Of course he does.

I asked my sister if she wanted the card, which seemed pretty obvious to me. We don't see each other often, although we only live about 20 miles apart. I offered to put it in the mail for her, which seemed to me the most efficient way to effect the transfer. She responded, "What are you doing for lunch Friday?"

•  •  •

Last week, I spent some time in Philadelphia, marveling at historical documents by people — families — who shaped that city, and ultimately the country, our culture. People I had never heard of, yet instinctively respected as I looked at the thin lines from their fountain pens.

My family has a record, too, written and unwritten, which shapes our country and culture: from a young soldier who followed his conscience, to a teenaged boy who unreservedly told his GG how much she meant to him.

The materials from Gram's stash box will get used. I learned enough from her to know that I shouldn't let anything go to waste.

And Friday, I'm having lunch with my sister for the very same reason.


Thursday, October 31, 2013

Teller and (my) Houdini

Hey, remember this project I did a couple of years ago?

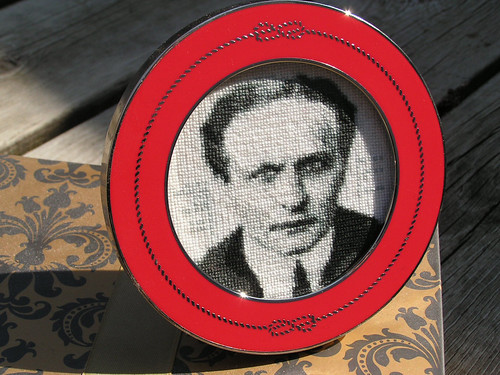
Houdini Finis

It's my itty-bitty Houdini cross-stitch that I made for Teller. I planned it for his February birthday, and wound up giving it to him on my July birthday. Hey, dates are arbitrary and time is an illusion.

Teller was gracious, as always. He said, "Oh, I know exactly where I'm going to put this. I have a Houdini grotto in my home..." (Did he really say "grotto"? I like to think so, but the truth is lost to history.)

To which I dorkily responded, "I know." Because I had read about his Houdini collection.

The next day, when I was in the Penn & Teller theater again post-show, Teller called to me by name from across the lobby. "I showed your Houdini to a couple of people. My wardrobe woman remarked that it's particularly fine work." And then, as far as I can recall, I blacked out.

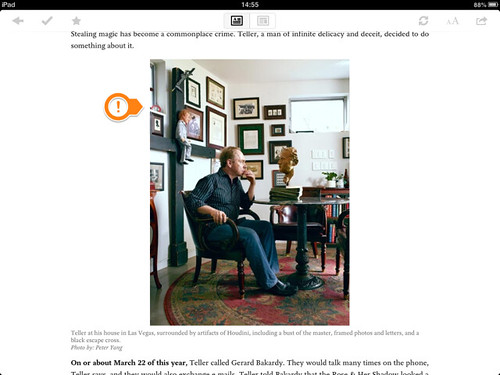
FF to a week ago when I was sitting in a local coney, having lunch with my iPad. (Coneys are, as far as I can tell, pretty much a Detroit thing. I didn't realize this until recently, when I saw a little bit more of our country. Here, Coney Islands are two to a corner. Everywhere else, well, they're whatever that region has for diners.) Someone I follow on twitter had tweeted an article about Teller which appeared in Esquire magazine last year. I thought I'd already read it, but doing a quick scan of the article, it was clear I had not — because there's no way I'd have seen this photo before and not flipped my lid.

Teller and Houdini by shefightslikeagirl

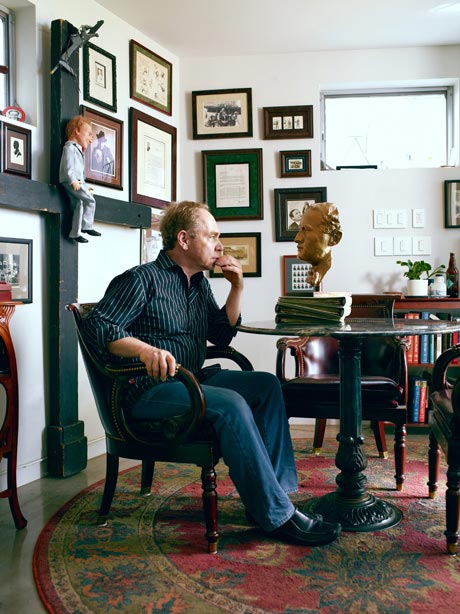
You see that up there on the left? In the corner of the window well? The bright red frame in that room of amazing artifacts including the got-dang Houdini cross?

I had never really wondered before whether Teller's consistently generous, gracious, effusive manner was genuine. I mean, to a large degree, does it matter? I've met him on several occasions, and he's always been the model of what "celebrities" should strive for, in my opinion. Does it really matter whether he meant it when he appreciatively told me he had just the place for my gift in his home?

Well, I can certainly say it means the world knowing that he did. And that four years later, my little contribution to his collection still has a place.

Teller in Esquire 2012

Sunday, August 25, 2013

In new news: I'm looking for work!

I'm officially on the job market.

I'm looking for full-time work, but I'm available for lots of different options. If you look at this site, you've seen some of the things I can do, creatively and craft-wise. In my professional life, I've been a graphic designer and production artist for, oh, let's just call it many years. But my skills really encompass a variety of creative areas, including writing and voice recording.

So if you've liked anything you've seen, read, or heard here and you think I might be able to contribute to your company or project, please email me and we can talk details. (And yes, I will relocate.) shefightslikeagirl at gmail


Monday, August 12, 2013

I was interviewed for the Project Archivist podcast...

featuring DC-in-Detroit

Hey people! Here's something from my non-crafty life.

I recently had the pleasure of a long talk with Roejen and Lobo, the minds behind the Project Archivist podcast, along with frequent guest/contributor/smart guy Tyler Kokjohn.

I've been a long-time PA listener; the show covers esoterica, spooky things, and general weirdnesses, with an air of open-minded curiosity. Turns out, Roejen is a local, so we've run into each other once or twice. A recent conversation we had over a couple pints of mead turned to the topic of dreams and sleep states, and we both agreed it would be a good topic for the show. Sleep paralysis and other sorts of sleep disturbances provide a crossover between "skeptics" and "believers" in a way that I don't often hear discussed.

So we discussed it.

The show is about an hour and a half long, and it was a good, spritely conversation. At least I think so.

Listen here.

Greetings Archivists!

We are the music makers and we are the dreamers of the dreams...

In this episode Show listener Dorion joins us to talk about the strange world of sleep disorders. We take a look at Narcolepsy, Sleep Paralysis, Cognitive dreaming, Lucid dreaming, Night terrors and Hypnagogia. All of which she experiences or suffers from!

We also take a look at how these conditions of consciousness could be perceived as paranormal experiences and describe what it feels like to have one. Later at the end of the interview, a few listeners call in with their own experiences. Yes, that other voice in the back ground is Tyler who joins us as a guest host just to add a bit more coolness and logic to the topic.
Friday, August 02, 2013

Zombie Kitty wants BRAAAIIIINS!!...and catnip.
BRAAAIIINS!!!

Hey, have you seen the zombie kitty catnip toys I made that I'm selling on my Brocade Lion etsy store? They're gruesomely adorable, and I have it on good authority that they are irresistible.

Some testimonials:
"I owe you $14. I was going to put your cat toys in the shop today, and our asshole cat went and stole one of them." —Friend with a boutique shop, whom I cannot name because she called her cat an asshole.

"All hopped up on your catnip meth, my cat went and killed a bird today. I HOPE YOU'RE HAPPY." —Friend I also cannot name to protect the guilty.

I have a handful of different colors up in the shop right now, and will be making more all the time. Custom orders are always entertained, so if you have favorite color combinations, let me know, and it's no extra cost.

There are also embroidered vintage ties, and some big bright polka-dotty convertible necklace/bracelet combos.

Go check 'em out, and buy something!

Sunday, July 14, 2013

1979 Fitz & Floyd parrot pitcher and matching napkin rings for sale.

Hey everyone. In case there are any parrot lovers or vintage pitcher collectors out there, I wanted to let you know that I am selling this nifty Fitz and Floyd parrot pitcher, with four matching napkin rings, on ebay.

You can check out the listing here.

Edit: SOLD!

Tuesday, July 09, 2013

My revamped etsy store is UP! brocadelion.etsy.com

Check it out, folks. I've repopulated my formerly dormant etsy shop:

I've reposted some items I made shortly ago but didn't yet sell, and there are bunches of new things to come.

Come visit, and keep visiting, because I've got some things in the hopper waiting to get posted!


   brocadelion.etsy.com

Machine Shaming

Inspired by this blog post from Urban Threads, I took a couple of pictures of what had happened to me today, literally moments before I saw the post. (Yes, I was taking a frustration break.)

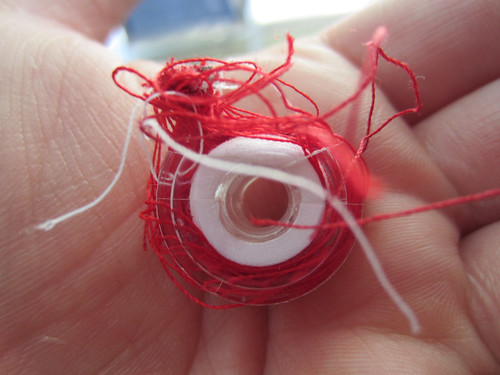
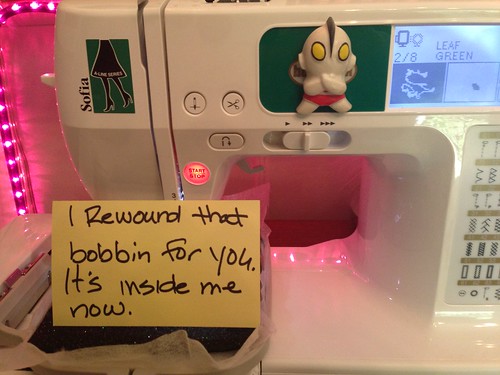
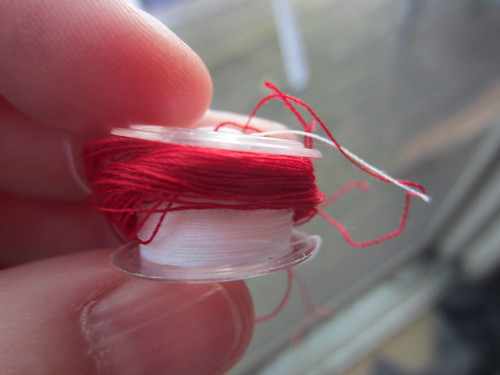
Trying to stitch out something I've done several times, I decided I didn't need to completely keep an eye on dear old Rudy there, until I heard a tell-tale *clunk*. Somehow it had managed to wind the upper thread around the bobbin, so desperately, after I cut the project out of the tangle, I had to actually break the bobbin to get it out of the guts of the machine. What a mess.

Seems fine now... But it canNOT be proud of itself...

Machine Shaming by shefightslikeagirl Machine Shaming Machine Shaming

Thursday, June 27, 2013

Embroidered/Cut/Sewn Felt Rob Doll

My latest favorite project!

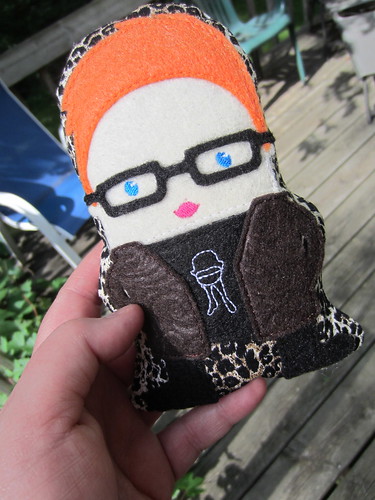
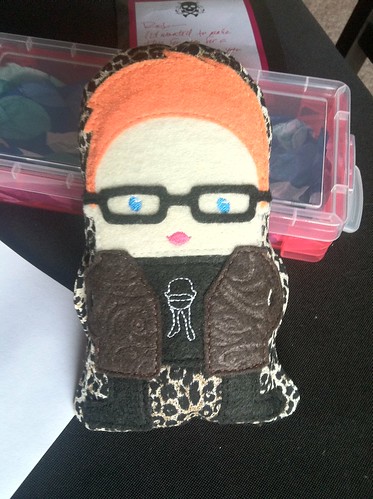
Rob Doll by shefightslikeagirl
I have a friend, Rob, who moved out of my town a few months ago. I'd had this project in mind right about since he pulled away. There are some people who lend themselves easier to cartooning than others — Rob is one of the easy ones. He has several easily-distinguishable characteristics; bright blue eyes, black eyeglasses, an adorable strawberry mouth, and most horrifyingly of all, he's a natural ginger.

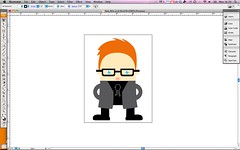
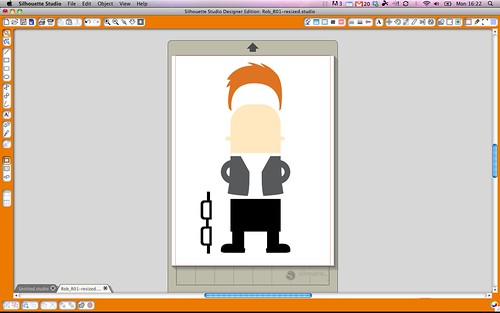
I'd never made a doll of a person before, but the setup came to me quickly. And it started in Adobe Illustrator.

Rob Doll

I had intended to hand-cut the felt for the  [counting] 6 pieces that make up the illustration. As I was contemplating how I would transfer the cutlines to the felt (probably by printing on plain paper, lightly spray-adhering the paper to the back side of the felt, and scissor-cutting along the lines), something came to my attention: The Silhouette Portrait (and the bigger one, the Cameo). Silhouette was in the midst of a big blog giveaway, and I must have entered to win the thing about 100 times at 20 blogs over the course of a week. By the time all the sweepstakes were over, I hadn't won, but I was convinced I was buying one, especially when I found out fabric-cutting was an on-label use.

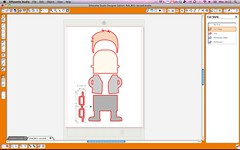
The included free Silhouette Studio software does a lot, but it doesn't do what I really needed, which was to import Illustrator (vector) files, while maintaining editability. The upgraded Studio software does, however, and does it quite well.

Rob Doll
Once the illustration was imported and exploded (kaBOOM!), I had to tell the software what to cut. As each piece was still a vector object, defining the cuts was as easy as a click.

Rob Doll At my local Joann, I picked out some felt colors that I thought suited him well, including a nifty embossed brown felt for the jacket. (I was thinking plaid, but that just wasn't going to come together well enough.)

Then it was cuttin' time!

The Silhouette Portrait I got was the fabric-cutting bundle, which included two types of fusible interfacing and a fabric-specific cutting blade. Looking around the site, I didn't find any recommendations for felt, which as you know, is a different animal from your typical quilting cottons. I think because the fabric bundle is a relatively new thing, there isn't yet a lot of chatter about it, at least not where I looked. When I didn't find the details I was looking for, I decided screw it, I'll just forge ahead.

Silhouette sells two kinds of fusible interfacing, one intended for the cleanest cuts, and a slightly lighter weight version intended to be more easily sewable. I did a test of the clean-cut version fused to the back of a sample of craft felt (which is relatively thin) with the fabric blade set to the deepest setting, 10. It cut beautifully.

Rob Doll
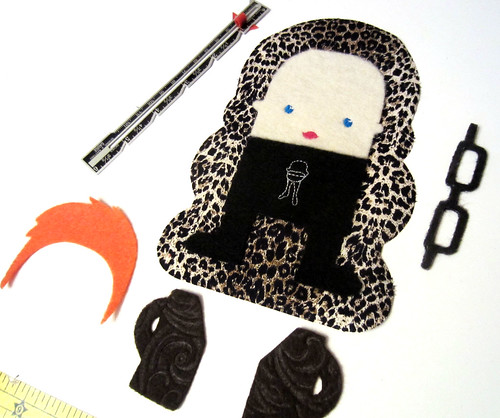
My intention was to fuse the layers of felt together, so I decided to try cutting with two-sided Wonder Under, which has a similar feel to the Silhouette interfacing. Basically, the felt (or fabric) just needs something extremely stable to keep the fabric from distorting or pulling under the blade. The Wonder Under did the trick, even with the skinny parts of the eyeglasses. I had to clean up some of the fuzzy edges a teeny bit, but that was worlds better than cutting it all by hand. I also expanded the whole outline (in Illustrator) and used that to cut a shape for the background field out of a swank leopard cotton.

Now, about his sweet little face.

As I've mentioned hundreds of times, I have an embroidery machine (hi, Rudy!). I intended to embroider the little details of the eyes and mouth right from the start. What I had to figure out was how to do it to register the shapes between the embroiderer and the cutterer. What I wound up doing was executing the embroidery first on a big piece of fleshy-colored felt. Then I took advantage of an awesome feature of the Silhouette Studio software, the print-and-cut.

The way that works is that you print your design from your inkjet (or whatever), including registration marks in the corners (which Studio automatically puts in place). Then, you stick your printed paper on the cutting mat, and the Silhouette actually scans the page for the registration corners, and then cuts appropriately. I'd tested out that feature a couple of times, and found it remarkably accurate and consistent. I printed the face shape, with eyes and mouth in place, on plain paper with registration marks. I stuck that down in place on the carrier mat, then spray-adhered the Wonder Under-backed embroidered felt on top of the outline, inside of the printed registration marks, registering the eyes and mouth (on a light table).

Got it?

With that in place, the Silhouette scanned the registration marks, and cut the face out correctly, first-go.

Rob Doll

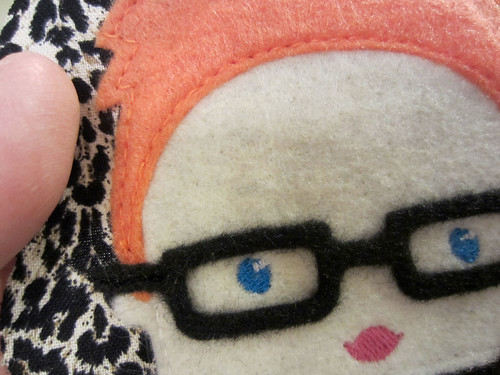
Have you ever seen anything more adorable? No, you have not.

At this point, it was just a matter of sandwiching the layers together, in place on the leopard backing, and pressing it together to adhere the Wonder Under.

Or so I thought.

I wasn't happy with the level of adherence from the Wonder Under alone, so I decided to hand-stitch around the perimeter. That lasted about 4 stitches before I realized how much of a mess that was going to be. It's not that I don't enjoy hand-stitching — I actually do — but it takes ages, and I'm not always good about keeping the stitches even. Believe it or not, I'm much better at doing extreme details with my trusty Husqvarna (hi, Nigel!). Using matching threads, I stitched around the hair, face, jacket, and shirt/pants.

Oh! I forgot about the shirt!

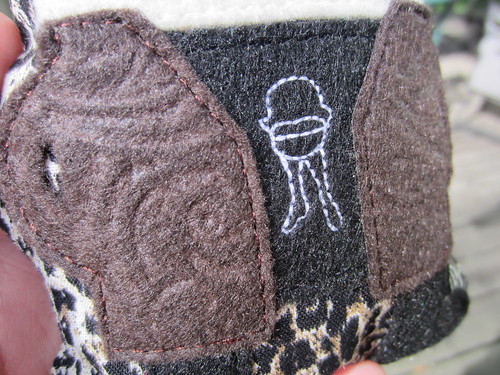
Rob DollI couldn't just put him in a plain t-shirt, so I wanted to find a good symbol that would read at only 1" high (and skinny). Rob is a bigtime movie guy, and I happen to know that his favorite movie is The Discreet Charm of the Bourgeoisie. Not exactly privileged information; he has a tattoo of the poster image on his arm.

I took the image, broke it down to one color, outlined it, and converted it for embrawdry. As the registration was less tricky for this part — it just needed to be centered — I cut the shirt/pants shape out first before embroidering the obviously-simplified icon.

Now firmly stitched down to the background shape, I stitched, turned, and stuffed in the traditional way. And voila! My little Rob doll.

I found a little snap-top container that he just fit inside, coffin-style, and sent him off to Rob's new home on the other side of the country.

Yes, of course I gave it away. I wanted to make it for Rob, and so it needed to wing its way to him. I hope they're very happy together.

IMG_8775.jpeg

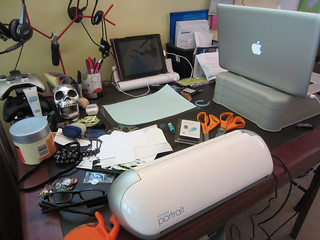
PS The Silhouette Portrait, which is the smaller model, is tiny and lightweight. Portable enough that I could find a place for it in the sometime-chaos of my work table.

Rob Doll

Friday, June 14, 2013

Spent the weekend in Chicago with the Stranglers...

For those interested, I wrote an extensive column about going out to Chicago to see the Stranglers last weekend, 7-8 June. The column, an audio clip of JJ Burnel speaking with me, a video of the band, and my photoset can be found at my other blog here.

Never let it be said I'm not a content producer. :)

Sunday, June 09, 2013

The Stranglers Embroidered Jacket

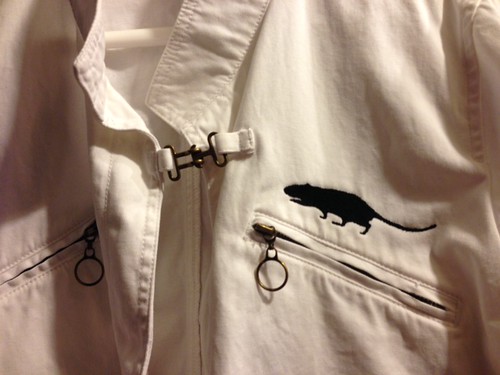
Rattus Norvegicus by shefightslikeagirlYesterday I created a machine embroidery version of the iconic rat image from The Stranglers debut album, "Rattus Norvegicus." I had purchased this vintage white denim jacket at resale for exactly this project -- I didn't expect hooping the jacket to be such a major PITA! That zipper complicated everything, but that's exactly where I wanted the rat to be. Eventually I got it hooped up, and the stitching looks great.

The Stranglers are easily one of my top-5 all-time favorite bands. I saw them their last time in Detroit, which was twenty years ago (ow my mortality)! I've been super-excited for this show for months now, and wanted to make something to wear that was appropriate and an in-joke wink.

I'm happy with how the stitching turned out, risky as it was, jamming the jacket in that hoop. I woke up this morning super-excited for this show...which is now postponed until September. D'oh!

ADDENDUM:
I was too excited to see The Stranglers to risk somehow missing them when they come back through my town in the fall, so I drove out to Chicago this weekend to see them. I had originally intended to drive out Friday morning, see the Friday night show, and then head home Saturday early afternoon, but the show promoters were so fun, friendly, and generous, they invited me to come to the Saturday show as well -- which I did, thus giving this jacket a two-day debut. And I have to say, it was a smash hit. I didn't expect that the band would be selling their OWN embroidered jacket -- a very cool black work jacket (which I am somehow forgetting whether it was Carhartt or Dickies) -- which prompted a couple of people to ask me "how'd you score a WHITE one?"

I kept telling everyone it was a "limited edition...of one."

Friday, June 07, 2013

Check out this monsterrific new game...

A good friend of mine is doing something really cool, and everyone should see it.


He has designed this board game -- his second -- and he's doing the Kickstarter thing to fund it and get it out to The Peoples.

Ben is a monster guy; he knows almost as much about monsters as I do. And this game is all about monsters: zombies, vampires, werewolves, and worst of all, post-apocalyptic dudebros. It's called Undead Apocalypse, and it looks pretty sweet. I don't understand much about how it plays -- I don't play these kinds of things -- but it LOOKS, as I say, pretty sweet. It's worth it for the werewolf figure alone. 

Yeah, okay, I admit I'm biased... not because Ben is a friend of mine, but because I'm a secret werewolf. Evidently.

Werewolf
Werewolf
Grab the avatar image below to show that you are on Team: Werewolf
Which Apocalyptic Leader Are You?
Web Statistics