I didn't win anything.
I'm not bitter or anything, so I'm not going to say that one of the winners is a canned design and one looks like someone/something peed on it.

Thursday, October 28, 2010


Monday, October 18, 2010
I'm in a contest here...

Hey, I'm in a contest right now, if you feel like voting for me. :)
The good people at Babylock are running a two-level contest right now for Halloween-themed bags. I've entered my Bride of Frankenstein bag, made for a swap a couple of years ago. I say it's a two-level contest because the grand prize winner will be chosen by the Babylock judging panel, and the entry with the most visitor votes will win a bag full of sewing goodies.
The contest page is here, and if you want to vote for me (from now until October 24), search for SheFightsLikeAGirl and give me some stars. I mean, you know, if you want to. ;)
One way or another, I'll post the results here in a week.
Sunday, September 19, 2010
A follow-up I forgot to make!
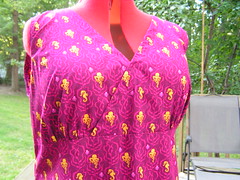
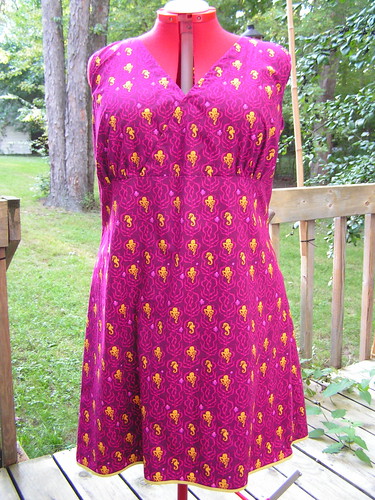 I like the idea of making a Birthday Dress for myself, something maybe a bit outside my usual "style." (haha I have a style.) Because my birthday is in July, I have sundress-y options of which I might not ordinarily avail myself. In 2009, I knew I'd be spending my birthday in Vegas, at the Penn & Teller show on the night of, so something vivid was definitely called for.
They've become so popular these days, I'm almost loath to admit it, but I have a long-term love affair with all things Cephalopod. The good thing about them becoming such rockstars on the crafting scene is the availability of some super-sweet fabrics. Last year I discovered the "Mendocino" collection by Heather Ross. There were a couple of colorways, but you know I'm going to pick screaming fuchsia/orange whenever that's an option.
This also marked one of the few times I paid full price (faint!) for project fabric. I remember being so nervous when I started cutting it, you'd have thought it was my first time.
 I chose a simple dress with no sleeves and an open neck, the now out of print Simplicity 5074, out of my stash. I've got a bit extra to work with in the Up Top department, which I tend to remedy by lengthening the bodice, but I didn't on this dress. On the other hand, it's probably a little too big in the 24 that I made. The sleeves actually have little flanges or something, as I recall, but I omitted those and just did a regular narrow hem on the arm openings. Also omitted the zipper, of course. It pulls over easily enough. I wound up whacking about 6" off the length, finishing with this lovely bright yellow narrow bias tape.
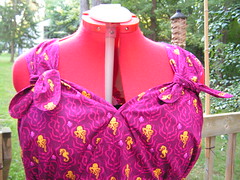 There is also a little bit of gapping in the cross-over in the front, which could just be tacked. Additionally, I made two little ties of matching fabric to tie off the thick shoulder straps. It changes the fit and look of the dress greatly. Much more bombshell this way. Wearable the other way, too; simply more casual.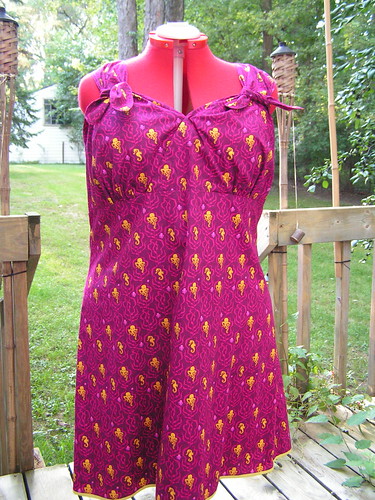
The dress is comfortable and makes an entrance, to be sure (particularly if I wear it with orange tights and red shoes, like last time), but the fabric itself is a bit stiff. If I wear it with leggings, which of course I always do, it wants to stick to my legs. It's a great cut for my shape, though, so I could imagine making it again, out of something a bit more flowy. And possibly less octo-y.
(Ugh, that last picture is kinda terrible. I'm not as lopsided as Heddy seems to be here.)
Tuesday, September 14, 2010
Mending with a Stippling Foot
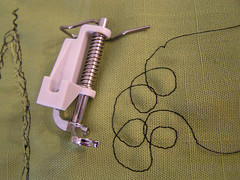 This is my stippling foot. I just had to have it... and then not use it much. But it's one of those tools which, when you need it, there is no substitute. Its first major project was the Vinyl Flames Applique NYE dress. This time, it was mending a vertical tear in the leg of a pair of blue jeans.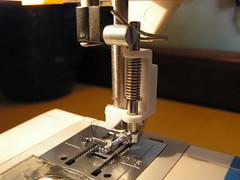
Recently, a coworker gave me a pair of jeans with a long tear down the front of the left upper thigh, which I'd apparently at some point agreed to mend. (I have no memory of this... but what the hell, I'm a giver.) She had a quadrupled piece of skull and crossbones quilters cotton pinned behind the long tear, showing how she wanted it. "Why don't you just hand-sew it?" I asked her. She laughed.
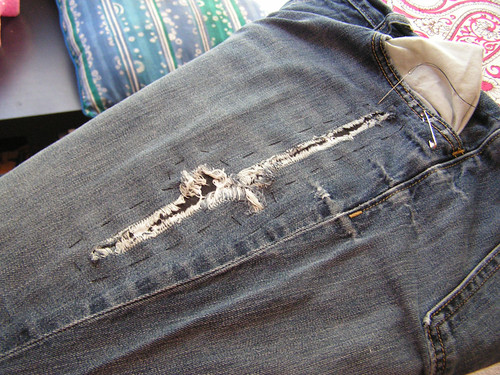 I finally had some time today, so I took a closer look at the pants. I hadn't given it much thought when she gave them to me, but when I looked at them, I realized they would have to be sewn sideways because of the position of the tear. Erm, that's not how sewing machines work... then I remembered the stippling foot. I decided what I would do was sew several rounds around the tear in a sort of scribbled stitch (good lord, that sounded like I was possessed by Seuss there for a moment).
First, I unpinned the layers and ironed everything. Then I replaced the four layers of cotton behind the tear and hand-based. I decided to sew a bit outside of the tear; there wasn't much denim actually missing from the tear, but it seemed like she wanted the skulls to show, so I left it open so she could either trim it out, or just leave it free to fray like crazy (up to the machine stitching).
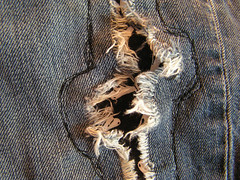
These are clearly well-loved/-worn jeans, as there are a couple more (less scandalously-placed) holes and some threadbare spots. Since I was at it, I took a chunk from what had been trimmed off and made a small patch for the other side, scribble-stitching that from the top side. Trimmed the edges and pulled a few threads so it'll ravel nicely, too. Cute, right?

Oh dear. Why do I have a feeling a bunch more holey jeans are going to wind up dropped off at my desk?
Okay, I admit. After I made this post and looked at the pictures, I decided to do more, longer, looser scribbles to soften the whole shape. Why do something if I'm not going to do it all the way?
Sunday, September 12, 2010
What? Not another skull dress!
Yes, another skull dress. I don't do it on purpose, I swear.
I found this adorable stripey skull knit on the clearance table and bought the remainder, not sure what I was going to make. I want to learn to work with knits more, though, since they're so nice to wear.
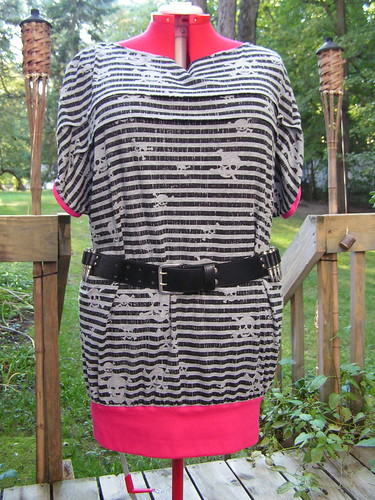 I dug through my patterns to find something that could support so much... stripeyness. I thought Butterick 5327 was an interesting shape, but the way I'm built, bat-wing styles make me completely waist-less, rather than being nearly waist-less. So I decided to make a tunic out of it to lengthen the whole bodyline. At the same time, I had my eye on Simplicity 2998, and decided to work in a detail from that design.
I started with View C and just extended the lower hem to just past my ass. I went on a hunt for a good, strong pink knit, which I found in a nice rib. I decided to make the strip 4" high, and just long enough to hug my upper thigh area. I gathered the lower edge of the tunic, folded the pink in half, and overlocked the 3 raw edges together. The shape as it came together was pretty good, but those dropped shoulders bothered me. Again, with my build, my shoulders are a bit sloped, so those sleeves were just making me look lost.
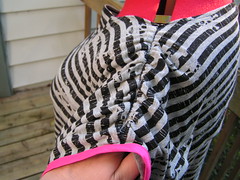 I shortened the sleeves and then ran elastic gathers along the shoulder to pull the whole thing into an itty-bitty short sleeve. Then I found a matching pink pre-made bias tape and ringed the armholes – you know I loves me some bias tape, and I wanted to make the pink more highlighted.
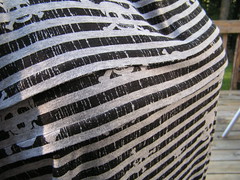 So there you have it! I really like the pleat detail at the upper front and back, even though it does get a bit lost on this particular fabric, and the loose neck. It's a super comfy dress, though, and I've worn it at least three times now, including to the Psychedelic Furs (with a big belt) and to a festival last night (with a long-sleeve zipper-front sweater).

I found this adorable stripey skull knit on the clearance table and bought the remainder, not sure what I was going to make. I want to learn to work with knits more, though, since they're so nice to wear.
I started with View C and just extended the lower hem to just past my ass. I went on a hunt for a good, strong pink knit, which I found in a nice rib. I decided to make the strip 4" high, and just long enough to hug my upper thigh area. I gathered the lower edge of the tunic, folded the pink in half, and overlocked the 3 raw edges together. The shape as it came together was pretty good, but those dropped shoulders bothered me. Again, with my build, my shoulders are a bit sloped, so those sleeves were just making me look lost.
So there you have it! I really like the pleat detail at the upper front and back, even though it does get a bit lost on this particular fabric, and the loose neck. It's a super comfy dress, though, and I've worn it at least three times now, including to the Psychedelic Furs (with a big belt) and to a festival last night (with a long-sleeve zipper-front sweater).
Bear with me...
I've been hanging on to the oooooold blogger template for a long time, because I'd done so much customization. I'm updating now, though, which means I'll be redesigning and moving shit around for the foreseeable future. Fun! Same dumb old content though, rest assured.
Wednesday, September 08, 2010
The future from the past.
 Before going to see the Mighty Mighty Bosstones last week, I was excavating the depths of my wardrobe, and unearthed a gorgeous green retro suit which I hadn't worn in maybe a decade. In the pants pocket (yes, they fit, more or less) I found a big silver ring with a black cats-eye stone that I used to wear all the time (which also still fit me) and this fortune.
 I didn't wear the suit, but I had both the ring and the fortune with me for the show. After my usual night of having a bouncing good time and being approached by no one, I pulled my keys out of my pocket, and the fortune came out with them. I let it blow away across Detroit.
Friday, September 03, 2010
Just bragging.
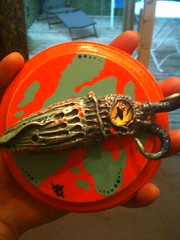
I had scanned through the vendor list the week before, and while I knew there were lots of awesome artists expected to show, there was one artist in particular whose work I was chomping at the bit to see in person; Emi Slade.
Everyone knows I'm a sucker (heh) for the cephs, and they are more popular than ever in arts and crafts right now. Emi's works are extraordinary though, and I couldn't wait to see them.
It seems like it's been a long time since I've brought home some original art, and after visiting Emi's booth literally 4-5 times – bringing another person with me each time! — I finally plunked down my ducats for this beauty. The colors! Just perfect for me.
Not only are Emi's works super-cool, while they are fantastical, they are clearly, and carefully, modeled on real-life creatures. This made them even more special to me, and added to the notion that they could swim off at any moment.
Just gushing to be supportive and to brag, I swear this isn't a paid ad. :)
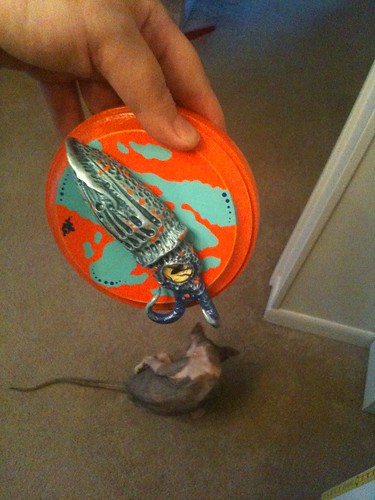
This fella is actually installed on a small plate stand on a shelf in my living room, which I'll probably get better photos of later. Until then, my iPhone snaps will have to do.
Until it eats Sevie at least...
Saturday, July 10, 2010
How I spent my birthday this year...
A little off my usual subject matter, once again.
I'm at the end of my annual Birthday Week sabbatical, and I just wanted to show off a little bit of what I did during my time off. Well, not what *I* did exactly. :)
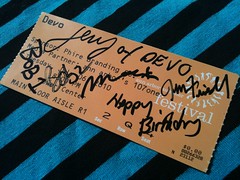
My birthday was Wednesday (07-07). Tuesday night, I saw, and then met, DEVO.
Fantastic.
There's a more in-depth, far dorkier version of the story here, if you're interested. :)
I'm at the end of my annual Birthday Week sabbatical, and I just wanted to show off a little bit of what I did during my time off. Well, not what *I* did exactly. :)
My birthday was Wednesday (07-07). Tuesday night, I saw, and then met, DEVO.
Fantastic.
There's a more in-depth, far dorkier version of the story here, if you're interested. :)
Wednesday, June 30, 2010
New RH Navbar Option
I've been doing a lot more writing/contributing to MOTORCITYBLOG.net over the past year or so, and I'm notoriously bad at promoting (or mentioning) when I do anything... so I've added my DC-in-Detroit icon to the navigation bar on the right there, which will lead you straight to my original content. Hope you enjoy. Or at least do not die from the overwhelmity.
Tuesday, June 15, 2010
Machine-Embroidered Quilted Coasters
A good friend of mine ran off and eloped last week, and I wanted to make something monogrammed for them, something useful. Since I had already decided to sneak in and leave them some champers and glasses, coasters seemed like a good idea.
They got married at a big tiki party in Florida, so I also wanted to do something that tied in to that. I lit upon a design using Adobe Illustrator.
With the embroidery software, I broke it down thusly:

For the first time in a while, I actually took pictures during the process! Mostly because I was doing something I'd never done before, and there are a few different ways of doing it. I went the somewhat non-expected path.
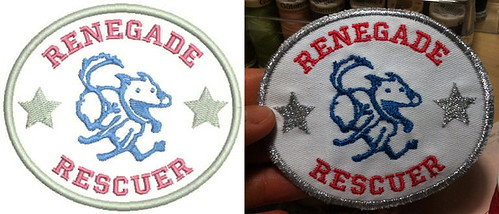
Typically, when doing an applique/patch/coaster/whatever, you would put down the die line and then cut out the field fabric and affix it to some stabilizer within the shape. I'd done this with Kelly's Renegade Rescuer patches with varying levels of success.
The concern is that the precut piece will shift around, even with adhesive, and when it's time for the satin-stitched edge, some wovens will blow out at the edges. Additionally, I intended to use a piece of felt under the fabric front, and another piece of felt at the back. Just seemed like too many opportunities to shift around. I saw one tutorial that approached this from a slightly different angle, and decided to give that a go.
I started with a layer of tear-away stabilizer in the hoop (the tutorial I saw used a heavier water-soluble stabilizer, but I didn't have any) then floated a piece of craft felt and then the upper fabric, a quilting cotton, all adhered with temporary spray adhesive. (I recently realized -- again? -- how often I make sure my fingers are in my crafting pics, for scale.)

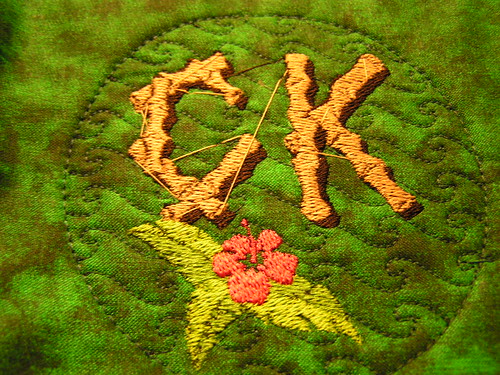
The first stitching is the outer shape, just to hold everything together. Then the quilting, to take advantage of the thickness of the felt. I've never done that before, and I think it turned out really cool.

Then the design gets laid down infive six colors.
After that, I removed the hoop from the machine and floated another piece of craft felt to the back (more adhesive). Then another trip around the perimeter to fully attach the back piece.
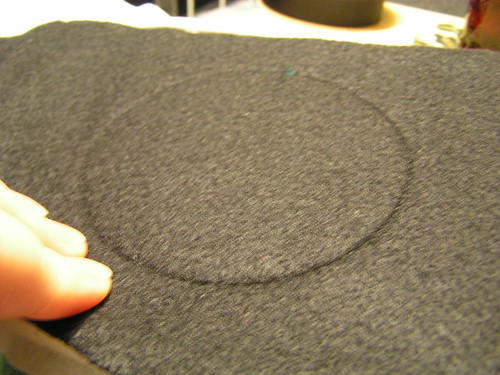
I should mention: when I did the layout, I made sure to make this layer, the stitching that holds all of the final layers together before trimming, very close to the inside edge of the final satin stitched border, rather than right in the middle where it would be by default. In other words, that stitching will still be covered by the satin stitch after the final border, but is far enough inside that when I trim out all the fabric, the raw edge that will necessarily be left will ALSO be covered by the satin stitch.
Next comes the pain in the arse: Trimming the shape without unhooping the whole thing. This is where applique scissors would come in handy. Yeah. Sure would. I have a little pair of sharps that I got with the machine, and they served me pretty well.
Gotta get close to that stitching. Be careful: snipping the stitching on the front is not a big deal, but you want to make sure you don't cut through the stabilizer. Try not to snip through the stitching at the back though.
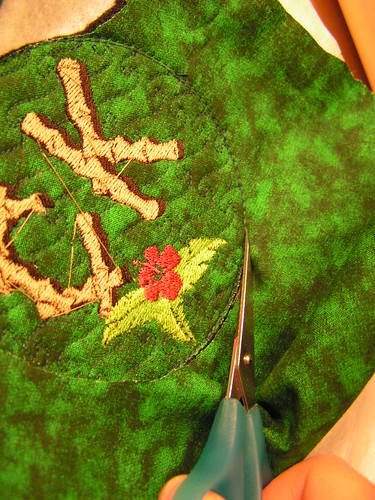
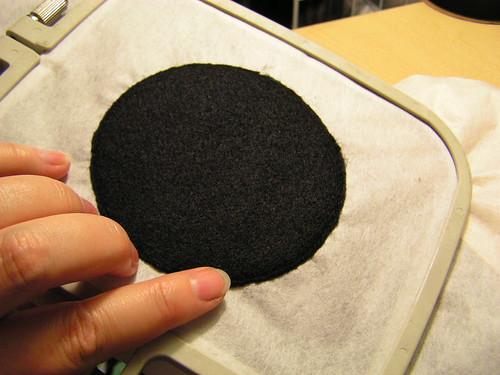
Snapped the hoop back into the machine for the final layer, the outer satin border.
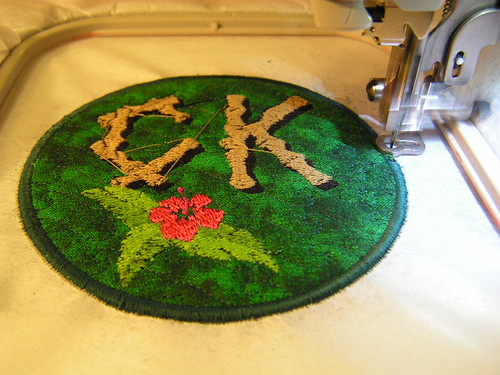
All of the edges nicely encased!
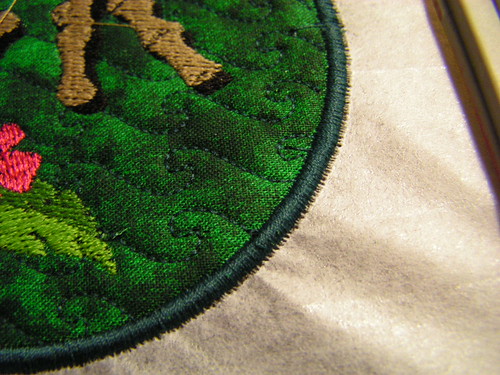
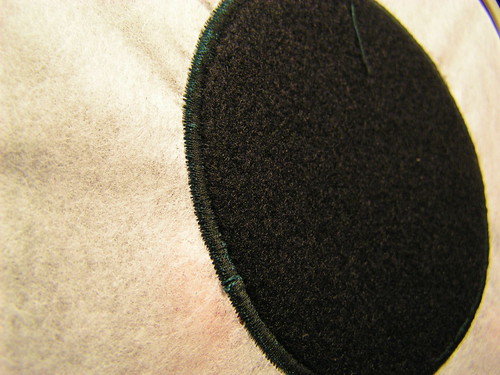
Then I popped the coaster out of the stabilizer and found my nice clean edges to be full of little stabilizer bits. D'oh! This is where I added a step, not mentioned in any of the other tutorials: Fire.
Since the thread I used was 100% polyester, it was an obvious choice. I lit a small candle and ran the fuzzy white edge quickly through the flame, all the way around. Perfect!

Honestly, they look better in person than they do in that photo—in the pic it looks like you can see more white than is accurate. And anyway, it's certainly nothing a green Sharpie couldn't handle. What's most important is that there was no FUZZ.
And the two finished coasters (much truer to color)!
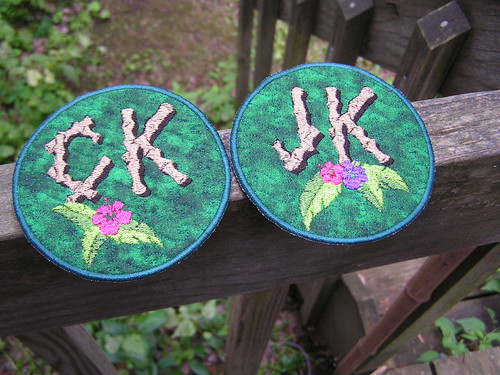
They got married at a big tiki party in Florida, so I also wanted to do something that tied in to that. I lit upon a design using Adobe Illustrator.
With the embroidery software, I broke it down thusly:
For the first time in a while, I actually took pictures during the process! Mostly because I was doing something I'd never done before, and there are a few different ways of doing it. I went the somewhat non-expected path.
Typically, when doing an applique/patch/coaster/whatever, you would put down the die line and then cut out the field fabric and affix it to some stabilizer within the shape. I'd done this with Kelly's Renegade Rescuer patches with varying levels of success.
The concern is that the precut piece will shift around, even with adhesive, and when it's time for the satin-stitched edge, some wovens will blow out at the edges. Additionally, I intended to use a piece of felt under the fabric front, and another piece of felt at the back. Just seemed like too many opportunities to shift around. I saw one tutorial that approached this from a slightly different angle, and decided to give that a go.
I started with a layer of tear-away stabilizer in the hoop (the tutorial I saw used a heavier water-soluble stabilizer, but I didn't have any) then floated a piece of craft felt and then the upper fabric, a quilting cotton, all adhered with temporary spray adhesive. (I recently realized -- again? -- how often I make sure my fingers are in my crafting pics, for scale.)
The first stitching is the outer shape, just to hold everything together. Then the quilting, to take advantage of the thickness of the felt. I've never done that before, and I think it turned out really cool.
Then the design gets laid down in
After that, I removed the hoop from the machine and floated another piece of craft felt to the back (more adhesive). Then another trip around the perimeter to fully attach the back piece.
I should mention: when I did the layout, I made sure to make this layer, the stitching that holds all of the final layers together before trimming, very close to the inside edge of the final satin stitched border, rather than right in the middle where it would be by default. In other words, that stitching will still be covered by the satin stitch after the final border, but is far enough inside that when I trim out all the fabric, the raw edge that will necessarily be left will ALSO be covered by the satin stitch.
Next comes the pain in the arse: Trimming the shape without unhooping the whole thing. This is where applique scissors would come in handy. Yeah. Sure would. I have a little pair of sharps that I got with the machine, and they served me pretty well.
Gotta get close to that stitching. Be careful: snipping the stitching on the front is not a big deal, but you want to make sure you don't cut through the stabilizer. Try not to snip through the stitching at the back though.
Snapped the hoop back into the machine for the final layer, the outer satin border.
All of the edges nicely encased!
Then I popped the coaster out of the stabilizer and found my nice clean edges to be full of little stabilizer bits. D'oh! This is where I added a step, not mentioned in any of the other tutorials: Fire.
Since the thread I used was 100% polyester, it was an obvious choice. I lit a small candle and ran the fuzzy white edge quickly through the flame, all the way around. Perfect!
Honestly, they look better in person than they do in that photo—in the pic it looks like you can see more white than is accurate. And anyway, it's certainly nothing a green Sharpie couldn't handle. What's most important is that there was no FUZZ.
And the two finished coasters (much truer to color)!
Tuesday, June 01, 2010
Here's something I've done lately...
Yes, I actually HAVE done something lately! In fact, that's why it's been so quiet around here.
I got a commision (hi, JRC!) to make a series of 50 embroidered and sewn fabric sleeves for a limited-edition 7" record. (Yes, I said record.) I converted the Five Three Dial Tone logo to PES format myself, for use with my Sofia. Then embroidered and sewed all 50 in some of the most garish and ridiculous fabrics imaginable. The selections were JRC's doing. Also the glow-in-the-dark embroidery thread was all JRC.
They turned out well, considering I did the embroidery without stabilizer (to keep costs down). The sleeves are not lined, but all seams are contained in French seams.
I hear the release party went well, and that the records were "flying off the shelf." I couldn't make the party myself because I was committed to the big Steampunk Expo that same night. Yes, I made something to wear to that, too... which I'll try to get photos of sometime. The only pics I have so far include me, and are just too... weird to share.
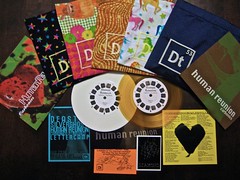
I got a commision (hi, JRC!) to make a series of 50 embroidered and sewn fabric sleeves for a limited-edition 7" record. (Yes, I said record.) I converted the Five Three Dial Tone logo to PES format myself, for use with my Sofia. Then embroidered and sewed all 50 in some of the most garish and ridiculous fabrics imaginable. The selections were JRC's doing. Also the glow-in-the-dark embroidery thread was all JRC.
They turned out well, considering I did the embroidery without stabilizer (to keep costs down). The sleeves are not lined, but all seams are contained in French seams.
I hear the release party went well, and that the records were "flying off the shelf." I couldn't make the party myself because I was committed to the big Steampunk Expo that same night. Yes, I made something to wear to that, too... which I'll try to get photos of sometime. The only pics I have so far include me, and are just too... weird to share.
Friday, May 07, 2010
Rain Lamp follow up.
After I took a pipe cleaner to its nooks and crannies, the rain lamp was really working like a champ. In order to share the joy with a friend, I took a quick iPhone video (what? iPhone video? oh that's right, I keep forgetting the 3GS does VIDEO!). And now, I'm sharing it with the rest of the world.
Don't let my voice startle you. Yes, that's me. More or less; I was still getting over a little bit of a cold at the time. Plus being silly. (I do love that pig lamp.)
Don't let my voice startle you. Yes, that's me. More or less; I was still getting over a little bit of a cold at the time. Plus being silly. (I do love that pig lamp.)
Sunday, April 04, 2010
Here's that rain lamp.
I promised in this post that I'd post pictures of the "rain" (oil) lamp once I got it set up. Well, here it is!
Shortly after I brought it home, I took the whole thing apart and cleaned up 30 years worth of... gunge. Then I put it back together and was SO excited when I switched it on and it worked. I left it on the kitchen counter overnight, in a deep tray, just in case. When I got home the next night, the tray was full of oil. D'oh! Upon examination I realized it's because I put too much oil in and the level was above the screw holes holding the reservoir to the base. Had to disassemble it AGAIN, which annoyed me to no end, and clean it up even more, because... oil everywhere. But now, she is beeyooootiful.
What's interesting about this one is that it is not a swag lamp, like I'm accustomed to seeing. Even the table-top versions don't usually have an upper light and shade. In fact, I can't find ANY information about this model. I mean, I know it's a Johnson Industries model, and the original stickers are still under the canopy. But I don't see any renditions of THIS model online anywhere. How is that POSSIBLE??
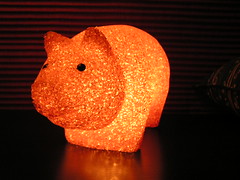
I got it at an estate sale a few weeks ago, and was actually considering modding it to take that top part OFF. I've wanted a swag-style rain lamp for a while, to be hung next to my door so visitors can immediately see how much class I've got. Exactly how much. But after some reading, I'm starting to think this lamp is especially collectible. Which isn't what I'm in it for, it's never what I'm in it for. Now that I've got it set up in my front room with the pig lamp -- PIG LAMP! -- I'm kinda digging the height the shade gives it. It runs great, but the oil isn't flowing as I'd like, so I may need to clean up a couple of the holes again.
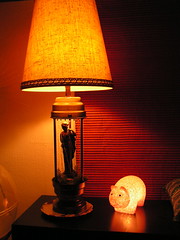

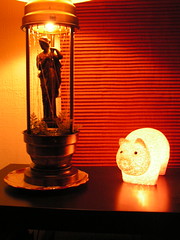
Shortly after I brought it home, I took the whole thing apart and cleaned up 30 years worth of... gunge. Then I put it back together and was SO excited when I switched it on and it worked. I left it on the kitchen counter overnight, in a deep tray, just in case. When I got home the next night, the tray was full of oil. D'oh! Upon examination I realized it's because I put too much oil in and the level was above the screw holes holding the reservoir to the base. Had to disassemble it AGAIN, which annoyed me to no end, and clean it up even more, because... oil everywhere. But now, she is beeyooootiful.
What's interesting about this one is that it is not a swag lamp, like I'm accustomed to seeing. Even the table-top versions don't usually have an upper light and shade. In fact, I can't find ANY information about this model. I mean, I know it's a Johnson Industries model, and the original stickers are still under the canopy. But I don't see any renditions of THIS model online anywhere. How is that POSSIBLE??
I got it at an estate sale a few weeks ago, and was actually considering modding it to take that top part OFF. I've wanted a swag-style rain lamp for a while, to be hung next to my door so visitors can immediately see how much class I've got. Exactly how much. But after some reading, I'm starting to think this lamp is especially collectible. Which isn't what I'm in it for, it's never what I'm in it for. Now that I've got it set up in my front room with the pig lamp -- PIG LAMP! -- I'm kinda digging the height the shade gives it. It runs great, but the oil isn't flowing as I'd like, so I may need to clean up a couple of the holes again.
Friday, March 26, 2010
An irrelevant aside.
I've been sick for the past few days in the weirdest way. I woke up 7am Wednesday morning stuffy, scratchy and sore, after having awoken many times during the night for funtimes coughing fits. I stumbled into the bathroom where I always have a bottle of Nyquil waiting for me -- yes, RED is the only way to be! -- to find about half a shot left. Dammit. Called off work and went back to sleep.
I'm one of those people who doesn't use an alarm clock. I didn't think that was all that unusual -- when I wake up, I just naturally know what time it is. I knew something was up when I re-awoke on Wednesday with no idea what time it was. I tested myself, lying there in bed trying to take a stab at it before looking at the clock. It could have been 9am. It could have been noon. It could have been 4pm for all I could tell. Turns out, it was about 1.30pm.
I rolled off the edge of my bed (it's a low bed) and directly into another coughing fit. I made it as far as the living room after a couple of tries, into the loving arms of my sofa and awaiting kitty, where after about a half hour, I fell asleep again. I woke up after another couple of hours, thought about getting something to eat, realized I had nothing in the house and standing upright made my chest/lungs really mad at me, so had a glass of water aaaaaand... back to sleep. Repeat that 3 or 4 times and that was my whole day Wednesday.
Thursday, I woke at the usual time, feeling... somewhat rebounded. Made it in to work and everything. You know what's really great? When you go to work and people stop in their tracks and say, "Ooooh, how are you feeling?" Feeling like I should have stayed home, I'm thinking. By and large, I felt *okay*, I just had the occasional coughing spat that made me really light-headed. Aside from that, I'm pretty sure I did my job and all... or maybe I was too dizzy to realize how much I was screwing up.
The best thing about making it to work on Thursday, though, was that I was able to also make it to the drug store. If they sold Nyquil by the drum... Got my hit, crashed out hard while trying desperately to watch "Project Runway." Dreamed about ostrich-propelled vehicles.
Friday morning, I figured I'd be good because, well, I made it out of the house Thursday after all! But I definitely did not... feel... right. For one thing, I'd slept on my back all night, flat on my back, and I was pretty sure I had not moved once in 8 hours. When I did move, I realized why that had probably been the case. Ugh. Everything sore, everything coughy. But the best part was when I groaned to myself. It was, like... subsonic. Have you seen the stories about this whole "secret language" of elephants, where they can ultra-low-rumble to each other over distances of miles? I'm pretty sure there's a bull elephant in Kenya who is wondering why he keeps hearing his name. Made me laugh. Which, of course, launched a coughing fit.
I called off work again, if for no other reason than just to have a record of me as a cartoon villain. Took another shot, flopped back over, direct to zzzzzs. And again, awoke thinking, what, noon? One? Ten am it was. No voice at all, probably forced out by the softballs taking up all that space in my throat. Took a nice warm shower and thought, okay, I've got the whole day here, I should at least be able to get something done around the place. I re-cleaned my oil lamp -- there's a post coming about that, honest -- and did a load of dishes. That was EXHAUSTING. Back to sleep. Woke up, had some popcorn chicken, aaaaaand... back to sleep. This is the weirdest "cold" or whatever it is that I've ever had. I mean, even the CAT is like, "Really? Sleeping again? I mean, I'm all for a good nap now and then, but are you EVER going to get off the couch?"
It's Friday night now, and I am just plain confused. At one point, I woke up on the sofa thinking it was the middle of the night, only to find the room bathed in sunlight. I'm as awake right now, at nearly midnight, as I've been in several days. I can't really tell whether I'm hungry (I hope not, because I've long since made it through all the chicken) or if I should take some more of the red stuff and corpse out for another 10 or 16 hours.
Well, since the very process of writing this launched me into another coughing fit, I'm going to go with... zzzzzzzzzzzzz.
I'm one of those people who doesn't use an alarm clock. I didn't think that was all that unusual -- when I wake up, I just naturally know what time it is. I knew something was up when I re-awoke on Wednesday with no idea what time it was. I tested myself, lying there in bed trying to take a stab at it before looking at the clock. It could have been 9am. It could have been noon. It could have been 4pm for all I could tell. Turns out, it was about 1.30pm.
I rolled off the edge of my bed (it's a low bed) and directly into another coughing fit. I made it as far as the living room after a couple of tries, into the loving arms of my sofa and awaiting kitty, where after about a half hour, I fell asleep again. I woke up after another couple of hours, thought about getting something to eat, realized I had nothing in the house and standing upright made my chest/lungs really mad at me, so had a glass of water aaaaaand... back to sleep. Repeat that 3 or 4 times and that was my whole day Wednesday.
Thursday, I woke at the usual time, feeling... somewhat rebounded. Made it in to work and everything. You know what's really great? When you go to work and people stop in their tracks and say, "Ooooh, how are you feeling?" Feeling like I should have stayed home, I'm thinking. By and large, I felt *okay*, I just had the occasional coughing spat that made me really light-headed. Aside from that, I'm pretty sure I did my job and all... or maybe I was too dizzy to realize how much I was screwing up.
The best thing about making it to work on Thursday, though, was that I was able to also make it to the drug store. If they sold Nyquil by the drum... Got my hit, crashed out hard while trying desperately to watch "Project Runway." Dreamed about ostrich-propelled vehicles.
Friday morning, I figured I'd be good because, well, I made it out of the house Thursday after all! But I definitely did not... feel... right. For one thing, I'd slept on my back all night, flat on my back, and I was pretty sure I had not moved once in 8 hours. When I did move, I realized why that had probably been the case. Ugh. Everything sore, everything coughy. But the best part was when I groaned to myself. It was, like... subsonic. Have you seen the stories about this whole "secret language" of elephants, where they can ultra-low-rumble to each other over distances of miles? I'm pretty sure there's a bull elephant in Kenya who is wondering why he keeps hearing his name. Made me laugh. Which, of course, launched a coughing fit.
I called off work again, if for no other reason than just to have a record of me as a cartoon villain. Took another shot, flopped back over, direct to zzzzzs. And again, awoke thinking, what, noon? One? Ten am it was. No voice at all, probably forced out by the softballs taking up all that space in my throat. Took a nice warm shower and thought, okay, I've got the whole day here, I should at least be able to get something done around the place. I re-cleaned my oil lamp -- there's a post coming about that, honest -- and did a load of dishes. That was EXHAUSTING. Back to sleep. Woke up, had some popcorn chicken, aaaaaand... back to sleep. This is the weirdest "cold" or whatever it is that I've ever had. I mean, even the CAT is like, "Really? Sleeping again? I mean, I'm all for a good nap now and then, but are you EVER going to get off the couch?"
It's Friday night now, and I am just plain confused. At one point, I woke up on the sofa thinking it was the middle of the night, only to find the room bathed in sunlight. I'm as awake right now, at nearly midnight, as I've been in several days. I can't really tell whether I'm hungry (I hope not, because I've long since made it through all the chicken) or if I should take some more of the red stuff and corpse out for another 10 or 16 hours.
Well, since the very process of writing this launched me into another coughing fit, I'm going to go with... zzzzzzzzzzzzz.
Sunday, March 07, 2010
Tuesday, February 09, 2010
We now return...
Sorry about that. Glitch in the system. Eddies in the space-time continuum.
To make up for it, please to enjoy some random funny.
To make up for it, please to enjoy some random funny.
Tuesday, February 02, 2010
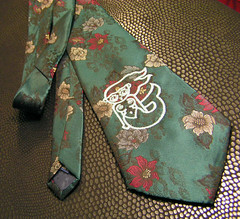
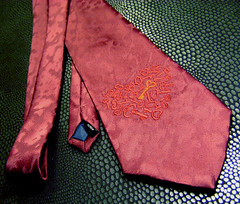
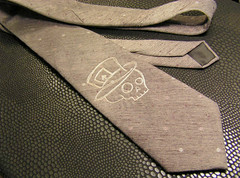
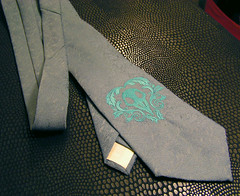
Ties still available!
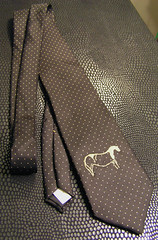
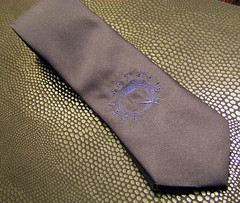
There are still some ties available at my etsy store BrocadeLion.etsy.com. I'll let y'all know if I make a few Valentine Specials. Meantime, check these out.
Monday, February 01, 2010
But I'm still fond of you... oh-ho-ho...
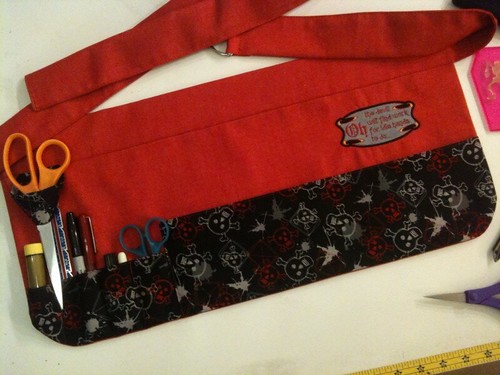
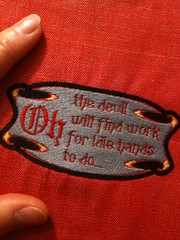
Sooooo much to learn with the embroidery software, but I have learned a bit so far. This is the (original design, Smiths lyrics) embroidered detail on my crafting apron/toolbelt, which I've been meaning to make for, oh, decades, and finally got around to this weekend.
I would claim that I'll take better pictures to post some time, but I doubt I will -- I'll be too busy wearing the thing. Also, I'd post a tutorial if anyone asked.
I just realized how massively lazy this post makes me sound. Blame the fact that the climate control at my office is killing me ded -- it was, like, 50°F in here when I got here, and about 85°F now.*
*What? I NEVER exaggerate.
I would claim that I'll take better pictures to post some time, but I doubt I will -- I'll be too busy wearing the thing. Also, I'd post a tutorial if anyone asked.
I just realized how massively lazy this post makes me sound. Blame the fact that the climate control at my office is killing me ded -- it was, like, 50°F in here when I got here, and about 85°F now.*
*What? I NEVER exaggerate.
Sunday, January 24, 2010
More adventures in resale.
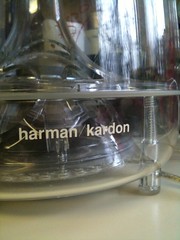
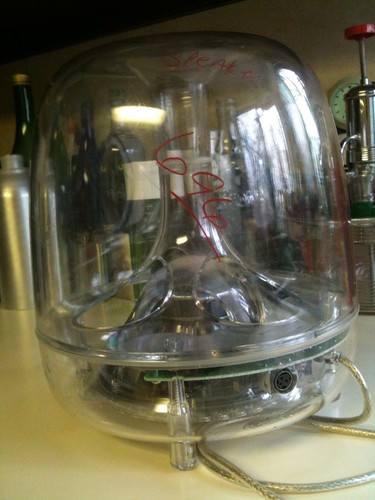
The rare Mac/Value Village (er WORLD, whatever) crossover kill. "Speaker" indeed.
I just happen to have an original pair of Apple Pro speakers on my decrepit, but beloved, G4. One of only two speaker sets to my knowledge that will work with this thing.
I spotted the iSub from across the room, but really just because it looks like a jellyfish. Cleaned the dog hair and dead spiders out if it, plugged it in, and it is a GO.
$7.
I just happen to have an original pair of Apple Pro speakers on my decrepit, but beloved, G4. One of only two speaker sets to my knowledge that will work with this thing.
I spotted the iSub from across the room, but really just because it looks like a jellyfish. Cleaned the dog hair and dead spiders out if it, plugged it in, and it is a GO.
$7.
Subscribe to:
Posts (Atom)

